You’ve probably wondered how tennis facilities maintain year-round play despite harsh winters or unpredictable weather patterns. Tennis air domes offer a practical solution that’s gaining traction across the USA, but there’s more to evaluate than simply inflating a structure over your courts. From understanding the engineering behind pressurized systems to maneuvering substantial upfront investments and ongoing operational costs, you’ll need to weigh several critical factors before determining if this approach aligns with your facility’s long-term goals.
What Is a Tennis Air Dome and How Does It Work?
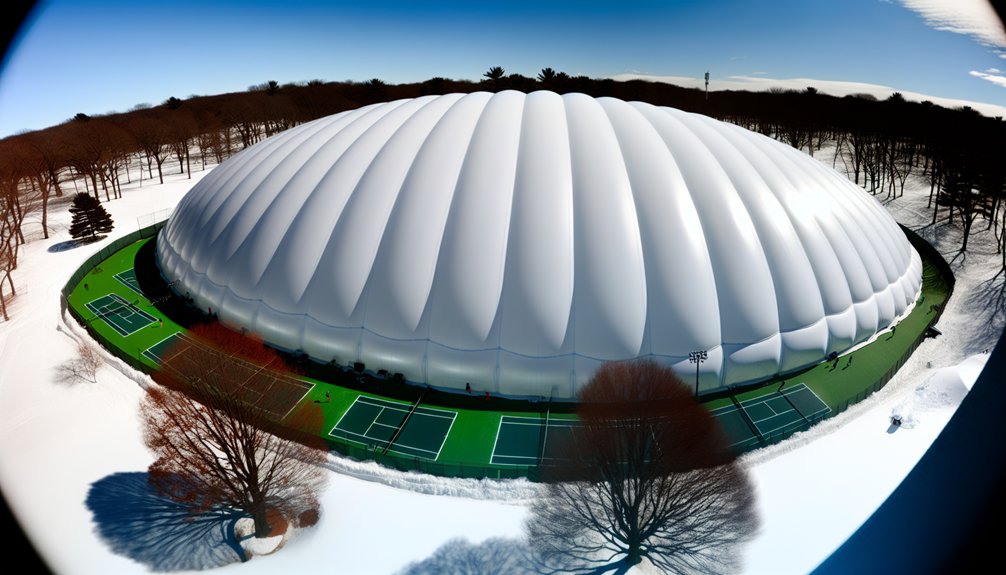
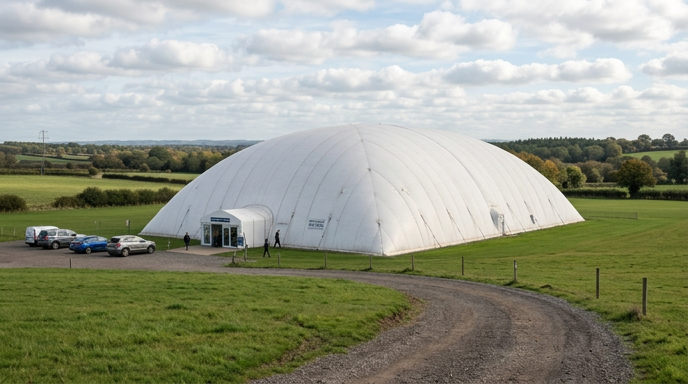
Imagine stepping into a massive inflated bubble where you can play tennis year-round, regardless of weather conditions outside. That’s exactly what a tennis air dome offers – an indoor tennis dome that creates a controlled playing environment through pressurized air systems.
These structures work by maintaining constant air pressure inside the dome, which keeps the fabric membrane inflated and structurally sound. Powerful fans continuously circulate air while maintaining slightly higher pressure than outside atmospheric conditions.
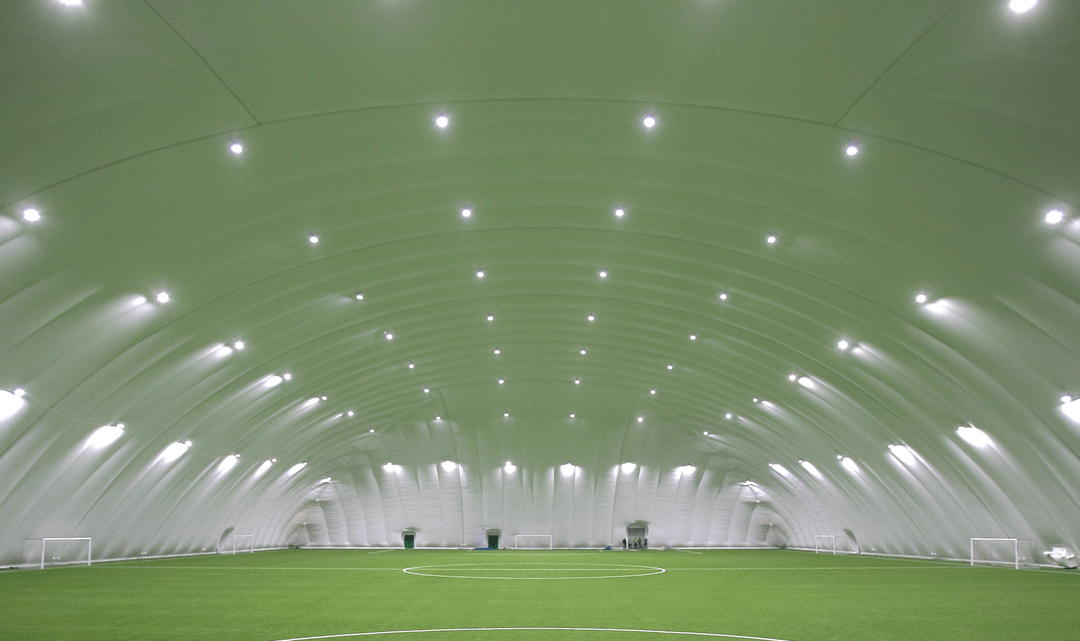
This tennis bubble specifications system requires no internal support beams, creating an unobstructed playing space.
Your tennis air dome guide wouldn’t be complete without understanding that these domes feature climate control systems, professional lighting, and ventilation that guarantees ideal playing conditions.
They’re fundamentally portable tennis facilities that can be installed seasonally or permanently on existing courts.
Tennis Air Dome Costs and Budget Planning
Now that you understand how tennis air domes function, you’ll need to budget for this investment carefully.
A single covered tennis court dome typically costs $15,000-$35,000 for basic models, while premium structures reach $50,000+. Installation adds $5,000-$15,000 depending on site preparation requirements.
Operating costs include electricity for air blowers ($200-$500 monthly), heating/cooling systems ($300-$800 monthly in extreme climates), and annual maintenance ($2,000-$5,000).
Factor in permit fees ($500-$2,000) and potential concrete pad installation ($8,000-$15,000).
Multi-court domes offer better value per court but require larger upfront investments ($40,000-$100,000+).
Consider financing options, as many manufacturers offer lease programs. Budget an additional 15-20% for unexpected costs like electrical upgrades or drainage improvements.
Plan for fabric replacement every 10-15 years.
Court Size Requirements and Space Planning
You’ll need to plan for a minimum court size of 78′ x 120′ (23.8m x 36.6m) per tennis court within your air dome structure.
If you’re considering multiple courts, a 2-court layout requires 78′ x 200′ (23.8m x 61m) of floor space.
Don’t forget that your dome’s peak height must reach at least 45 feet (13.7m) to accommodate overhead shots and lobs during play.
Standard Court Dimensions
Planning your tennis air dome starts with understanding the precise space requirements for each court. You’ll need a minimum interior space of 78 feet wide by 120 feet long for a single court, with additional clearance beyond the baseline and sidelines for player safety and movement.
The peak height must reach 45 feet to accommodate high lobs and serves without interference. This vertical clearance guarantees professional-level play remains uncompromised throughout your facility.
| Configuration |
Width |
Length |
Peak Height |
| Single Court |
78′ (23.8m) |
120′ (36.6m) |
45′ (13.7m) |
| Double Court |
78′ (23.8m) |
200′ (61m) |
45′ (13.7m) |
| Triple Court |
78′ (23.8m) |
280′ (85.3m) |
45′ (13.7m) |
| Quad Court |
156′ (47.5m) |
200′ (61m) |
45′ (13.7m) |
These dimensions provide the foundation for your dome’s structural engineering and installation planning.
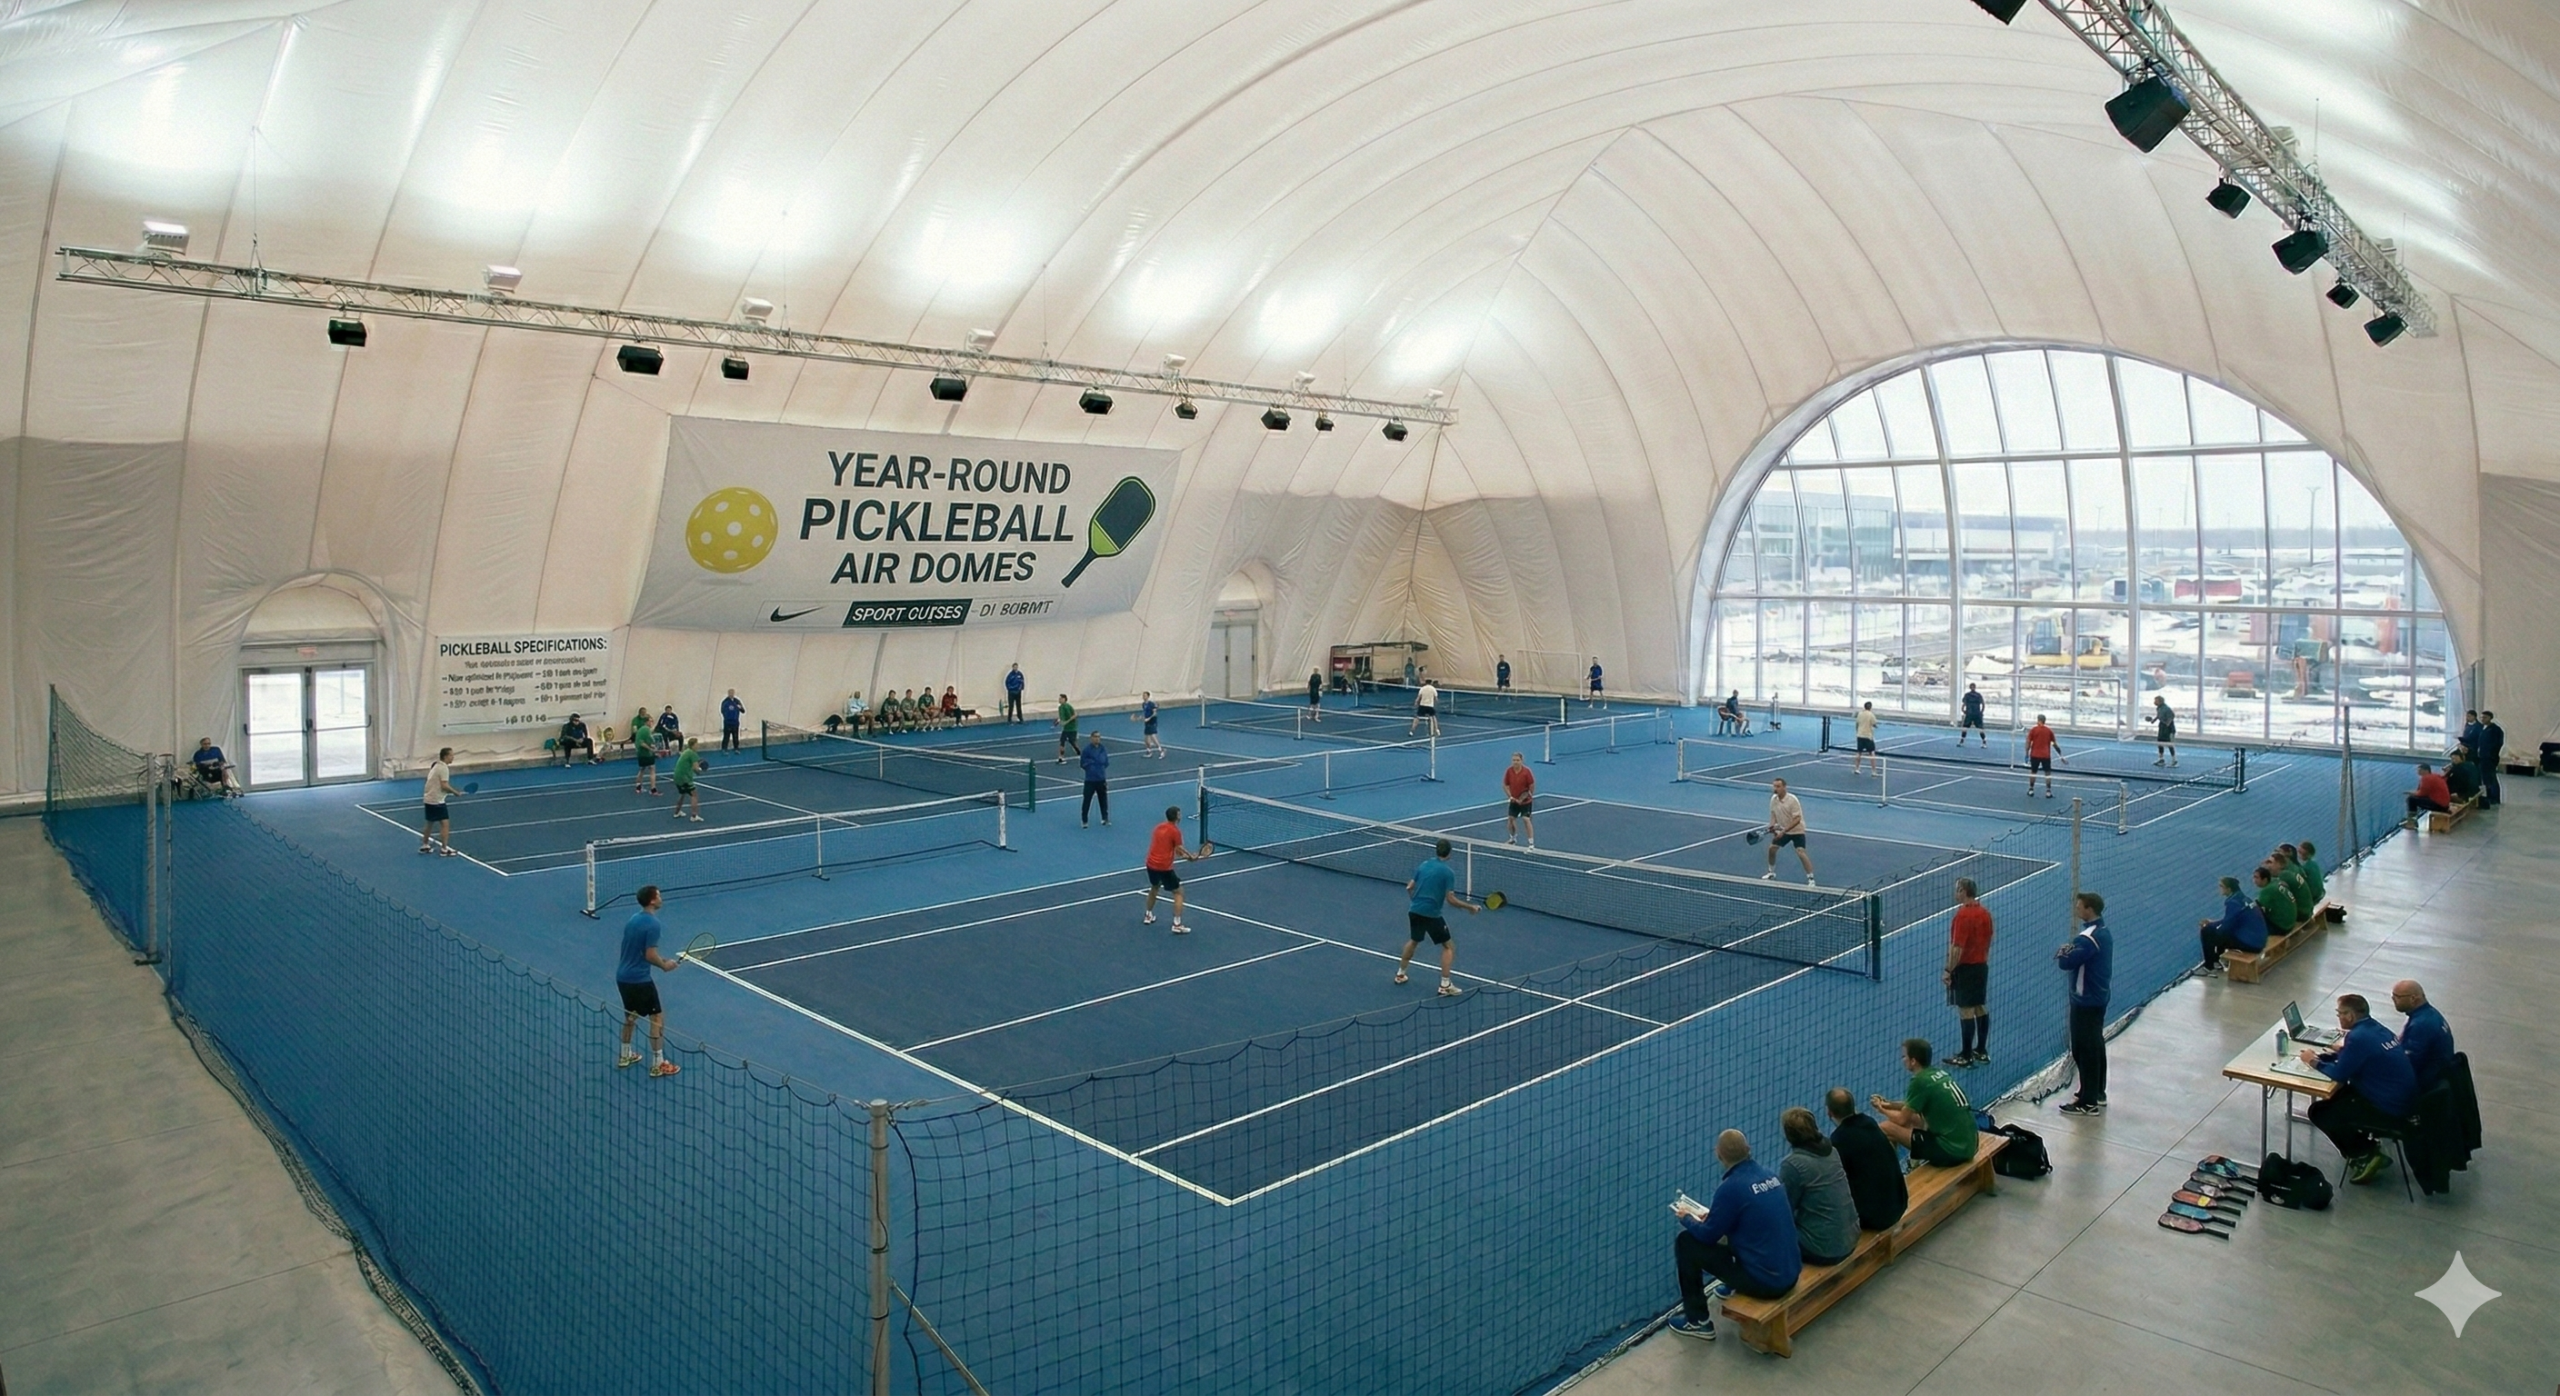
Multi-Court Layout Options
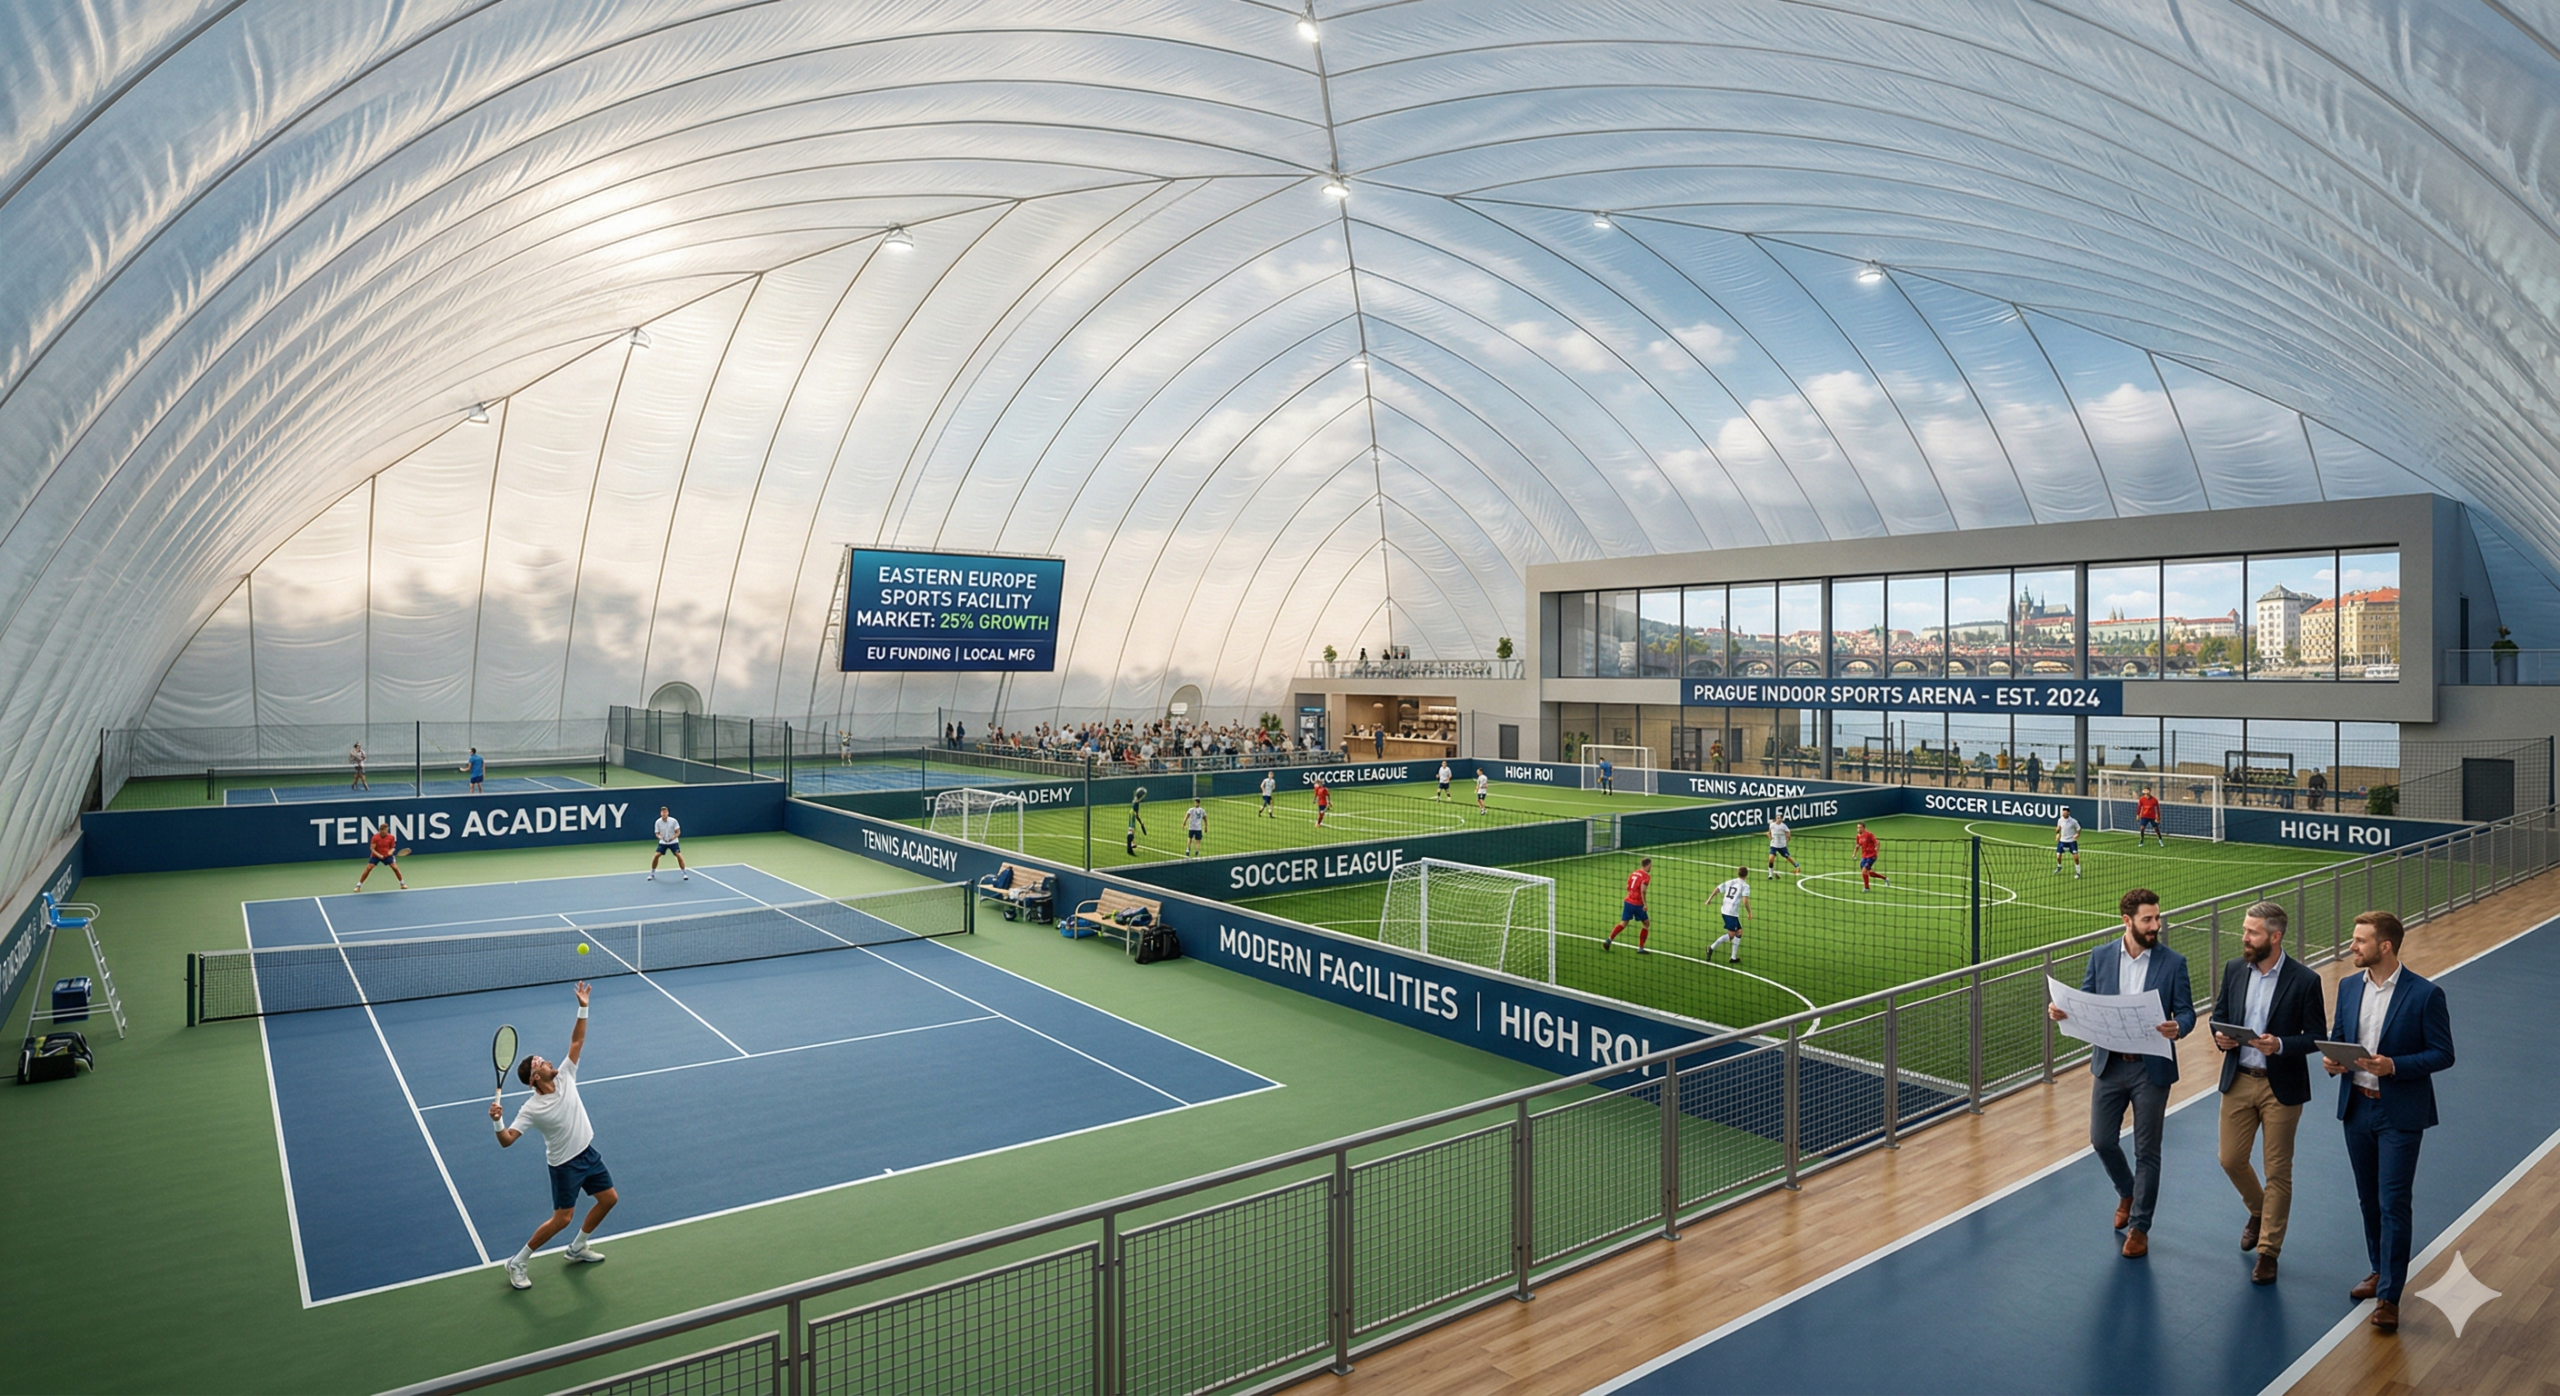
Multi-court facilities maximize your investment by housing multiple playing surfaces under one dome structure.
You’ll need to evaluate several layout configurations that optimize space while maintaining proper clearances between courts.
For dual-court setups, you’ll require a minimum 78′ x 200′ (23.8m x 61m) footprint. This allows adequate space between courts and proper ball containment.
Here are key multi-court layout evaluations:
- Side-by-side arrangement requires 12′ minimum between court sidelines
- End-to-end configuration needs 21′ clearance between baselines
- Shared spectator areas reduce overall footprint requirements
- Central entrance positioning improves traffic flow
- Equipment storage can be integrated between courts
Three or four-court facilities become increasingly cost-effective as you share structural, HVAC, and lighting systems across multiple playing surfaces while reducing per-court construction costs.
Height Clearance Requirements
While court dimensions follow standard regulations, vertical space becomes the critical factor that determines playability and player safety in your tennis air dome.
You’ll need a minimum peak height of 45 feet (13.7 meters) to accommodate high lobs and overhead shots without interference. This clearance guarantees players can execute their full range of strokes naturally.
The dome’s arched design means you’ll have maximum height at the center, gradually decreasing toward the sides.
Position courts strategically so the peak height aligns with the court’s center line where most lobs occur.
Don’t compromise on this specification – insufficient height restricts play quality and creates safety hazards when balls contact the dome ceiling.
Professional installations often exceed minimum requirements to provide ideal playing conditions and account for dome settling over time.
Climate Control and Lighting Standards
Since tennis requires precise ball visibility and comfortable playing conditions, your air dome’s climate control and lighting systems form the foundation of player experience and safety.
You’ll need to maintain temperatures between 55-75°F (13-24°C) for ideal comfort across seasons. Humidity control is equally critical—keep levels below 60% to prevent condensation on walls and equipment deterioration.
Your lighting system must deliver 50-70 foot candles of uniform illumination throughout the playing surface. This guarantees proper ball tracking and reduces eye strain during extended play sessions.
Essential climate and lighting standards include:
- Temperature range: 55-75°F (13-24°C)
- Humidity levels: Below 60%
- Lighting intensity: 50-70 foot candles
- Even light distribution across courts
- Energy-efficient LED fixtures recommended
Proper implementation of these systems guarantees year-round playability and player satisfaction.
Single vs Multi-Court Tennis Air Dome Options
When planning your tennis air dome, you’ll need to decide between a single-court or multi-court structure based on your specific needs and budget.
Single-court domes offer lower initial costs and simpler maintenance, making them ideal for private use or smaller facilities.
Multi-court options provide better cost efficiency per court and increased revenue potential, though they require larger upfront investments and more complex climate systems.
Single Court Benefits
Although multi-court facilities grab attention for their revenue potential, single-court tennis air domes offer distinct advantages that make them the smart choice for many operators.
You’ll find single courts easier to manage operationally and financially more accessible with lower upfront investment requirements.
Key benefits of single-court tennis air domes include:
- Lower initial investment – Reduced construction and equipment costs
- Simplified maintenance – Easier HVAC management and structural upkeep
- Flexible scheduling – Complete control over court availability and pricing
- Intimate atmosphere – Better player experience with focused environment
- Faster ROI – Quicker path to profitability with lower break-even point
You’ll also benefit from reduced utility costs, as heating and cooling a 78′ x 120′ space requires considerably less energy than larger multi-court facilities.
Multi-Court Advantages
Multi-court tennis air domes present compelling opportunities for operators seeking maximum revenue generation and facility utilization. You’ll accommodate more players simultaneously, increasing hourly income potential while spreading operational costs across multiple courts.
The shared infrastructure model reduces per-court expenses for heating, lighting, and structural components.
You can host tournaments, leagues, and group lessons more effectively with multiple courts under one dome. Players won’t wait as long for court availability, improving customer satisfaction and retention rates.
The 78′ x 200′ configuration for two courts optimizes space efficiency compared to separate single-court installations.
Multi-court facilities also provide operational flexibility during maintenance or repairs. If one court needs attention, you’ll maintain revenue streams from remaining courts, ensuring consistent cash flow throughout the season.
Tennis Air Dome Installation Process and Timeline
Since proper planning determines your project’s success, understanding the tennis air dome installation process helps you prepare for the typical 4-6 week timeline from groundbreaking to first serve.
The installation follows these key phases:
- Site preparation and foundation work (Week 1-2): Excavation, utilities, concrete pouring
- Anchor ring installation (Week 2): Steel foundation ring placement and securing
- Membrane installation (Week 3): Professional dome fabric assembly and attachment
- Inflation and testing (Week 3-4): System pressurization and safety checks
- Interior finishing (Week 4-6): Lighting, HVAC, court surfaces, and accessories
Weather conditions greatly impact your timeline, especially during foundation work.
You’ll coordinate with multiple contractors including excavators, concrete specialists, and dome technicians.
Most manufacturers provide project management services to streamline the process and guarantee proper sequencing of trades.
Ongoing Maintenance and Operating Expenses
Smart budgeting for your tennis air dome extends far beyond the initial installation costs, as ongoing maintenance and operating expenses typically range from $15,000 to $35,000 annually per court.
You’ll face considerable electricity bills for continuous air circulation and climate control systems, particularly during extreme weather conditions. Regular fabric inspections and repairs prevent costly emergency replacements, while HVAC maintenance guarantees ideal playing conditions year-round.
Your major expense categories include utility costs (40-50% of annual budget), routine maintenance contracts, insurance premiums, and periodic fabric replacements every 15-20 years.
You can reduce operating costs through energy-efficient LED lighting upgrades, programmable climate controls, and preventive maintenance schedules.
Multi-court facilities benefit from economies of scale, lowering per-court operational expenses considerably.
Best Tennis Air Dome Manufacturers and Suppliers
Selecting the right manufacturer greatly impacts your dome’s performance, longevity, and overall satisfaction with your investment. Research manufacturers with proven track records in tennis facility construction and strong warranty programs.
When evaluating potential suppliers, prioritize these key factors:
- Industry experience – Look for companies with 10+ years specializing in tennis air domes.
- Project portfolio – Review completed installations similar to your facility size and requirements.
- Engineering capabilities – Confirm they handle structural design, HVAC systems, and local permitting.
- Service network – Verify they provide maintenance support and emergency repairs in your region.
- Financial stability – Choose established companies that’ll honor long-term warranty commitments.
Request detailed proposals from multiple manufacturers, including installation timelines, material specifications, and thorough cost breakdowns before making your final decision.