Blog

  • New vs Used Air Dome Which to Buy

    New vs Used Air Dome Which to Buy

    You’re facing a significant investment decision that could impact your facility for decades. New air domes demand $150K-$400K upfront but deliver cutting-edge materials and extensive warranties. Used options slash costs by half, yet you’ll inherit someone else’s wear patterns and limited protection. The math isn’t simply about initial savings—it’s about calculating long-term value against immediate budget constraints. Your choice hinges on factors most buyers overlook until it’s too late.

    New vs Used Air Domes: Complete Decision Framework

    When you’re deciding between a new or used air dome, you’ll need to evaluate several critical factors that directly impact your project’s success and long-term costs.

    The new vs used air dome decision hinges on your budget, timeline, and operational requirements.

    For new installations, you’ll receive cutting-edge technology, full 25-year fabric warranties, and custom sizing from 7,200-50,000 square feet. Costs range $150K-$400K, but you’re investing in maximum longevity and performance.

    Used options offer 40-60% savings with prices between $60K-$200K. However, you’ll face limited warranties and 10-20 years remaining lifespan.

    When buying new tennis bubble structures, consider your facility’s projected usage and revenue potential.

    The used dome vs new comparison ultimately depends on whether short-term savings outweigh long-term reliability and customization benefits.

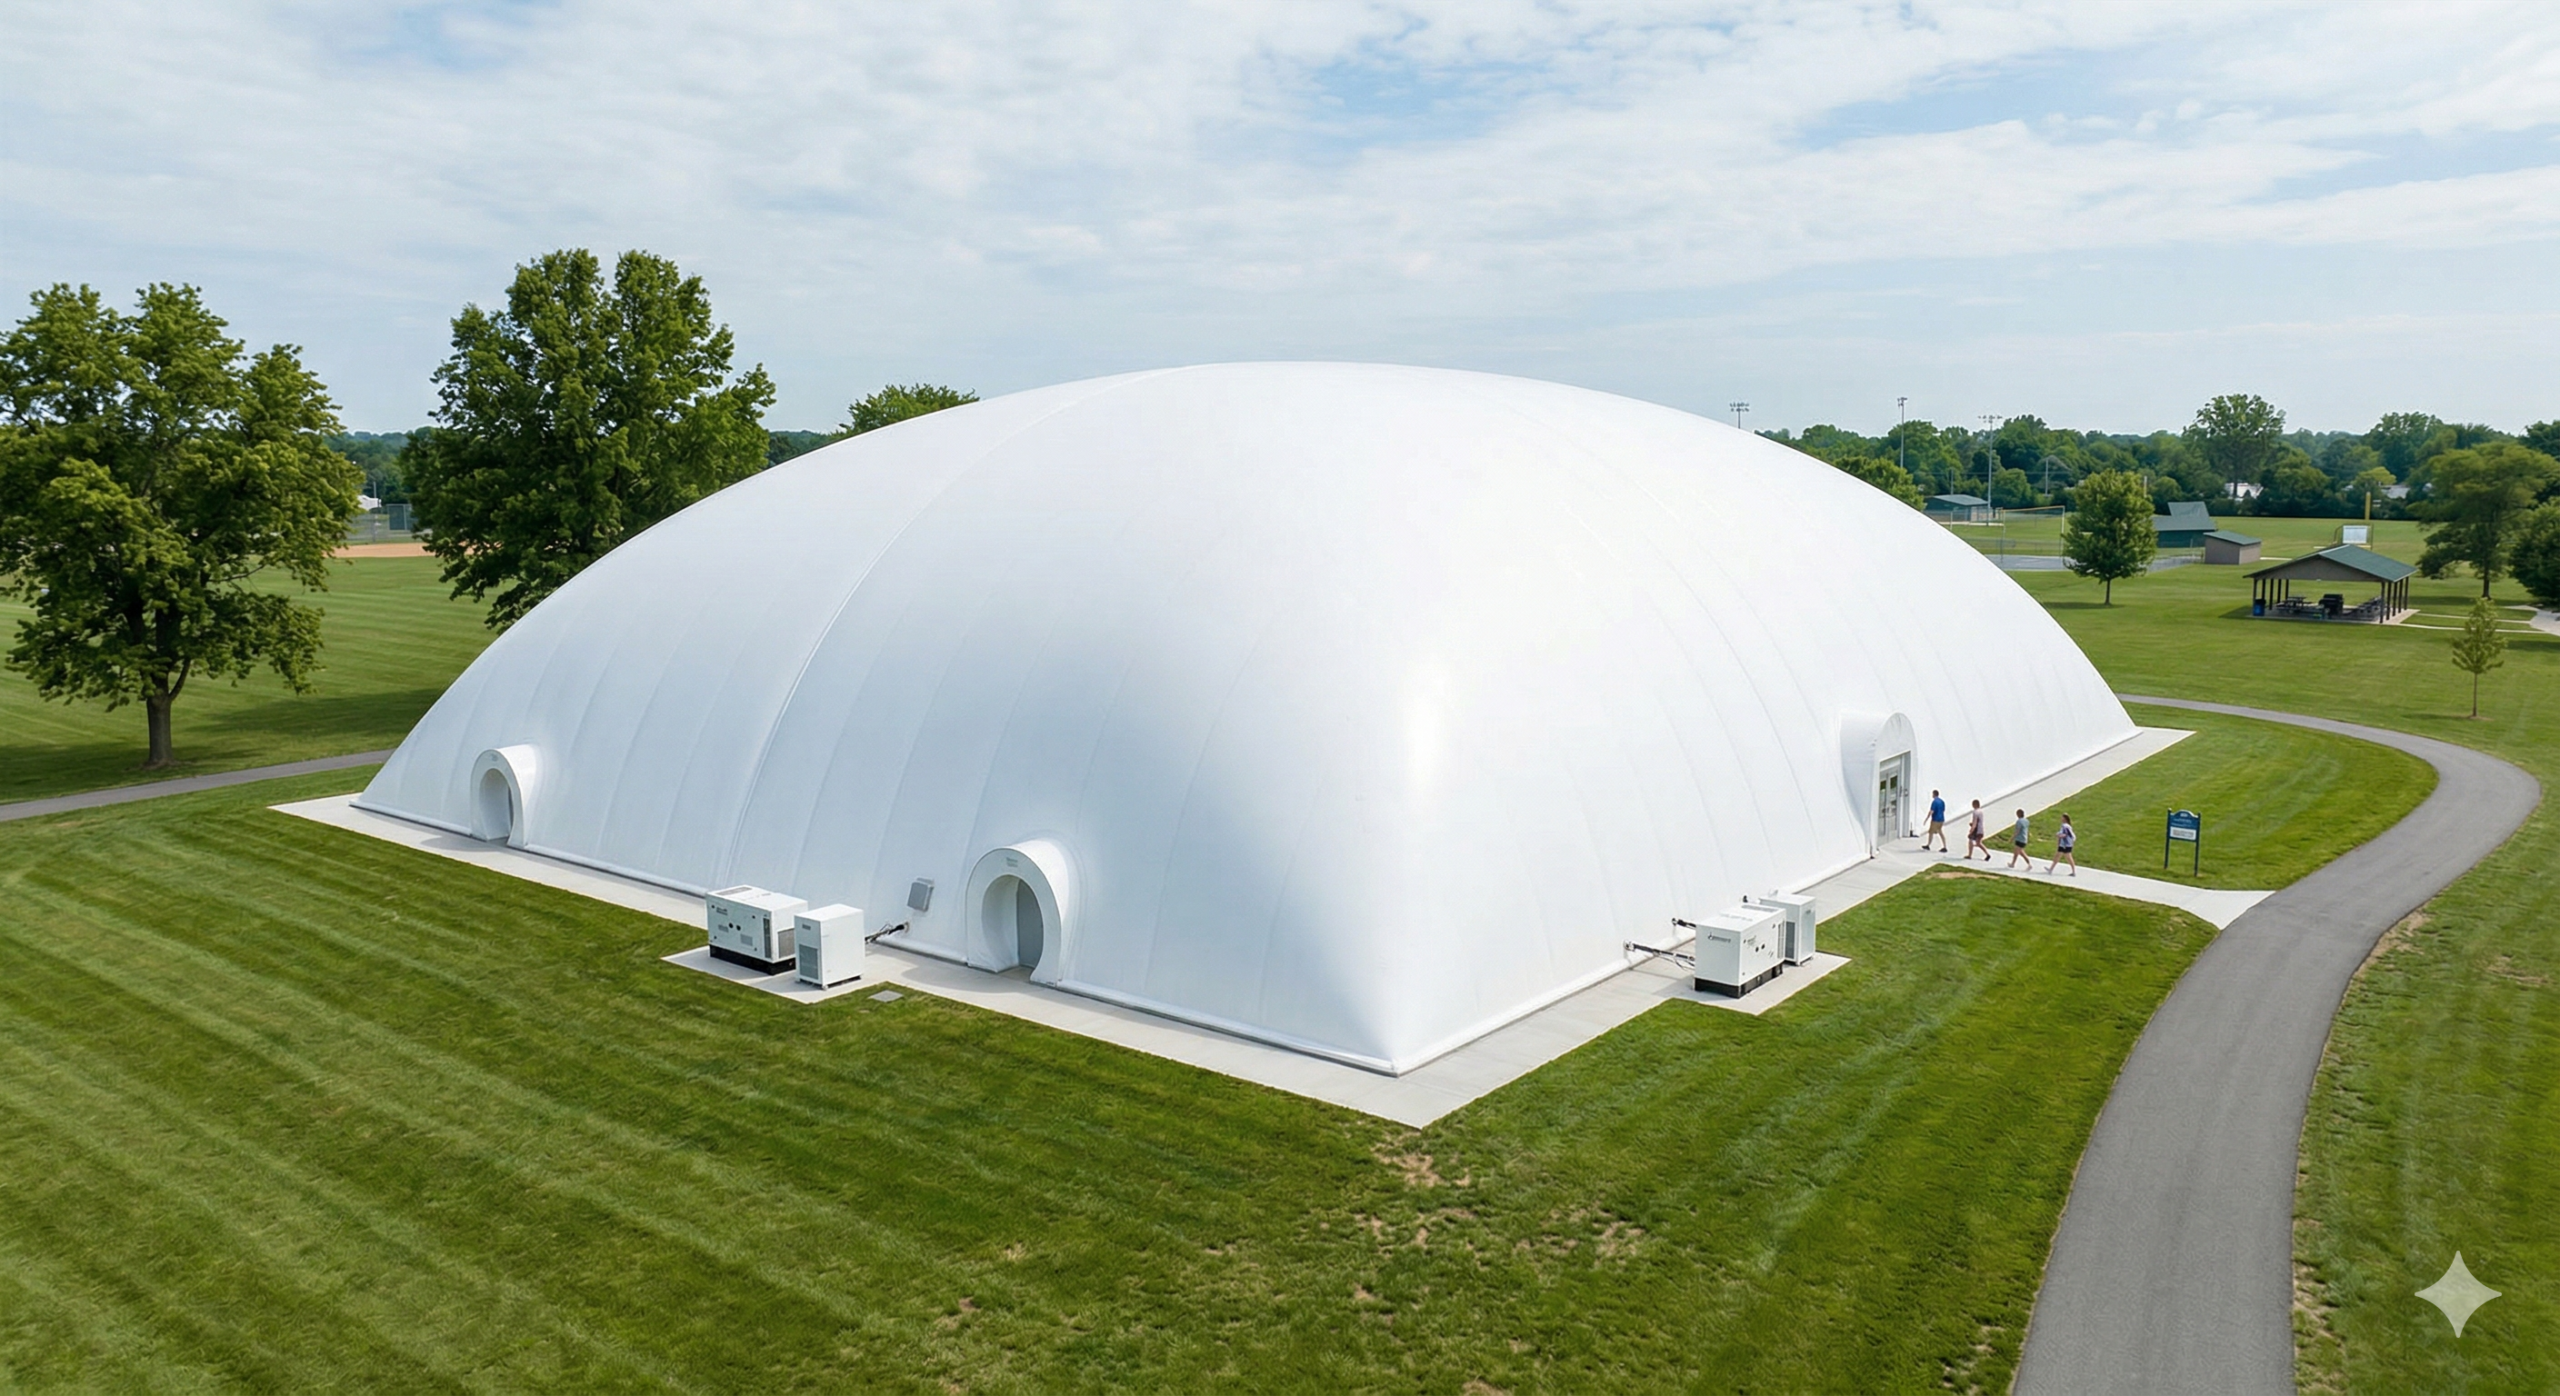
    New Air Dome Benefits: 25-Year Warranty and Latest Technology

    Because new air domes represent the pinnacle of structural engineering, you’ll receive unmatched protection through extensive 25-year fabric warranties that shield your investment from manufacturing defects and premature deterioration.

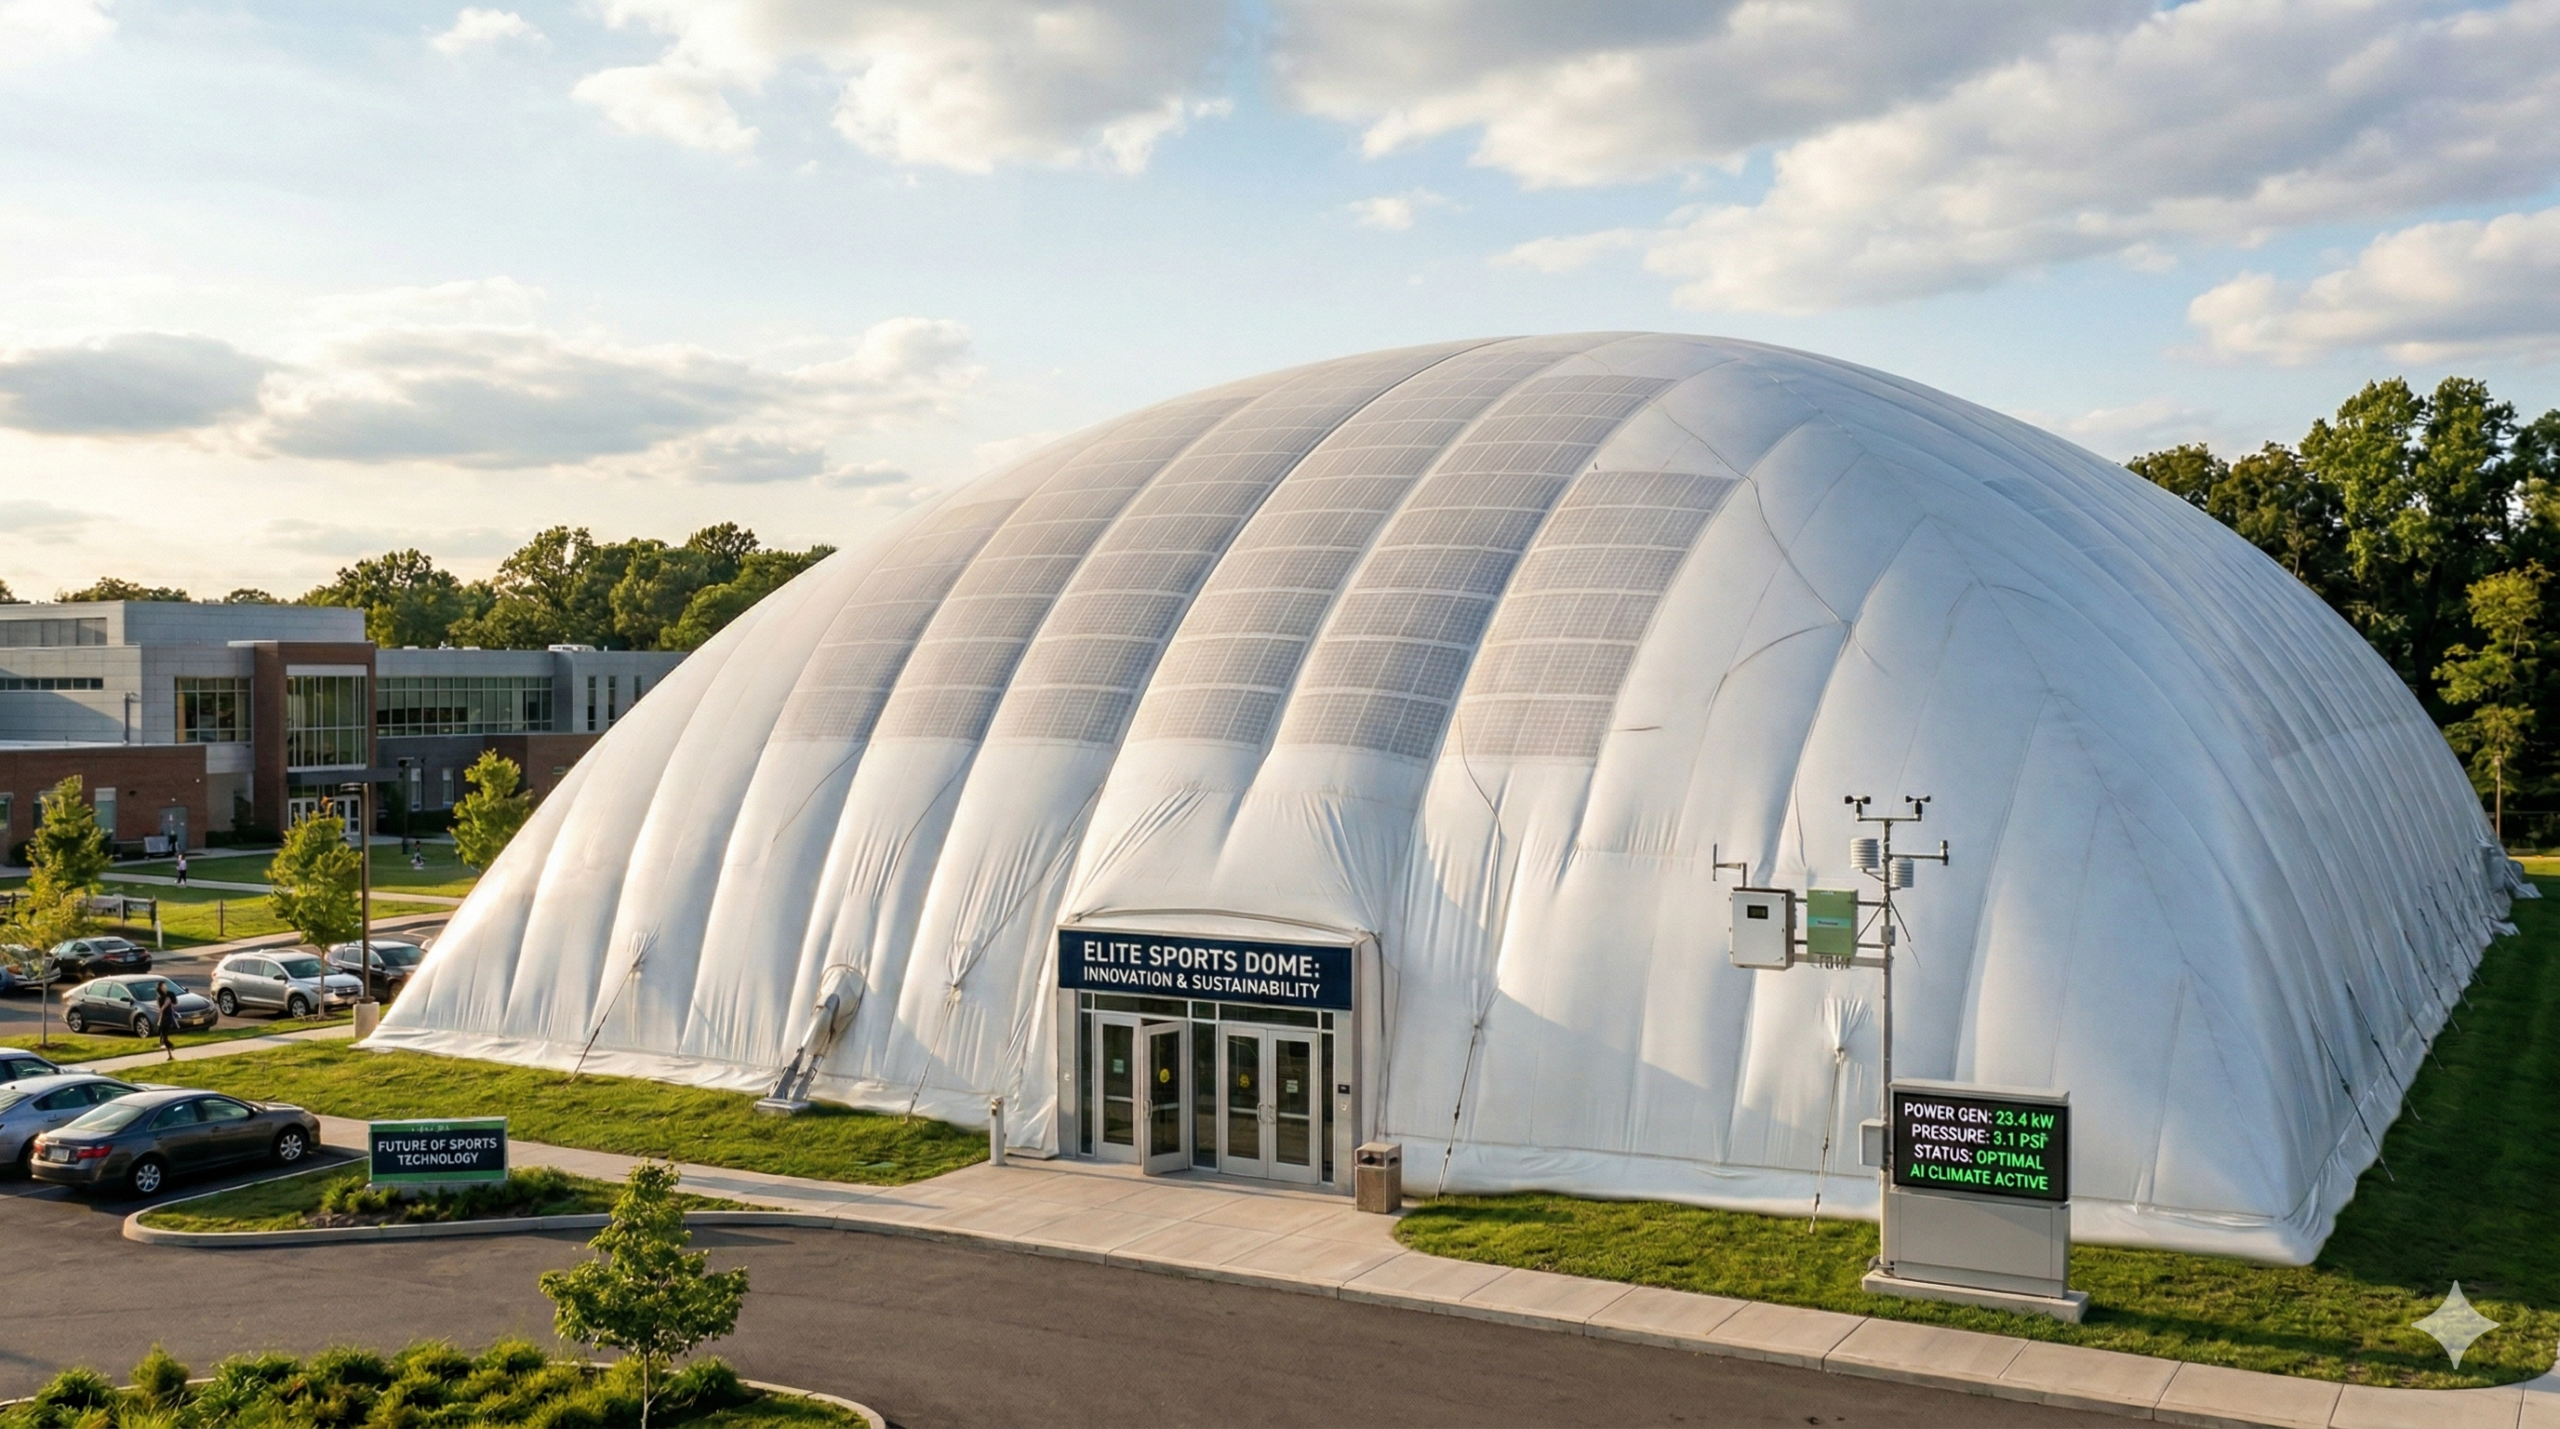
    When evaluating new vs second hand sports dome options, you’ll discover that new structures incorporate cutting-edge materials like advanced PVC fabrics with superior UV resistance and enhanced tensile strength.

    These technological innovations deliver improved energy efficiency through better insulation properties and reduced maintenance requirements.

    You’ll also benefit from state-of-the-art climate control systems, LED lighting integration, and smart monitoring capabilities that weren’t available in older models.

    The thorough warranty coverage guarantees peace of mind, protecting against unexpected repair costs while maximizing your facility’s operational lifespan and performance standards.

    Used Air Dome Value: 40-60% Savings With Smart Trade-Offs

    You’ll save 40-60% on your initial investment when you choose a used air dome, bringing costs down from $150K-$400K to just $60K-$200K.

    While you’re trading a 25-year warranty for limited coverage, you’re still getting 10-20 years of remaining service life from proven technology.

    This cost reduction lets you allocate resources elsewhere while securing substantial indoor space for your facility.

    Significant Cost Reduction Benefits

    While new air domes offer cutting-edge technology and full warranties, used options deliver substantial financial advantages that can’t be ignored.

    You’ll save 40-60% on your initial investment, reducing costs from $150K-$400K down to $60K-$200K. This dramatic price reduction frees up capital for other facility improvements like flooring, lighting, or HVAC systems.

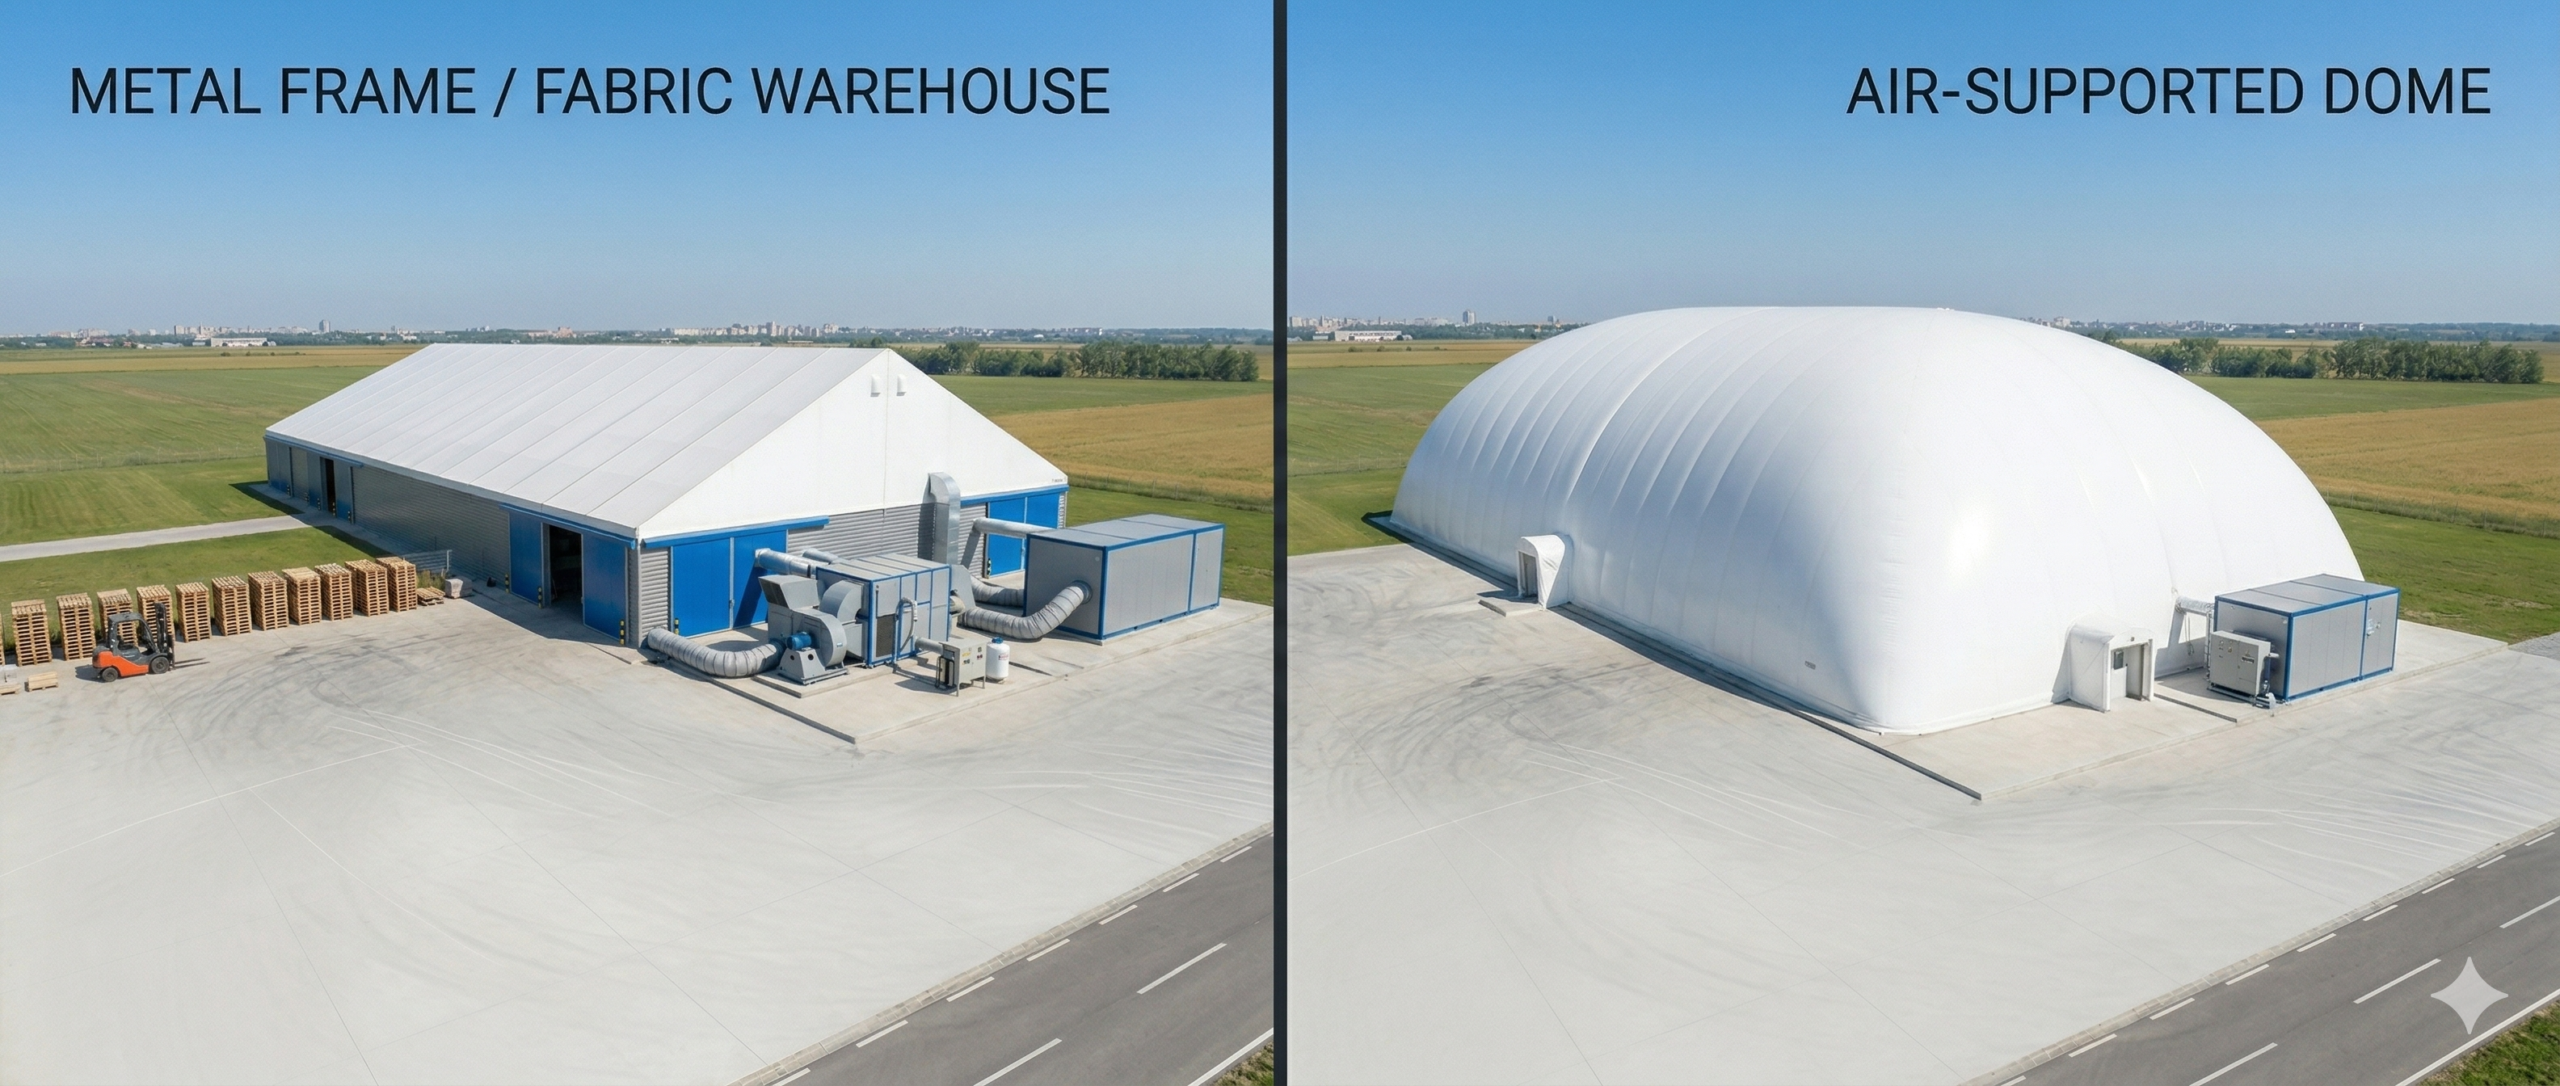
    You’re fundamentally getting the same structural benefits – weather protection, year-round usability, and expansive space – at a fraction of the cost.

    Even with 10-20 years of remaining lifespan versus 25 years for new domes, the math often works in your favor. The savings can offset potential future replacement costs while providing immediate facility solutions.

    For budget-conscious buyers, used air domes represent smart financial planning without sacrificing core functionality.

    Acceptable Warranty Trade-Offs

    Limited warranties on used air domes shouldn’t derail your purchasing decision when you’re already saving $90K-$240K upfront.

    While new domes offer 25-year full warranties, used units typically provide limited coverage with 10-20 years of remaining lifespan. This warranty trade-off becomes acceptable when you consider the substantial cost savings represent 40-60% off original pricing.

    You’re fundamentally exchanging extensive warranty protection for immediate capital preservation. Most used air domes have already proven their structural integrity and performance reliability through years of operation.

    The limited warranty still covers major structural components during the most critical ownership period.

    Smart buyers recognize that even with reduced warranty terms, the financial benefits often outweigh the coverage limitations, especially for short-term projects or budget-conscious facilities seeking proven air dome technology.

    Air Dome Pricing Breakdown: $60K-$400K Investment Guide

    Air dome investments range from $60,000 to $400,000, with pricing determined by whether you’re buying new or used, the size of your facility, and the technology features you select.

    New air domes cost $150,000-$400,000 depending on your square footage needs. You’ll pay premium prices for structures ranging from 7,200-50,000 square feet, but you’re getting cutting-edge technology and full 25-year fabric warranties.

    Used options deliver 40-60% savings, dropping your investment to $60,000-$200,000. However, you’re purchasing facilities with 10-20 years of useful life remaining and limited warranty protection.

    Size greatly impacts pricing. Smaller facilities start around the lower price ranges, while expansive 50,000-square-foot domes reach maximum pricing tiers.

    Custom sizing options allow you to match your budget with your specific space requirements and operational needs.

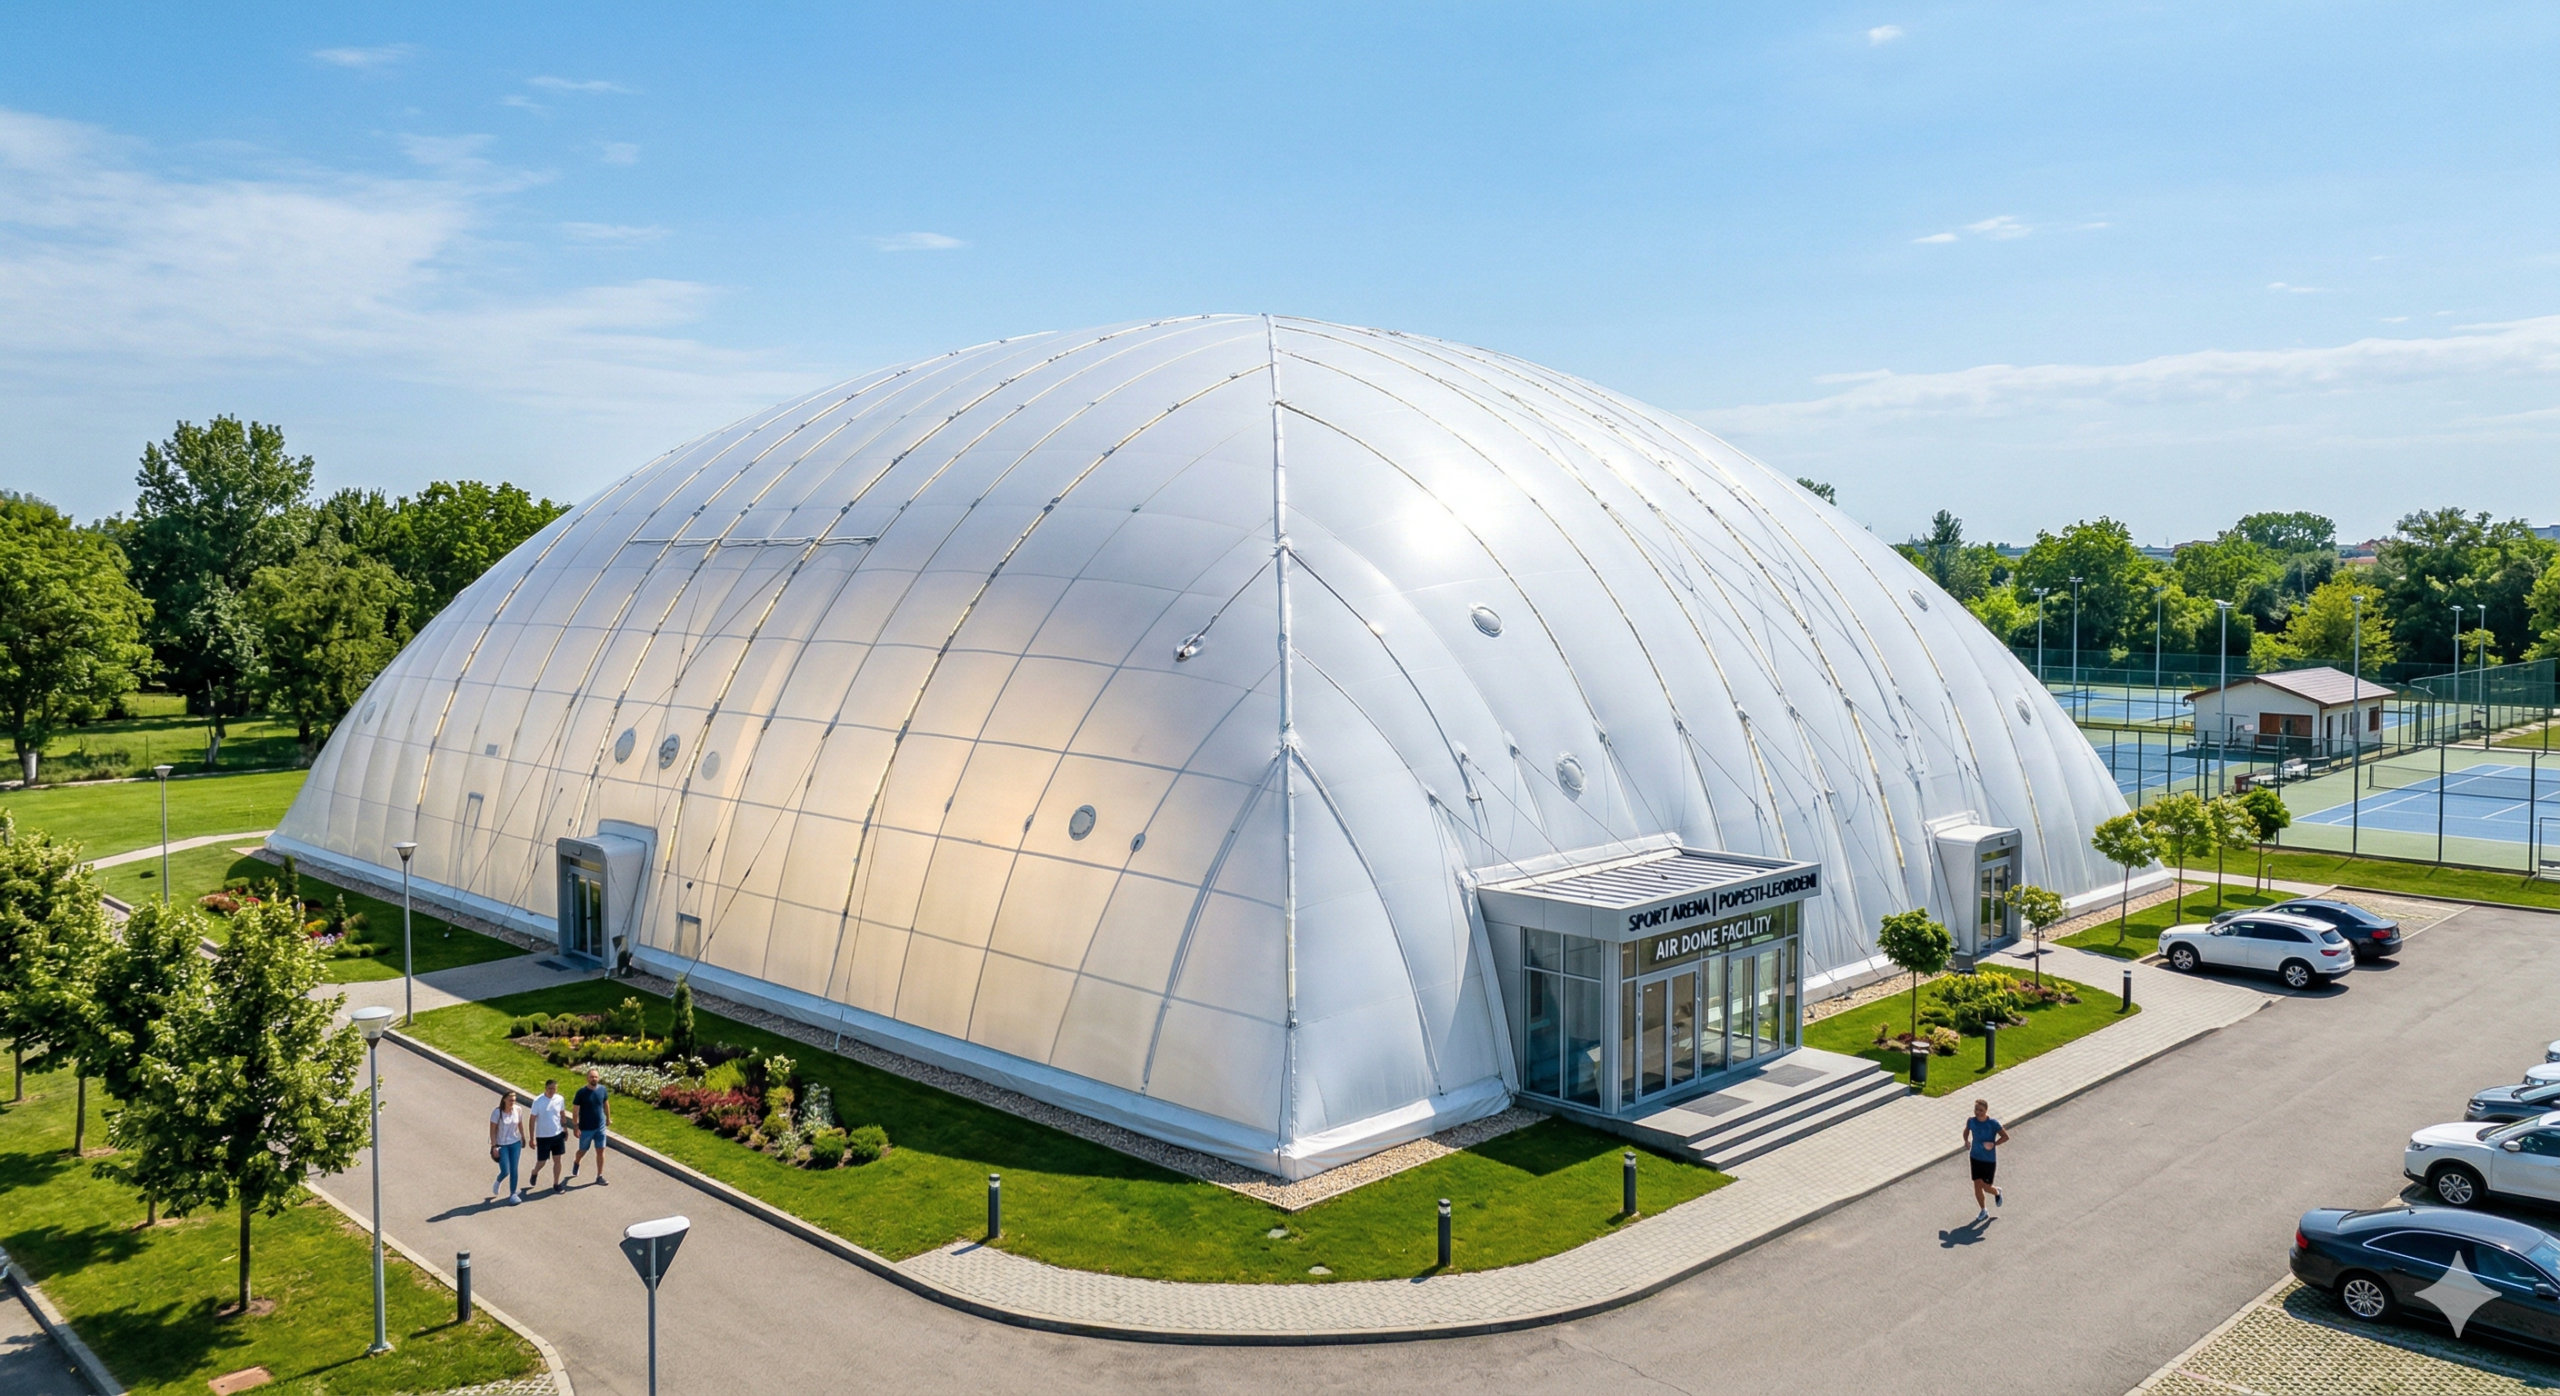
    Size and Customization: 7,200-50,000 Sq Ft Air Dome Options

    Your facility’s square footage requirements directly impact both your upfront investment and long-term operational success.

    Air domes range from 7,200 to 50,000 square feet, accommodating everything from tennis courts to full soccer fields. New domes offer complete customization—you’ll specify exact dimensions, door placements, ventilation systems, and structural features to match your needs perfectly.

    Used domes limit your options considerably. You’re buying what’s available, not what’s ideal for your space. The previous owner’s specifications mightn’t align with your requirements, forcing compromises on layout and functionality.

    Smaller facilities (7,200-15,000 sq ft) cost $150K-$250K new, while larger installations (25,000-50,000 sq ft) reach $300K-$400K.

    If customization matters for your operation’s success, new air domes provide the flexibility used options simply can’t match.

    Warranty Protection: Full vs Limited Coverage Compared

    When investing hundreds of thousands of dollars in an air dome, warranty protection becomes your financial safety net against unexpected failures and costly repairs.

    New air domes offer extensive 25-year fabric warranties that cover manufacturing defects, material failures, and structural issues. This broad coverage protects your entire investment period, giving you peace of mind for decades.

    Used air domes come with limited warranties that vary greatly by seller and condition. You’ll typically receive minimal coverage on remaining components, with most structural warranties already expired.

    This leaves you vulnerable to expensive repairs shortly after purchase.

    The warranty difference directly impacts your long-term costs. New domes transfer repair expenses to manufacturers, while used domes make you responsible for most maintenance and replacement costs during the facility’s remaining lifespan.

    Budget-Based Recommendations: Choosing Your Best Air Dome Option

    Three distinct budget scenarios determine whether you should buy new or used air domes for your facility.

    Tight Budget ($60K-$120K): You’ll need a used dome. While you’re getting 40-60% savings, expect limited warranty coverage and 10-20 years remaining lifespan.

    Moderate Budget ($120K-$250K): You can choose either option. Compare specific domes based on remaining lifespan versus warranty benefits.

    Generous Budget ($250K+): Buy new for maximum value. You’ll get 25-year fabric warranty, latest technology, and custom sizing options.

    Budget Range Recommendation Key Benefit Trade-off
    $60K-$120K Used Only 40-60% Cost Savings Limited Warranty
    $120K-$250K Either Option Flexibility Depends on Priorities
    $250K+ New Preferred Full Coverage Higher Investment

    Your budget ultimately determines your best path forward.

  • Air Dome Permit Requirements by State

    Air Dome Permit Requirements by State

    You’ve probably discovered that getting an air dome permit isn’t as straightforward as you’d hoped. What seems like a simple inflatable structure quickly becomes a maze of state regulations, engineering requirements, and safety codes that vary dramatically depending on where you’re building. The difference between a $200 temporary permit and a $15,000 permanent one often comes down to details that most people overlook until it’s too late.

    Temporary vs Permanent Air Dome Permits: Which Do You Need?

    When you’re planning an air dome installation, the duration of your project determines which permit pathway you’ll need to follow.

    If you’re installing your dome for less than 180 days, you’ll qualify for temporary structure permits, which involve a notably simpler approval process with reduced documentation requirements.

    However, if your installation exceeds 180 days, you’ll need permanent sports dome building permits that require thorough building permits with full engineering documentation. This includes detailed structural calculations, fire safety plans, and egress designs.

    The temporary route saves time and paperwork, but you can’t extend beyond the 180-day limit without converting to permanent status.

    Consider your project’s timeline carefully when determining which air dome permit requirements apply to your specific installation needs.

    Air Dome Permit Costs And Processing Timelines By Type

    You’ll face different costs and timelines depending on whether you’re seeking a temporary or permanent air dome permit.

    Temporary permits typically cost $200-$800 and process within 2-4 weeks, while permanent permits can range from $2,000-$15,000 with 6-12 week processing times.

    Several factors affect these timelines, including your project’s complexity, local jurisdiction workload, and whether you need additional engineering reviews for snow load calculations.

    Temporary Permit Costs

    Most temporary air dome permits cost between $200 and $1,500, depending on your facility’s size and local jurisdiction requirements.

    You’ll find smaller recreational domes typically fall toward the lower end, while large sports complexes approach maximum fees.

    Tennis bubble zoning classifications often determine your base permit cost, as recreational facilities face different fee structures than commercial operations.

    Processing fees usually range from $150-$500, with additional charges for plan reviews and inspections.

    Air dome regulations by state create significant cost variations.

    California and New York charge premium rates, often exceeding $1,000 for temporary permits.

    Meanwhile, states like Texas and Florida offer more affordable options, typically under $500.

    You’ll also encounter supplementary costs including fire department reviews ($50-$200) and structural engineering approvals ($100-$300), bringing total temporary permit expenses to $500-$2,000.

    Processing Timeline Factors

    Since permit processing timelines depend heavily on your jurisdiction’s workload and staffing levels, expect significant variations even within the same state.

    You’ll find temporary permits typically process faster, often within 2-4 weeks, since they require fewer reviews and documentation.

    Permanent air dome permits take considerably longer—usually 6-12 weeks—due to thorough engineering reviews, particularly for snow load calculations and structural assessments.

    Your timeline extends if you’re installing electrical, plumbing, or HVAC systems requiring separate permits.

    Complex projects exceeding 20,000 square feet face additional delays for fire safety reviews and egress plan approvals.

    You can expedite processing by submitting complete applications with professional engineering stamps upfront.

    Peak construction seasons (spring/summer) create longer wait times, while winter applications often move faster through municipal review processes.

    How To Apply For Air Dome Permits In Your State

    You’ll need to research your state’s specific air dome permit requirements since regulations vary greatly across jurisdictions.

    Start by contacting your local building department to determine whether you need a temporary or permanent permit based on your installation timeline.

    Once you understand the requirements, gather all necessary application documents including engineering calculations for snow loads, fire safety plans, and egress designs before submitting your permit application.

    Research State Requirements

    Before diving into your air dome project, understanding your state’s specific permit requirements will save you time, money, and potential legal headaches down the road.

    Start by contacting your state’s building department or construction regulatory agency to obtain current permit guidelines. You’ll discover that temporary installations under 180 days typically follow streamlined approval processes, while permanent structures require detailed building permits.

    Focus your research on critical engineering specifications, particularly snow load requirements ranging from 35-50 PSF depending on your geographic location.

    Don’t overlook fire safety codes and egress regulations, especially for larger facilities exceeding 20,000 square feet.

    Many states maintain online databases with permit applications, fee schedules, and approval timelines. Document all requirements thoroughly before beginning your application process to guarantee compliance.

    Submit Application Documents

    Gathering your required documentation marks the essential shift from research to action in the permit application process.

    You’ll need structural engineering plans showing snow load calculations for your region’s 35-50 PSF requirements, site surveys, and foundation details.

    Fire safety documentation must include sprinkler system layouts, emergency lighting plans, and egress route maps for facilities exceeding 20,000 square feet.

    Submit your complete application package through your state’s online portal or local building department.

    Include all required fees, which typically range from $500-$2,500 depending on facility size and complexity.

    Temporary installations under 180 days often require simplified documentation sets.

    Double-check that you’ve included zoning compliance letters, utility connection approvals, and insurance certificates.

    Missing documents will delay your approval timeline considerably, so review submission requirements thoroughly before filing.

    Snow Load And Structural Requirements That Make Or Break Applications

    When structural engineers evaluate air dome applications, snow load calculations often determine whether your project gets approved or rejected.

    You’ll need to meet specific requirements ranging from 35-50 PSF (1.67-2.39 kPa) depending on your location’s climate zone.

    Your engineer must account for the dome’s unique deflation risks during snow events. Unlike traditional buildings, air domes can’t shed snow loads through structural rigidity. They rely entirely on internal air pressure to maintain shape and support weight.

    Critical structural elements include emergency deflation procedures, backup power systems for blowers, and snow removal protocols.

    You’ll also need detailed calculations showing how your dome handles uneven snow distribution, ice dams, and rapid accumulation scenarios.

    Missing any of these engineering requirements typically results in immediate application denial.

    Fire Safety Rules For Air Domes Over 20,000 Square Feet

    Fire departments apply stricter safety standards to air domes exceeding 20,000 square feet due to increased occupancy risks and evacuation challenges.

    You’ll face extensive inspections and must demonstrate compliance with commercial fire codes rather than residential standards.

    Your large air dome requires these critical fire safety elements:

    1. Multiple emergency exits positioned strategically around the perimeter, with illuminated exit signs visible through fabric walls.
    2. Automatic sprinkler systems with pressurized water lines running along the dome’s interior framework.
    3. Fire-rated emergency lighting that activates when power fails, casting bright beams across evacuation routes.
    4. Smoke detection networks with sensors mounted on support cables, triggering piercing alarms throughout the space.

    You’ll also need fire department vehicle access roads and designated staging areas for emergency responders around your facility’s exterior.

    Why Air Dome Permit Applications Get Rejected (And How To Avoid It)

    Although building departments approve most straightforward construction permits, air dome applications face rejection rates exceeding 40% due to their unique structural and safety challenges.

    You’ll avoid rejection by addressing these common issues upfront.

    Inadequate snow load calculations cause most denials. You must provide engineering documentation proving your dome can handle 35-50 PSF loads based on local requirements.

    Don’t submit generic calculations—specify your exact location’s requirements.

    Fire safety violations trigger automatic rejections for facilities over 20,000 square feet. You’ll need proper egress plans, sprinkler systems, and emergency evacuation procedures clearly documented.

    Missing foundation details also doom applications. You must show proper anchoring systems and soil analysis reports.

    Submit complete structural drawings with professional engineer stamps, not basic sketches.

    Engineering Documentation Required For Air Dome Permit Approval

    Professional engineering documentation forms the backbone of successful air dome permit applications, requiring specific technical reports that building departments scrutinize closely.

    You’ll need extensive structural calculations that demonstrate your dome can withstand local environmental loads, particularly snow loads ranging from 35-50 PSF depending on your region.

    Your engineering package must include:

    1. Structural analysis reports showing load calculations for wind, snow, and seismic forces
    2. Foundation design drawings detailing anchoring systems and soil bearing capacity
    3. Mechanical system specifications for inflation equipment, backup systems, and emergency protocols
    4. Fire safety documentation including egress plans and emergency deflation procedures

    You’ll also need sealed drawings from a licensed professional engineer in your state.

    Without proper PE stamps and detailed calculations, building departments will reject your application immediately, regardless of your dome’s actual safety features.

  • Sports Dome Manufacturer Comparison USA

    Sports Dome Manufacturer Comparison USA

    You’re facing a significant investment when choosing a sports dome manufacturer, and the wrong decision could cost you thousands in repairs or premature replacement. The American market offers everything from budget-friendly options that’ll barely last five years to premium manufacturers backing their products with 15-year warranties. But here’s what most buyers don’t realize: the cheapest upfront price often becomes the most expensive choice, while the priciest option isn’t always worth the premium.

    What To Look For In A Sports Dome: Key Features That Matter Most

    When investing in a sports dome, you’ll want to prioritize three essential elements that directly impact performance and longevity.

    Fabric Quality stands as your most vital consideration. Premium sports dome manufacturers like Farley Group use reinforced PVC materials that resist tears, UV damage, and weather extremes.

    Budget options from manufacturers like Broadwell may compromise on material thickness and coating quality.

    Warranty Coverage reveals manufacturer confidence. Top tennis bubble manufacturers typically offer 10-15 year warranties on fabric and structural components, while budget suppliers often provide minimal coverage.

    Installation Expertise determines your dome’s success. Established air dome suppliers comparison shows that companies like DUOL and Yeadon Domes provide extensive installation training and ongoing support, ensuring proper setup and maintenance protocols for peak performance.

    Top 5 Sports Dome Manufacturers: Who Makes What In The US Market

    Five major manufacturers dominate the US sports dome market, each serving distinct customer segments with varying approaches to quality, pricing, and specialization.

    When researching air dome companies usa, you’ll encounter Farley Group leading the premium segment with Canadian-engineered solutions and superior fabric quality.

    Yeadon Domes specializes in custom US installations, offering personalized design services.

    DUOL brings European engineering expertise with highly engineered systems and extensive warranties.

    Broadwell targets budget-conscious buyers from the UK market with cost-effective solutions.

    Arizon focuses on commercial applications across the United States.

    Among the best dome manufacturers, fabric durability, warranty coverage, and installation support vary greatly.

    For typical single courts measuring 78′ x 120′, each manufacturer offers different value propositions worth comparing carefully.

    Fabric Quality Showdown: Which Brands Build Domes That Last

    Since dome fabric serves as your structure’s primary defense against weather extremes and daily wear, understanding material specifications separates smart buyers from those facing premature replacements.

    Farley Group leads with premium PVC-coated polyester fabrics offering 20-year warranties and superior UV resistance. Their Canadian-engineered materials withstand harsh weather conditions that destroy lesser fabrics within five years.

    DUOL’s European-sourced materials feature advanced polymer coatings with 15-year guarantees, excelling in snow load resistance and thermal efficiency. You’ll find their fabrics maintain flexibility in extreme cold where competitors crack.

    Yeadon Domes uses commercial-grade vinyl with 10-year coverage, suitable for moderate climates.

    Arizon offers standard PVC fabrics with basic 5-year warranties for budget-conscious buyers.

    Broadwell’s entry-level materials carry limited 3-year warranties, adequate for temporary installations but questionable for permanent facilities requiring decade-plus performance.

    Sports Dome Warranties And Installation: Comparing Service And Support

    Beyond fabric durability, warranty terms and installation support determine whether you’ll enjoy years of trouble-free operation or face costly surprises down the road.

    Manufacturer Warranty Coverage Installation Support
    Farley Group 15-year extensive Full turnkey service
    Yeadon Domes 10-year fabric/structure Engineering + supervision
    DUOL 12-year materials Technical guidance only

    You’ll find Farley Group offers the strongest protection with extensive coverage including fabric, structure, and air systems. Yeadon provides solid middle-ground protection with hands-on installation oversight. DUOL’s engineering focus means you’ll get technical expertise but less hands-on support.

    Installation timelines vary notably. Farley’s turnkey approach takes 4-6 weeks but removes your headaches. Yeadon’s custom approach requires 6-8 weeks. DUOL’s technical-only support means faster delivery but you’ll coordinate local contractors yourself.

    Tennis Court Dome Pricing: What You’ll Pay For 78′ X 120′ Coverage

    Three primary factors drive tennis court dome pricing: manufacturer positioning, fabric specifications, and installation complexity.

    You’ll find Broadwell offers the most budget-friendly option for a standard 78′ x 120′ tennis court, typically ranging $45,000-$65,000.

    Arizon’s commercial-grade domes fall in the mid-range at $70,000-$95,000, focusing on durability for high-traffic facilities.

    Yeadon Domes commands premium pricing of $85,000-$120,000 due to their custom engineering approach and superior fabric quality.

    DUOL’s European-engineered systems range $90,000-$130,000, reflecting advanced materials and precise installation methods.

    Farley Group sits at the top tier, with pricing from $110,000-$150,000 for their premium Canadian-manufactured domes.

    Installation complexity, site preparation, and optional features like ventilation systems can add $15,000-$40,000 to base pricing across all manufacturers.

    Budget Vs Premium Sports Domes: Matching Manufacturers To Your Priorities

    When you’re choosing between budget and premium sports dome manufacturers, you’ll face critical decisions about fabric durability and construction materials that directly impact your dome’s lifespan.

    Premium manufacturers like Farley Group and DUOL typically offer 15-20 year warranties with high-grade PVC fabrics, while budget options like Broadwell provide 5-10 year coverage using lighter-weight materials.

    Your choice determines whether you’ll prioritize lower upfront costs or invest in superior materials that resist UV damage, tearing, and weather extremes over decades of use.

    Quality Material Trade-Offs

    While premium manufacturers like Farley Group and DUOL offer superior fabric durability and extensive warranties, you’ll face a significant cost jump that may not align with your facility’s actual needs.

    Premium fabrics typically feature reinforced seams, UV-resistant coatings, and 15-20 year warranties, but budget options from Broadwell deliver adequate performance for recreational use at half the cost.

    You’re trading longevity for affordability when choosing budget materials. Standard PVC fabrics from budget manufacturers last 8-12 years with proper maintenance, while premium PTFE-coated fabrics can exceed 20 years.

    Consider your usage intensity—high-traffic commercial facilities justify premium investment, but seasonal recreational courts function well with mid-tier options from Yeadon Domes or Arizon that balance cost and durability effectively.

    Warranty Coverage Differences

    Five years separates entry-level warranties from premium coverage, creating a clear divide between manufacturer confidence levels.

    Budget manufacturers like Broadwell typically offer 5-7 year fabric warranties with limited structural coverage, reflecting their cost-focused approach. You’ll find basic protection against material defects but fewer guarantees on installation workmanship.

    Premium manufacturers like Farley Group and DUOL extend 10-15 year extensive warranties covering fabric, frame, and installation. They’ll replace materials showing premature wear and address structural issues at no cost.

    Yeadon Domes offers custom warranty packages matching your specific requirements and climate conditions.

    Mid-tier options like Arizon provide 8-10 year coverage, balancing cost and protection. You’re getting extended fabric warranties without premium pricing.

    Consider your long-term investment timeline when comparing warranty terms—longer coverage often justifies higher upfront costs through reduced replacement risks.

  • Tension Fabric Structure Buying Guide

    Tension Fabric Structure Buying Guide

    You’re about to make a significant investment in a tension fabric structure, but the sheer number of variables can overwhelm even experienced buyers. From calculating your clear span requirements to maneuvering through local permitting hurdles, each decision impacts your project’s timeline, budget, and long-term performance. The wrong choice in framing or fabric material could cost you thousands in repairs or replacements down the road. Here’s what you need to know before you commit.

    Tension Fabric Building Basics: Spans, Applications, and Budget Planning

    Three fundamental factors shape every tension fabric building decision: the clear span width you need, your intended application, and your available budget. You can achieve clear spans up to 300 feet (91 meters) without interior columns, making these structures ideal for warehouses, aircraft hangars, sports facilities, and manufacturing plants.

    Your application determines critical specifications like wind loads, snow loads, and required door configurations. Athletic facilities need different engineering than storage buildings. Manufacturing operations require specific ventilation and lighting considerations.

    Budget planning involves upfront costs for frames, fabric, and installation, plus long-term expenses for maintenance and energy. This tension fabric structure buying guide helps you balance these three factors effectively.

    Consider operational costs early—insulation and HVAC requirements greatly impact your total investment over the building’s 25-year lifespan.

    Frame Options: I-Beam vs Truss Systems for Your Tension Fabric Structure

    When selecting your tension fabric structure’s foundation, you’ll choose between two primary frame systems: I-beam and truss configurations. Each system offers distinct advantages when buying fabric building solutions for your specific needs.

    Feature I-Beam System Truss System
    Clear Spans Up to 200 feet Up to 300 feet
    Construction Speed Faster installation Longer assembly time
    Cost Lower initial investment Higher upfront cost
    Structural Strength Suitable for most applications Maximum load capacity

    I-beam frames use solid steel beams that’re ideal for smaller to medium-sized structures, offering quick assembly and cost-effectiveness. Truss systems utilize triangulated steel frameworks that provide superior strength for larger spans and heavy snow loads, making them perfect for industrial applications requiring maximum structural integrity.

    Fabric Material Guide: PVC vs PTFE Performance and Costs

    After selecting your frame system, you’ll need to choose between two primary fabric materials that’ll determine your structure’s durability, performance, and long-term costs.

    PVC (Vinyl) Fabric offers excellent value for most applications. It’s UV-resistant, translucent, and costs considerably less than PTFE. You’ll get 15-20 years of reliable performance with proper maintenance.

    PTFE (Teflon-coated fiberglass) delivers premium longevity and fire resistance. While more expensive upfront, it lasts 25-30 years and handles extreme weather conditions better than PVC.

    Consider these performance scenarios when consulting your rigid frame purchase guide:

    1. Coastal environments: Salt air accelerates PVC degradation.
    2. High-temperature zones: PTFE withstands heat without compromising structural integrity.
    3. Heavy snow loads: PTFE’s superior tensile strength prevents fabric stretching.

    Your climate, budget, and intended lifespan should drive this critical material decision.

    Permits and Engineering: Local Code Requirements for Tension Fabric Buildings

    Before you finalize your fabric selection and frame specifications, you’ll need to navigate the engineering and permitting requirements that govern tension fabric structures in your area. Local building codes vary considerably, and your clear span building buying process must account for wind loads, snow loads, and seismic requirements specific to your location.

    Most jurisdictions require stamped engineering drawings from a licensed structural engineer. Your manufacturer should provide preliminary calculations, but you’ll need final approval from a local engineer familiar with regional codes.

    Common requirements include foundation design, anchor point specifications, and fire safety compliance.

    Start the permit application early, as approval can take 4-8 weeks. Some areas have streamlined processes for pre-engineered buildings, while others require extensive documentation for these specialized structures.

  • Air Dome Size Calculator for Your Facility

    Air Dome Size Calculator for Your Facility

    You’re planning an air dome facility, but calculating the right size isn’t as straightforward as you’d expect. Most facility owners underestimate the space requirements, focusing only on court dimensions while overlooking vital elements like proper clearance zones, ventilation systems, and structural support needs. Getting these calculations wrong can cost you thousands in redesigns or leave you with a cramped, non-functional space that doesn’t meet safety standards or user expectations.

    How Much Space Does Your Tennis Court Air Dome Actually Need?

    When planning your tennis court air dome, you’ll need considerably more space than just the court’s official dimensions. A single tennis court measures 78′ x 36′, but your air dome requires 78′ x 120′ (9,360 sq ft) to guarantee safe play with proper clearance zones.

    Don’t forget to add 20-30% extra space for essential features like walkways, spectator seating, and storage areas. This brings your total footprint to approximately 12,000 sq ft for a single court facility.

    For multiple courts, a four-court air dome needs 120′ x 200′ (24,000 sq ft) minimum.

    Using an air dome size calculator helps you determine exact specifications based on your unique requirements, local building codes, and planned amenities. Proper planning prevents costly modifications later.

    Real Air Dome Examples: 1, 2, and 4-Court Space Comparisons

    Real-world installations demonstrate the dramatic space differences between single and multi-court air dome facilities. A single-court dome requires approximately 9,360 square feet, but you’ll need closer to 12,000 square feet when including essential amenities like seating and storage areas.

    Two-court facilities typically need 16,000-18,000 square feet, offering better cost efficiency per court than single installations. You’re looking at roughly $180,000-$220,000 for professional-grade construction.

    Four-court complexes require 24,000-30,000 square feet and represent the sweet spot for commercial operations. These larger facilities maximize your investment through shared infrastructure costs and increased revenue potential.

    This sports dome sizing guide shows that while initial costs increase with size, your per-court investment decreases considerably.

    Multi-court domes also provide operational flexibility during maintenance periods.

    Why Air Domes Need More Space Than Outdoor Courts

    Although outdoor tennis courts measure a standard 78′ x 36′, air domes require considerably more enclosed space to function safely and effectively. You’ll need additional clearance for several critical factors that don’t affect outdoor courts.

    Space Requirement Outdoor Courts Air Domes
    Ball clearance Natural boundaries 20-25′ height minimum
    Player safety zones Open-ended Enclosed buffer zones
    Equipment access Direct entry Airlock systems

    Your tennis dome dimensions must account for structural elements like anchor points, ventilation systems, and emergency exits. Unlike outdoor facilities, you can’t simply mark court lines and start playing. The pressurized environment demands proper air circulation space, and players need adequate overhead clearance for serves and lobs without hitting the dome ceiling.

    Should Your Air Dome Include Storage and Spectator Areas?

    Where will you store your tennis equipment, maintenance tools, and seasonal gear once your air dome is operational? Storage areas are essential but often overlooked when learning how to size air dome facilities.

    You’ll need dedicated space for nets, balls, court maintenance equipment, and emergency supplies.

    Spectator areas add significant value but require careful planning. Bleacher seating along sidelines needs 8-12 feet of depth, while elevated viewing areas require structural support and emergency exits.

    Consider your facility’s primary use—private clubs may prioritize storage, while commercial operations need spectator capacity for tournaments and lessons.

    Integration is key. Built-in storage rooms and viewing areas cost less than separate structures and maintain the dome’s structural integrity.

    Plan these elements during initial sizing to avoid expensive modifications later.

    How Air Dome Size Affects Your Total Investment

    Every square foot you add to your air dome directly impacts three major cost categories: initial construction, ongoing operational expenses, and long-term maintenance.

    Understanding this relationship helps you determine the proper dome size for courts without overspending on unnecessary space.

    Here’s how size affects your investment:

    1. Construction costs increase by $8-12 per square foot, meaning a 12,000 sq ft dome costs $24,000-36,000 more than a 9,000 sq ft structure.
    2. Energy expenses rise proportionally with volume – larger domes require more powerful blowers and climate control systems.
    3. Maintenance costs scale with surface area, as you’ll need more fabric repairs, cleaning, and eventual replacement materials.

    Calculate your minimum required space first, then add only essential features.

    This approach guarantees you’re investing in functionality rather than excessive square footage.

  • How to Buy a Tennis Air Dome in 2026

    How to Buy a Tennis Air Dome in 2026

    You’re considering a tennis air dome for 2026, but the process isn’t as straightforward as you might expect. While prices have stabilized compared to recent years, you’ll face new regulations, updated technology options, and shifting supplier landscapes that didn’t exist just two years ago. The key lies in understanding what’s changed in the industry and how these developments will impact your investment, timeline, and long-term operational costs.

    Tennis Air Dome Costs and Budget Planning for 2026

    Before diving into specific features and installation logistics, you’ll need to establish a realistic budget for your tennis air dome project in 2026.

    Tennis air dome costs and budget planning for 2026 requires understanding several pricing factors. Basic single-court domes start around $150,000-$200,000, while multi-court facilities can exceed $500,000.

    Your budget should include the dome structure, foundation work, electrical systems, HVAC equipment, and installation labor. Don’t forget ongoing operational costs like electricity, maintenance, and insurance.

    Seasonal domes cost less initially but require annual setup fees. This thorough air dome purchase guide emphasizes getting multiple quotes early, as material costs fluctuate.

    Consider financing options, including equipment loans and lease agreements, to manage cash flow effectively throughout your project timeline.

    Determine Your Court Size and Site Requirements

    The first critical step in your tennis air dome project involves calculating the exact dimensions and evaluating your site’s suitability.

    When learning how to buy tennis air dome structures, you’ll need minimum dimensions of 78′ x 120′ (23.8m x 36.6m) for a single court, totaling 9,360 square feet. This doesn’t include additional space for walkways and equipment.

    Your site must be level with proper drainage to prevent water accumulation. Check local zoning laws and obtain necessary permits before proceeding.

    Consider proximity to utilities like electricity and water connections, as these affect installation costs. Soil conditions matter too – soft ground may require additional foundation work.

    Measure twice and account for buffer zones around the court perimeter to guarantee players have adequate movement space during gameplay.

    Choose Your Tennis Air Dome Type and Key Features

    Once you’ve established your site requirements, you’ll face the critical decision between seasonal and permanent tennis air dome options. When buying tennis bubble structures, seasonal domes cost less upfront but require annual installation and removal. Permanent installations offer year-round play but demand higher initial investment.

    Feature Seasonal Permanent
    Cost $15,000-$40,000 $50,000-$150,000
    Installation Annual setup/takedown One-time installation
    Durability 5-7 years 15-25 years
    Insulation Basic single layer Double-wall options
    Lighting Portable systems Integrated LED

    Consider essential features like ventilation systems, emergency exits, insulation levels, and lighting quality. Double-wall construction provides superior insulation but increases costs. Evaluate your budget against long-term usage plans to determine which option delivers the best value for your specific needs.

    Compare Air Dome Suppliers and Get Smart Quotes

    After selecting your preferred dome type and features, you’ll need to identify reputable suppliers who can deliver quality structures within your budget.

    Research manufacturers with proven track records in tennis facility construction. Look for companies offering extensive warranties, installation services, and ongoing maintenance support.

    Request detailed quotes from 3-5 suppliers to compare pricing, specifications, and timelines. Your sports dome buying process should include evaluating each vendor’s experience with similar projects, checking customer references, and reviewing installation portfolios.

    Ask about financing options, permit assistance, and post-installation support.

    Don’t automatically choose the lowest bid—consider value, quality, and service reliability. Request itemized quotes showing materials, labor, permits, and additional features.

    Verify insurance coverage and licensing before making your final decision.

    Installation Timeline and Permitting Process

    Before construction begins, you’ll need to secure proper permits and understand the installation timeline for your tennis air dome. Most installations require building permits, electrical permits, and zoning approvals, which can take 4-12 weeks depending on your local municipality.

    The typical installation timeline follows these phases:

    1. Site preparation and foundation work – 2-4 weeks for concrete pad and utilities
    2. Dome delivery and setup – 1-2 weeks for fabric installation and inflation system
    3. Interior finishing – 1-3 weeks for lighting, HVAC, and court surfacing
    4. Final inspections and testing – 1 week for safety compliance and operational checks

    Your air dome selection guide should include permit requirements specific to your area. Weather conditions can extend timelines, so plan installations during favorable seasons.

    Most suppliers coordinate with local contractors to streamline the permitting and installation process.

  • Complete Guide to Buying Used Air Domes USA

    Complete Guide to Buying Used Air Domes USA

    You’re considering a used air dome, but you don’t want to make a costly mistake. The American market offers numerous opportunities, yet steering through pricing, inspections, and reliable sources can feel overwhelming without proper guidance. Whether you’re looking at a five-year-old facility or something older, knowing what constitutes a fair deal versus a potential disaster separates smart buyers from those who learn expensive lessons. The difference often comes down to understanding what others have discovered too late.

    How Much Should You Pay for a Used Air Dome?

    Several factors determine the fair market price for a used air dome, with age being the primary consideration.

    You’ll typically pay 60% of the original price for a 5-year-old structure. For example, a single court 7,200 square foot dome that originally cost $180K-$240K new will run $108K-$144K used.

    A 10-year-old dome drops to 40-50% of its original value, ranging from $72K-$108K for the same size structure.

    Your used tennis bubble buying guide should include professional inspections of three critical components: fabric integrity for tears or wear, blower system condition and efficiency, and door functionality.

    These elements greatly impact the dome’s remaining lifespan and operating costs, making them essential factors in determining fair market value.

    Inspect These 5 Critical Components Before Buying

    Five essential components require thorough inspection before you purchase any used air dome.

    The fabric membrane represents your largest concern—check for tears, excessive wear, UV damage, and proper tension.

    Inspect the blower system‘s motor condition, belt wear, and overall maintenance history since it’s costly to replace.

    Door seals and mechanisms must function properly to maintain air pressure; test all entry points for leaks and smooth operation.

    The inflation system requires evaluation of pressure sensors, backup systems, and control panels.

    Finally, examine the foundation anchoring system for rust, loose bolts, or structural damage.

    A detailed used sports dome inspection by a qualified technician costs $2,000-$5,000 but prevents expensive surprises.

    Document all findings and obtain repair estimates before finalizing your purchase decision.

    Best Places to Find Used Air Domes for Sale

    Multiple specialized marketplaces and industry channels offer access to used air domes, though you’ll find the best selection through sports facility dealers who handle trade-ins and upgrades.

    These dealers often maintain inventory from schools and clubs replacing older structures.

    Commercial auction sites like EquipNet and BidSpotter regularly feature decommissioned air domes from recreational facilities.

    You’ll also discover opportunities through direct contact with manufacturers like DBS Engineering and Air Structures American Technologies, who broker used units.

    Industry publications such as Athletic Business magazine’s classified sections connect buyers with sellers nationwide.

    LinkedIn groups focused on sports facility management provide networking opportunities where deals emerge organically.

    Don’t overlook local tennis clubs, schools, and recreational centers that might be upgrading their facilities—they’re among the best places to find used air domes for sale.

    What to Expect: Used Air Dome Condition by Age

    Once you’ve located potential air dome sellers, understanding how age affects structural condition helps you negotiate fair prices and avoid costly surprises.

    When buying used air dome structures, age directly correlates with wear patterns and maintenance needs.

    Here’s what you’ll typically encounter:

    1. 5-year-old domes (60% of new price): Expect minor fabric wear, functioning blower systems, and operational doors with minimal repairs needed.
    2. 10-year-old domes (40-50% of new price): Anticipate fabric patches, potential blower replacements, and door mechanism adjustments or upgrades.
    3. 15+ year domes: Require thorough fabric inspection, likely blower overhauls, and possible structural component replacements.

    Always prioritize professional inspections focusing on fabric integrity, blower motor condition, and door functionality.

    These three components determine your dome’s immediate usability and future maintenance costs.

  • Sports Dome Heating System Cost Options

    Sports Dome Heating System Cost Options

    You’re facing a heating decision that’ll impact your sports dome’s budget for years to come. While forced air systems tempt you with their low $8,000 installation cost, they’ll hit your wallet harder each month at $2,500. Heat pumps demand $50,000 upfront but slash monthly bills to just $800. Here’s the catch: the “cheapest” option today might cost you thousands more over the next decade, and the math isn’t what you’d expect.

    Dome Heating Costs: Installation Vs. Monthly Operating Expenses

    When evaluating heating systems for your 20,000 square foot sports dome, you’ll face a classic trade-off between upfront installation costs and ongoing monthly expenses.

    Forced air systems offer the lowest dome heating installation price at $8,000-$20,000, but you’ll pay $1,500-$2,500 monthly in gas costs to maintain comfortable temperatures of 60-70°F.

    Infrared heating requires a higher initial investment of $15,000-$35,000, yet reduces monthly operating costs to $1,200-$2,000.

    Heat pumps represent the steepest upfront expense at $20,000-$50,000, but they’ll deliver the lowest monthly costs of $800-$1,500.

    Your decision should factor in long-term projections.

    While forced air systems seem budget-friendly initially, heat pumps often prove more economical over several years despite their substantial installation requirements.

    Forced Air Systems: Lowest Installation Cost For Large Dome Spaces

    Although forced air systems require the highest monthly operating costs, they’ll get your 20,000 square foot sports dome heated with minimal upfront investment.

    You’ll spend between $8,000-$20,000 for installation, making forced air systems the most budget-friendly option initially. These systems work by circulating heated air throughout your dome space using ductwork and powerful blowers.

    You’ll pay $1,500-$2,500 monthly in gas costs to maintain comfortable temperatures between 60-70°F. The system’s efficiency depends on your dome’s insulation quality and local gas rates.

    Forced air systems heat large spaces quickly, making them ideal when you need rapid temperature control for events. However, you’ll face higher long-term operating expenses compared to infrared or heat pump alternatives.

    Infrared Vs. Heat Pump Heating: Comparing Mid And Premium Options

    Beyond forced air systems, infrared and heat pump technologies offer you better long-term value despite higher installation costs.

    Infrared heat dome cost ranges from $15K-$35K upfront, but you’ll save on monthly bills at $1,200-$2,000 compared to forced air’s $1,500-$2,500. These systems heat objects directly rather than air, making them ideal for high-ceiling domes where warm air typically rises.

    Heat pumps represent the premium choice at $20K-$50K installation, delivering the lowest operating costs of $800-$1,500 monthly. They’re most efficient in moderate climates and provide both heating and cooling capabilities.

    While infrared systems excel in spot heating for active play areas, heat pumps offer consistent temperature control throughout your entire dome space.

    Real Monthly Heating Bills: Gas, Electric, And Heat Pump Costs

    How much will you actually spend each winter heating your 20,000 square foot dome? Your monthly bills will vary dramatically based on your chosen system and local utility rates.

    Gas-powered forced air systems typically cost $1,500-$2,500 monthly during peak winter months. You’ll maintain comfortable temperatures around 60-70°F, but gas price fluctuations can impact your budget considerably.

    Electric infrared heating runs $1,200-$2,000 monthly. While electricity rates are generally more stable than gas, your costs depend heavily on your local utility company’s pricing structure.

    Heat pumps offer the most economical operation at $800-$1,500 monthly. They’re particularly efficient in moderate climates, though performance decreases in extremely cold conditions.

    When evaluating sports dome heating options, remember that actual costs depend on your climate zone, insulation quality, and local energy prices.

    Best Dome Heating System For 10-Year Savings

    Over a decade, heat pumps deliver the strongest return on investment despite their higher upfront costs. When calculating your air dome heating system cost over 10 years, heat pumps save you thousands compared to forced air and infrared options.

    System Type 10-Year Total Cost Your Savings
    Heat Pump $116,000-$230,000 Best Choice
    Infrared $159,000-$275,000 $43,000+ more
    Forced Air $188,000-$320,000 $72,000+ more

    You’ll spend $35,000 more upfront for heat pumps, but you’ll recoup that investment within 3-4 years through lower monthly bills. After that, you’re banking serious savings every month. Heat pumps also provide consistent temperatures and require less maintenance, making them the smart long-term choice for your facility’s budget.

  • Temporary vs Permanent Sports Dome Costs

    Temporary vs Permanent Sports Dome Costs

    You’re facing a significant decision that’ll impact your sports facility’s budget for years to come. While temporary domes seem like the safer choice with their lower upfront costs of $700K to $1M, they’re quietly draining your resources through annual setup fees and maintenance. Permanent structures demand more initially—up to $1.2M—but here’s what most facility managers don’t realize about the hidden expenses that completely flip this equation.

    Temporary vs Permanent Sports Domes: Investment Comparison

    When you’re evaluating sports dome options for a 20,000 square foot facility, the financial picture shifts dramatically over time.

    Your temporary sports dome cost appears lower initially at $700K-$1M, but you’ll face annual setup and removal expenses of $16K-$30K.

    This seasonal vs permanent dome comparison reveals that temporary installations total $860K-$1.3M over ten years.

    Permanent domes require higher upfront investment of $800K-$1.2M but eliminate recurring costs entirely.

    You’ll reach the break-even point in just 3-4 years with permanent installations.

    The removable dome vs fixed installation cost analysis clearly favors permanent structures for long-term use.

    If you’re planning multi-year operations, permanent domes deliver superior value despite their steeper initial price tag.

    Break-Even Analysis: When Permanent Domes Pay For Themselves

    When you’re weighing temporary versus permanent dome options, the break-even point becomes your most critical decision factor.

    You’ll find that permanent domes typically cost $100K-$200K more upfront, but they’ll save you $16K-$30K annually by eliminating setup and removal expenses.

    The math works in your favor quickly—permanent installations usually pay for themselves within just three to four years through these ongoing operational savings.

    Initial Investment Comparison

    Although temporary sports domes require less money upfront, you’ll find that permanent structures become the more economical choice within just a few years.

    When comparing temporary vs year-round facility cost for a 20,000 square foot dome, you’re looking at $700K-$1M initially for temporary structures versus $800K-$1.2M for permanent installations.

    However, temporary domes carry hidden expenses that quickly erode their initial advantage. You’ll face $16K-$30K annually for setup and removal services, plus potential storage costs during off-seasons.

    These recurring expenses mean you’ll spend $860K-$1.3M over ten years with temporary domes.

    Permanent structures eliminate these ongoing costs entirely. While requiring higher upfront investment, they typically break even within 3-4 years, making them markedly more cost-effective for long-term operations.

    Annual Operating Savings

    Beyond the initial cost difference, permanent domes deliver substantial annual operating savings that accelerate your return on investment. You’ll eliminate the recurring setup and teardown expenses that plague temporary structures, creating immediate cost benefits.

    Cost Factor Temporary Dome Permanent Dome
    Annual Setup/Removal $16K-$30K $0
    5-Year Total Operating $80K-$150K $0
    10-Year Total Cost $860K-$1.3M $800K-$1.2M
    Break-Even Point N/A 3-4 years
    Labor Requirements High seasonal Minimal

    Your permanent dome typically pays for itself within 3-4 years through these operational savings. After the break-even point, you’re saving $16K-$30K annually compared to temporary alternatives. These savings compound over time, making permanent installations increasingly cost-effective for long-term facility planning.

    Three Year Payback

    The math behind permanent dome investments reveals a compelling financial story that most facility owners find irresistible.

    You’ll reach break-even on your permanent dome investment within just 3-4 years compared to temporary alternatives.

    Here’s how it works: while you’re spending $16,000-$30,000 annually on setup and removal costs for temporary domes, permanent structures eliminate these recurring expenses entirely.

    Your initial investment difference of $100,000-$200,000 gets recovered quickly through avoided annual costs.

    After year four, you’re generating pure savings of $16,000-$30,000 annually.

    Over a 10-year period, you’ll save $260,000-$500,000 by choosing permanent construction.

    This accelerated payback period makes permanent domes one of the smartest long-term investments in sports facility infrastructure.

    Upfront Sports Dome Costs: $700K-$1.2M Investment Breakdown

    Major financial decisions require understanding every dollar you’ll invest upfront in a sports dome project.

    You’re looking at a substantial initial investment ranging from $700,000 to $1.2 million for a 20,000 square foot facility, depending on your chosen approach.

    Here’s how the upfront costs break down:

    1. Temporary seasonal domes: You’ll pay $700K-$1M initially, appearing more budget-friendly at first glance.
    2. Permanent structures: Higher upfront investment of $800K-$1.2M, but no recurring installation expenses.
    3. Additional considerations: Site preparation, permits, and utility connections add to both options.

    While temporary domes seem cheaper initially, you’ll face annual setup and removal costs of $16K-$30K.

    Permanent structures eliminate these recurring expenses, making the higher upfront investment more cost-effective long-term.

    Annual Setup, Removal, And Maintenance Expenses

    While upfront costs grab most attention during planning, recurring annual expenses can dramatically impact your sports dome’s total cost of ownership.

    Temporary domes require significant annual setup and removal costs ranging from $16,000 to $30,000 each year. You’ll need specialized crews, transportation, and storage facilities during off-seasons. These expenses accumulate quickly—over ten years, you’re looking at $160,000 to $300,000 in setup costs alone.

    Permanent domes eliminate these recurring expenses entirely.

    You’ll only face standard maintenance costs like HVAC servicing, minor repairs, and cleaning. The math is compelling: permanent structures typically break even within 3-4 years when you factor in eliminated setup costs.

    After that break-even point, you’re saving substantial money annually while enjoying year-round facility access without weather-related interruptions.

    Seasonal vs Year-Round Sports Dome Usage Scenarios

    Your facility’s usage pattern directly impacts whether temporary or permanent domes make financial sense.

    If you’re only covering fields during peak winter months, temporary structures let you maximize space during busy spring and summer seasons without year-round obstruction.

    However, if you need consistent indoor space regardless of weather—for leagues, training programs, or rental income—permanent domes eliminate recurring setup costs and storage headaches.

    Peak Season Demand

    Since most sports facilities experience dramatic usage fluctuations throughout the year, you’ll need to carefully analyze your peak season demand patterns before choosing between temporary and permanent dome solutions.

    Understanding your facility’s usage peaks helps determine which option maximizes your investment. If you’re operating a football field that’s heavily used September through November but sits mostly empty in summer, temporary domes make financial sense.

    Conversely, year-round facilities with consistent demand justify permanent installations.

    Consider these peak season factors:

    1. Duration intensity – How many months do you experience maximum capacity usage versus minimal activity periods?
    2. Revenue concentration – What percentage of annual income comes from your busiest three-month period?
    3. Off-season alternatives – Can you generate revenue during traditionally slow periods with dome coverage?

    Off-Season Storage Costs

    Temporary domes require significant off-season storage space and associated costs that many facility owners overlook during initial planning. You’ll need climate-controlled warehouses to prevent fabric deterioration, plus specialized handling equipment for the massive structural components.

    Storage Component Space Required Annual Cost
    Fabric membrane 2,000 sq ft $8,000-$12,000
    Steel framework 3,500 sq ft $14,000-$21,000
    Anchor systems 500 sq ft $2,000-$3,000
    Blower equipment 200 sq ft $800-$1,200
    Total Storage 6,200 sq ft $24,800-$37,200

    These storage costs add $248,000-$372,000 over ten years to your temporary dome investment. Permanent structures eliminate these expenses entirely, making the long-term financial advantage even more compelling for year-round facilities.

    20,000 Square Foot Sports Dome Capacity Planning

    Planning capacity for a 20,000 square foot sports dome requires careful consideration of your intended activities and peak usage periods.

    You’ll need to evaluate how many simultaneous events you can accommodate while maintaining safety and quality standards.

    Your capacity planning should focus on these key areas:

    1. Court configurations – You can fit 2-3 full basketball courts, 4-6 volleyball courts, or multiple smaller training areas depending on your layout strategy.
    2. Peak hour scheduling – Plan for 150-250 active participants during busy periods, accounting for spectators and waiting areas.
    3. Multi-sport flexibility – Design zones that convert quickly between activities to maximize revenue per square foot.

    Consider seasonal demand fluctuations when determining ideal capacity.

    Winter months typically see 40-60% higher usage than summer periods, affecting your temporary versus permanent dome decision based on utilization rates.

    10-Year Total Investment: $860K-$1.3M Cost Reality

    Over a decade, your temporary sports dome investment will reach $860,000 to $1.3 million when you factor in both initial costs and recurring expenses. This total includes your initial $700,000-$1 million purchase price plus annual setup and removal costs of $16,000-$30,000.

    You’ll face these recurring expenses every season because temporary domes require professional installation and dismantling. Weather delays, storage fees, and potential damage during handling can push costs higher.

    Equipment wear from repeated assembly cycles may demand earlier replacement than anticipated.

    Compare this to permanent domes costing $800,000-$1.2 million upfront with minimal ongoing expenses. Your temporary dome’s financial disadvantage becomes clear after year three or four, when permanent structures break even.

    Consider your long-term facility needs carefully before committing to the seemingly lower-cost temporary option.

    Location, Permits, And Insurance: Beyond Purchase Price

    While dome costs dominate budget discussions, you’ll encounter significant expenses that extend far beyond the structure itself. Location selection, permitting processes, and insurance requirements create substantial financial obligations that can derail your project if you’re unprepared.

    These hidden costs vary dramatically between temporary and permanent installations:

    1. Permits and zoning compliance – Temporary structures need annual permits ($2K-$8K), while permanent domes require thorough building permits, environmental assessments, and zoning approvals ($15K-$50K upfront).
    2. Site preparation and utilities – Temporary setups need basic leveling and temporary power connections, but permanent installations require foundations, permanent electrical, plumbing, and HVAC infrastructure ($100K-$300K).
    3. Insurance premiums – Coverage costs increase 15-25% for permanent structures due to higher replacement values and extended liability exposure.
  • Tension Fabric Building Installation Cost

    Tension Fabric Building Installation Cost

    When you’re considering a tension fabric building, you’ll quickly discover that installation costs extend far beyond the initial structure price. Your 20,000 sq ft project could range from $235,000 to $570,000, but here’s what most contractors won’t tell you upfront: site conditions can double your foundation expenses, and labor availability in your area might push timelines from 8 weeks to 20. Understanding these hidden variables will determine whether your project stays on budget or spirals out of control.

    Total Tension Fabric Building Costs (20,000 Sq Ft Breakdown)

    Five major cost components determine your total investment for a 20,000 square foot tension fabric building.

    Site preparation ranges from $15,000-$40,000, covering excavation and ground leveling. Concrete foundations cost $30,000-$80,000, providing structural stability for your building.

    The steel frame represents your largest expense at $120,000-$300,000, forming the backbone of your structure. Your fabric membrane costs $60,000-$150,000, delivering weather protection and architectural appeal.

    Labor expenses add $40,000-$100,000 to complete installation. These tension fabric installation cost factors total $265,000-$670,000 for your project.

    The wide fabric building construction cost range reflects variables like soil conditions, local labor rates, and material specifications.

    Premium features and complex designs increase fabric structure build cost, while standard configurations keep expenses toward the lower end.

    Foundation And Site Prep: What You’ll Actually Pay

    Three critical factors drive your foundation and site preparation costs for tension fabric buildings.

    First, soil conditions determine excavation complexity and concrete requirements. Rocky terrain or poor drainage increases costs considerably, while stable soil keeps expenses manageable.

    Second, site accessibility affects equipment mobilization and material delivery. Remote locations or limited access roads add 15-30% to baseline costs.

    Third, utility connections and grading requirements vary by location. You’ll pay $15,000-$40,000 for complete site preparation, including excavation, grading, and utility rough-ins.

    Foundation work ranges $30,000-$80,000, covering concrete footings and anchor points essential for rigid frame installation pricing.

    Weather delays during excavation can extend timelines by 2-4 weeks. Smart planning during dry seasons minimizes these risks and keeps your project on budget.

    Steel Frame And Fabric Membrane Pricing Guide

    Two primary components determine your tension fabric building’s structural costs: the steel frame system and fabric membrane installation.

    For a 20,000 sq ft facility, you’ll pay $120,000-$300,000 for steel framing. This wide range reflects different structural requirements—basic warehouse frames cost less than complex multi-bay designs requiring engineered connections and wind load considerations.

    Frame complexity, local building codes, and seismic requirements directly impact pricing.

    Fabric membrane costs range from $60,000-$150,000 for the same size building. Premium architectural fabrics with enhanced UV resistance, fire retardants, and custom colors push costs higher.

    Standard PVC-coated polyester fabrics offer the most economical option.

    Combined, these two components represent 60-70% of your total project cost.

    Don’t skimp here—quality steel framing and properly engineered fabric membranes guarantee long-term structural integrity and weather resistance.

    Installation Timeline And Labor Cost Reality

    While steel and fabric costs grab attention, labor expenses and installation timelines often catch builders off guard.

    You’re looking at $40,000-$100,000 in labor costs for a 20,000 sq ft facility, representing 15-20% of your total project budget. The 8-20 week timeline depends heavily on weather conditions, site accessibility, and crew experience.

    Labor-intensive phases that’ll impact your schedule:

    • Foundation crews pouring concrete footings while surveying exact anchor points
    • Crane operators lifting massive steel frame sections into precise alignment
    • Specialized fabric installers stretching membrane panels with hydraulic tensioning systems
    • Electrical teams routing conduits through pre-engineered frame openings
    • Final inspection crews testing structural connections and weatherproofing seals

    Weather delays can extend timelines considerably.

    Rain halts fabric installation, while high winds prevent crane operations entirely.

    How Building Size Impacts Your Tension Fabric Investment

    Building size dramatically affects your per-square-foot costs, but not in the way you’d expect. Larger tension fabric buildings actually cost less per square foot due to economies of scale.

    While a 10,000 sq ft facility might run $16-25 per square foot, your 20,000 sq ft building drops to $13-34 per square foot, and 50,000+ sq ft structures can hit $10-15 per square foot.

    You’ll see the biggest savings in steel frame costs, which don’t double when you double the size. Fixed costs like site preparation and permits get spread across more square footage.

    However, complex shapes, multiple entrances, or unusual height requirements can eliminate these economies of scale. Simple rectangular designs maximize your cost benefits as you scale up.