Tag: Energy efficiency

  • How to Heat an Air Dome Efficiently

    How to Heat an Air Dome Efficiently

    You’re probably spending more on heating your air dome than necessary. Most facility managers don’t realize that standard heating methods can waste up to 60% of energy due to the dome’s unique curved structure and constant air pressure requirements. The good news? There are proven strategies that can slash your heating costs while maintaining ideal temperatures year-round. Let’s examine which heating system will deliver the best return on your investment.

    Compare Air Dome Heating Systems: Heat Pumps vs. Radiant vs. Gas

    When choosing a heating system for your air dome, you’ll need to weigh three primary options: heat pumps, radiant heating, and gas systems.

    Heat pumps excel in moderate climates (41-59°F), delivering exceptional energy efficiency by extracting warmth from outside air. They’re perfect for efficient dome heating when temperatures don’t drop below freezing consistently.

    Radiant infrared systems target the floor and occupants directly, creating comfortable warmth without heating the entire air volume. This approach reduces energy waste in high-ceiling spaces.

    Gas systems provide reliable heat regardless of outdoor temperature, making them ideal for cold climates. However, they typically cost more to operate than heat pumps in suitable conditions.

    Your climate, budget, and usage patterns determine the best choice for maximum efficiency.

    Upgrade Your Air Dome Insulation to Cut Bills 40

    While your heating system choice matters greatly, upgrading to double-layer insulated fabric delivers the most dramatic impact on your energy bills. When you upgrade your air dome insulation to cut bills 40%, you’re making the smartest investment possible. Double-layer fabric creates superior thermal barriers that standard single-layer domes simply can’t match.

    Single-Layer Dome Double-Layer Insulated
    $800 monthly heating $480 monthly heating
    Constant heat loss Trapped warm air
    Cold interior surfaces Comfortable temperatures
    High energy waste 40% energy savings

    Learning how to heat air dome facilities efficiently starts with proper insulation. The upgrade pays for itself within two seasons through reduced heating costs. Your players and staff will notice improved comfort immediately, while you’ll appreciate dramatically lower utility bills throughout winter months.

    Install Radiant Infrared Heat for Maximum Air Dome Efficiency

    After upgrading your insulation, radiant infrared heating becomes your next game-changing investment for air dome efficiency.

    Unlike traditional forced-air systems that waste energy heating empty space, radiant infrared heaters target the floor and people directly. You’ll feel warmth immediately while avoiding the energy losses that occur when heating vast air volumes.

    These systems work by emitting infrared waves that heat solid surfaces rather than air. Your floor absorbs this energy and radiates it back, creating consistent temperatures throughout your dome.

    You’ll achieve significant air dome energy savings because radiant heat eliminates stratification—hot air won’t rise uselessly to your dome’s peak.

    Install ceiling-mounted units for ideal coverage across your 20,000 square feet.

    You’ll reduce heating costs by 25-35% while maintaining superior comfort levels.

    Stop Heat Loss With Vestibules and Smart Air Dome Thermostats

    Heat escapes from your air dome every time someone opens the door, but vestibules act as thermal airlocks that trap cold air before it reaches your main space.

    These entry chambers create a buffer zone that prevents direct heat loss and maintains consistent internal temperatures. You’ll reduce dome heating costs by 10-15% with proper vestibule installation.

    Smart thermostats take efficiency further by automatically adjusting temperatures based on occupancy and usage patterns.

    Program lower temperatures during off-hours and gradually warm the space before activities begin.

    • Install double-door vestibules at all main entrances to minimize cold air infiltration
    • Use programmable thermostats with zone controls for different dome areas
    • Set automatic temperature reductions during unoccupied periods to maximize energy savings

    Calculate Your Air Dome Heating Costs and ROI

    Before investing in air dome heating upgrades, you need concrete numbers to justify the expense and measure your return on investment. Start by calculating your current heating costs per square foot. For a 20,000 sq ft dome, multiply your monthly energy bills by 12 to get annual expenses.

    Next, estimate potential savings from efficiency improvements—double-layer insulation and radiant heating typically reduce costs by 40-60%.

    Calculate payback periods by dividing upgrade costs by annual savings. Heat pumps might cost $15,000-25,000 but save $3,000-5,000 yearly in moderate climates.

    Solar panels offer 6-10 year paybacks while improving sports dome heating efficiency long-term. Track metrics like BTUs per square foot and temperature consistency to measure performance improvements and validate your investment decisions.

  • Swimming Pool Air Dome Cover

    Swimming Pool Air Dome Cover

    You’ve probably wondered how some pool owners manage to swim comfortably even during harsh winters while keeping their energy bills surprisingly low. The secret lies in pool air dome covers—inflatable structures that create a controlled environment over your existing pool. These aren’t just oversized bubbles; they’re engineered systems that can transform your seasonal pool into a year-round aquatic retreat. But there’s more to contemplate than simply inflating a dome over your water.

    What Is A Pool Air Dome And How Does It Work?

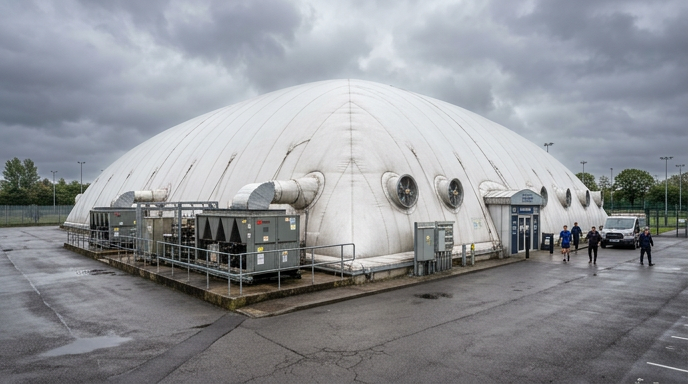
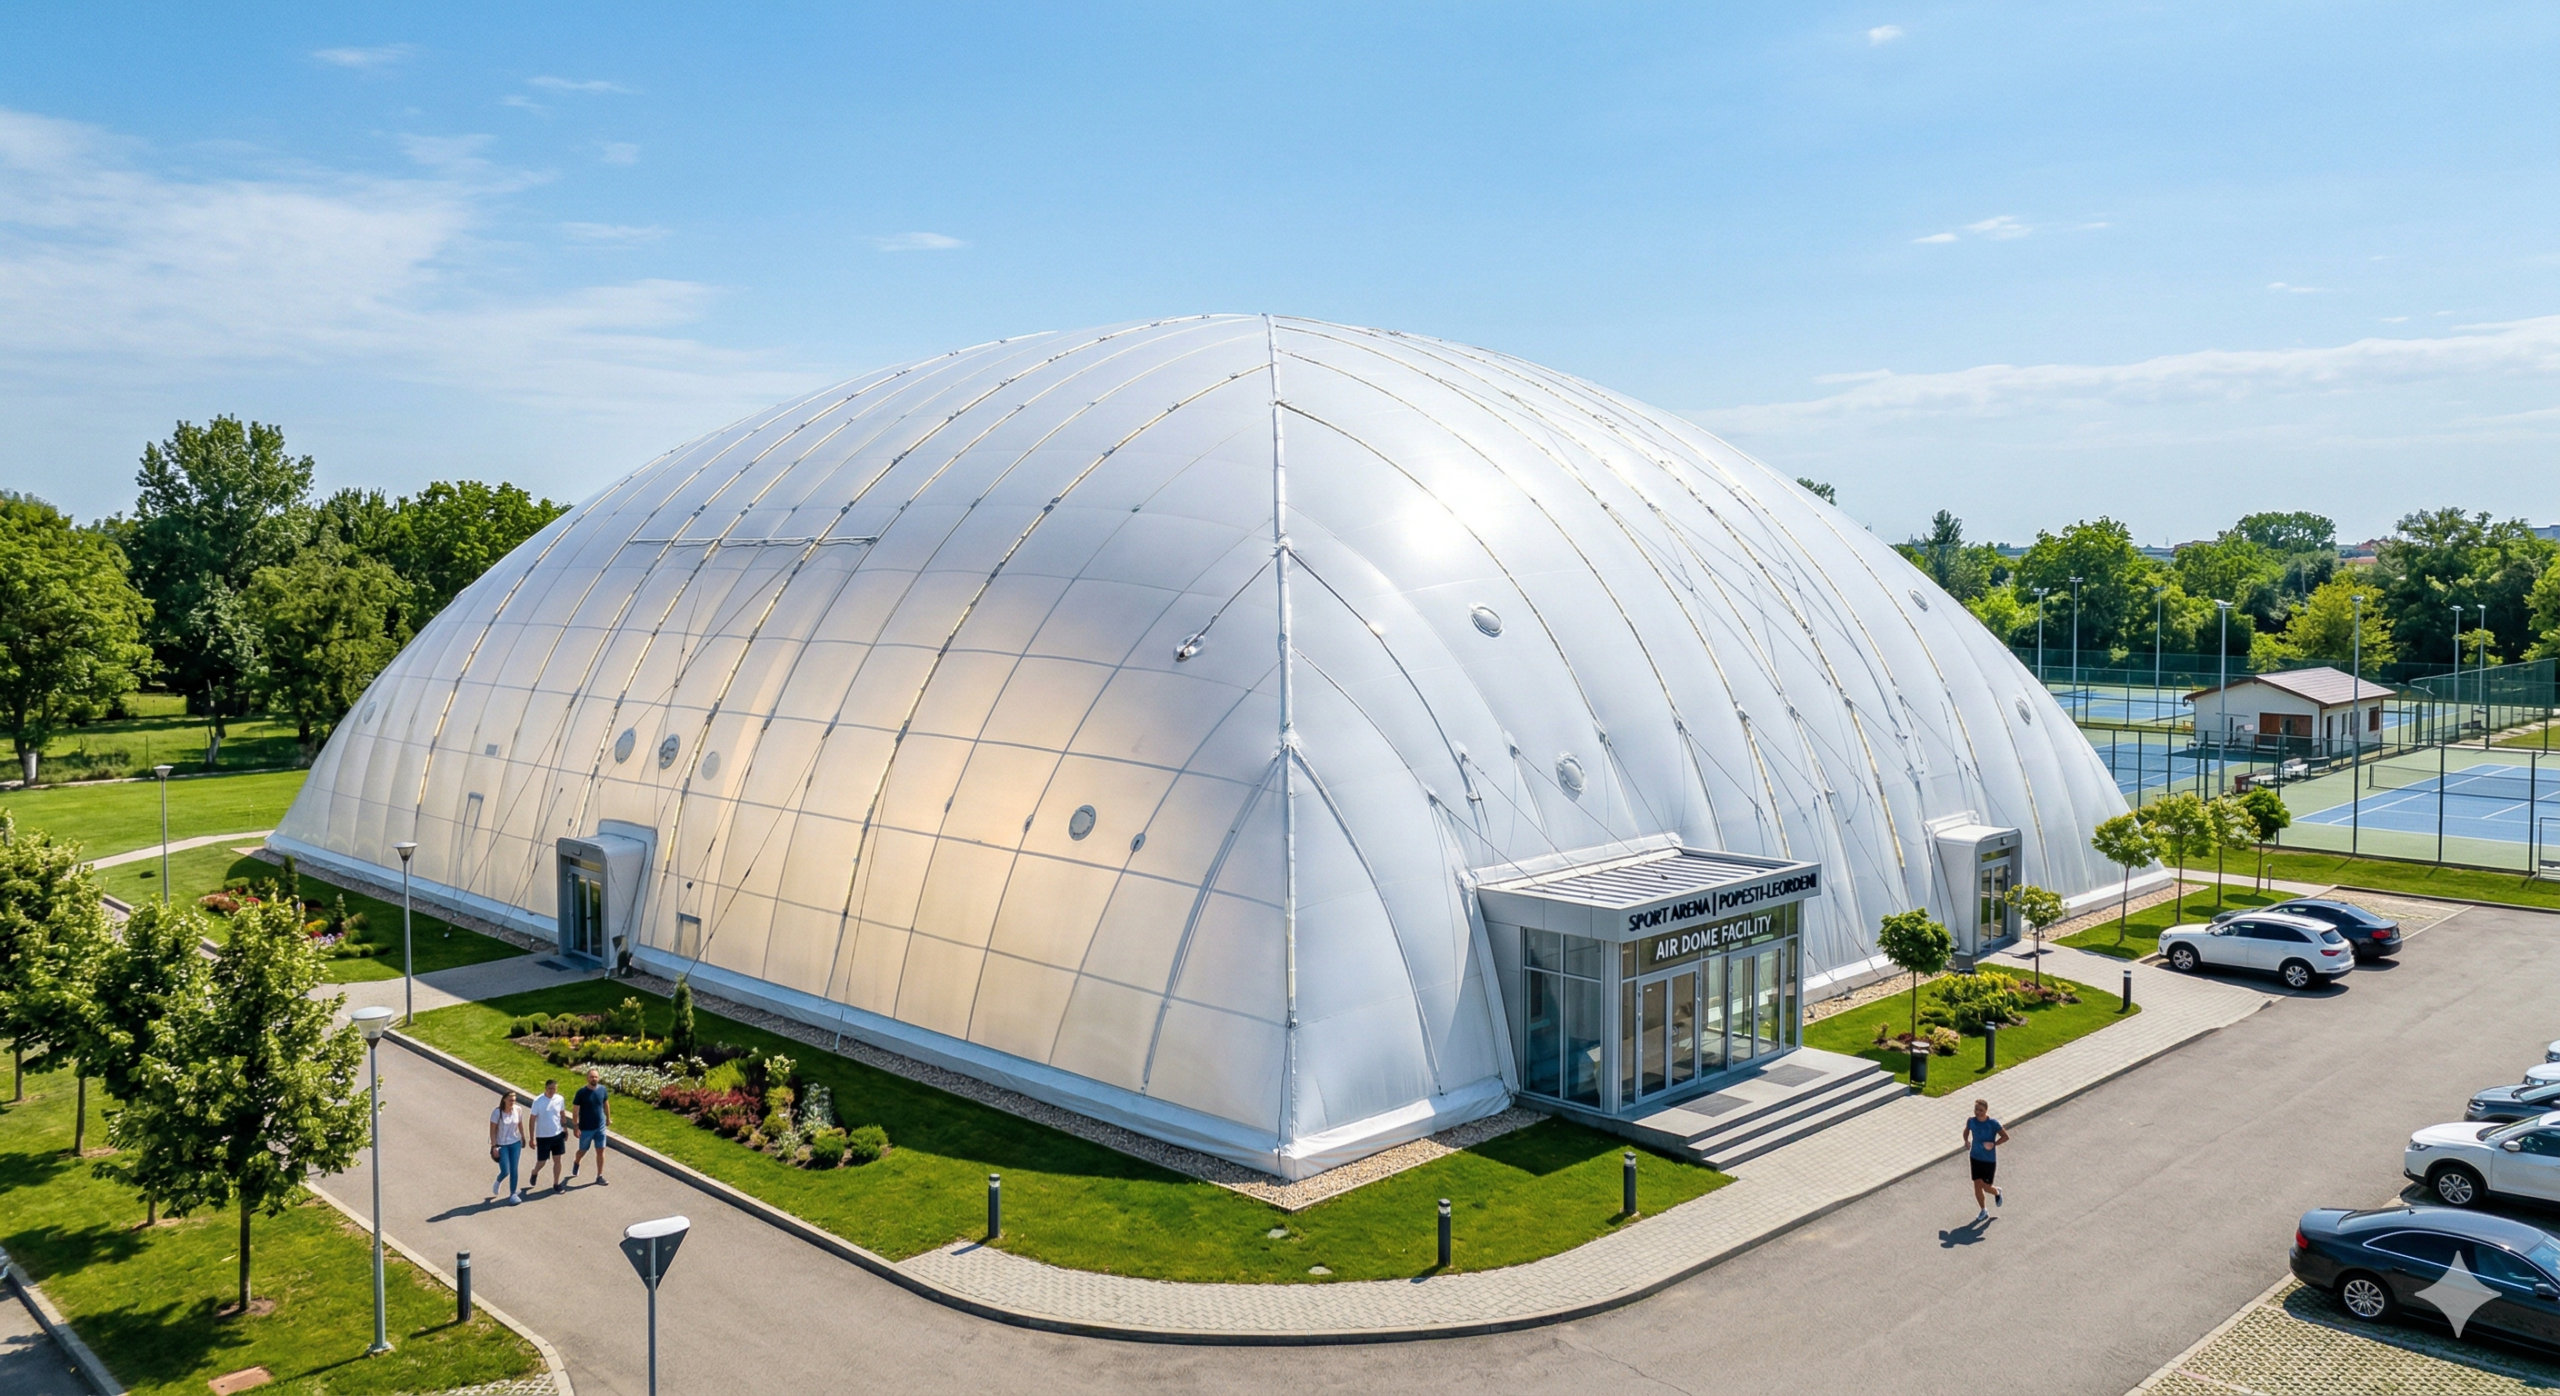
    A pool air dome is an inflatable fabric structure that completely encloses your swimming pool, creating a controlled indoor environment year-round.

    You’ll benefit from constant air pressure that maintains the dome’s shape while providing structural integrity without traditional support beams or frames.

    Your swimming pool air dome operates through continuous air circulation systems that maintain positive internal pressure.

    The specialized fabric withstands chlorine exposure and humidity while the pressurized air keeps the structure inflated.

    Temperature controls maintain ideal conditions between 75-85°F.

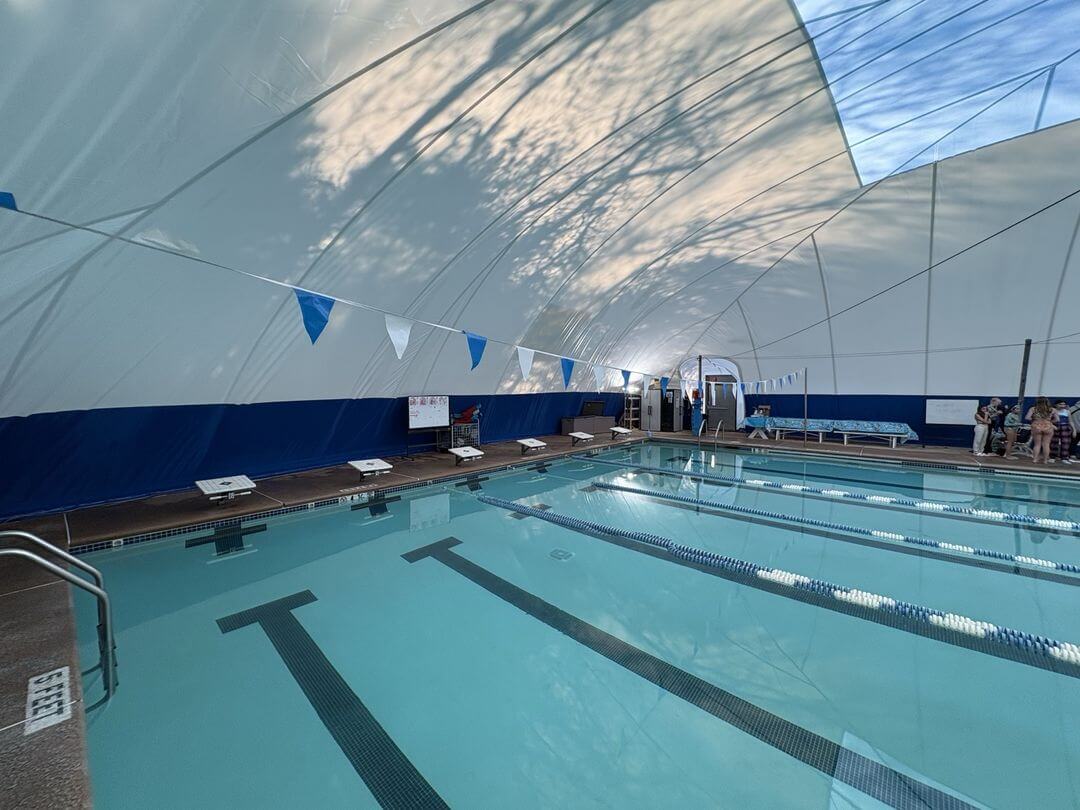
    This indoor pool enclosure transforms your outdoor pool into a protected swimming space.

    The natatorium air dome shields against weather elements while dehumidification systems prevent moisture buildup.

    You’ll enjoy extended swimming seasons with reduced maintenance costs and energy efficiency compared to traditional indoor pool construction methods.

    Pool Air Dome Benefits: Year-Round Swimming And Energy Savings

    You’ll transform your pool into a year-round aquatic haven with an air dome that extends your swimming season well beyond traditional outdoor limits.

    Your heating bills will drop considerably as the dome traps warm air and reduces heat loss, creating an insulated environment that maintains comfortable temperatures with less energy.

    You’re also protected from harsh weather conditions like rain, snow, and strong winds that would otherwise force you to close your pool for months at a time.

    Extended Swimming Season Benefits

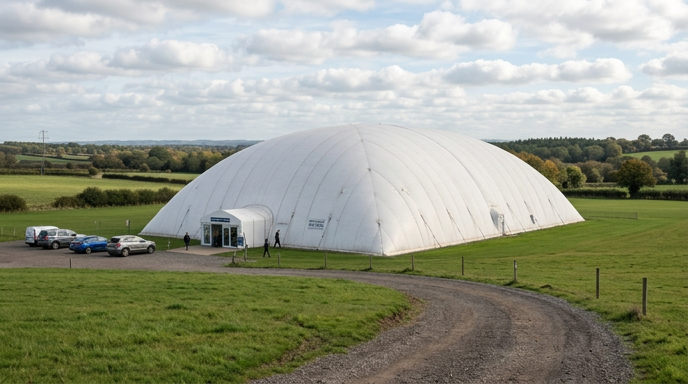
    When winter temperatures drop and outdoor pools become unusable, an air dome cover transforms your swimming facility into a year-round aquatic haven.

    You’ll extend your swimming season from the typical 3-4 months to a full 12 months of operation, maximizing your pool investment regardless of weather conditions.

    Your pool cover dome creates a controlled environment that maintains ideal water temperatures between 75-85°F, eliminating seasonal shutdowns.

    You won’t need to winterize your pool or deal with expensive reopening procedures each spring.

    The extended season means increased revenue opportunities for commercial facilities and enhanced property value for residential pools.

    Additionally, you’ll protect swimmers from harsh weather elements like wind, rain, and UV exposure while maintaining consistent water quality year-round through the dome’s climate-controlled environment.

    Reduced Heating Costs

    Since air dome covers create an insulated barrier around your pool, you can slash heating costs by up to 70% compared to open-air swimming facilities.

    The dome’s specialized fabric traps warm air inside while blocking cold outdoor temperatures from affecting your pool water. You’ll maintain consistent water temperatures between 75-85°F without constantly running expensive heating systems.

    The enclosed environment eliminates heat loss from wind and evaporation, which typically accounts for most energy waste in outdoor pools. Your heating equipment won’t work overtime fighting against weather conditions, dramatically reducing monthly utility bills.

    During winter months, you’ll see the most significant savings when outdoor temperatures drop substantially. This energy efficiency means your air dome investment pays for itself through reduced operational costs over time.

    Weather Protection Advantages

    Beyond energy savings, air dome covers shield your pool from harsh weather conditions that would otherwise shut down swimming operations.

    You’ll maintain consistent swimming schedules regardless of external conditions, protecting your investment and users from nature’s unpredictability.

    Your air dome provides extensive weather protection through:

    • Wind resistance – Engineered fabric withstands strong gusts without compromising structural integrity
    • Rain and snow deflection – Waterproof membrane keeps precipitation from contaminating pool water
    • UV protection – Specialized materials filter harmful rays while maintaining natural lighting
    • Temperature stability – Insulated environment prevents extreme temperature fluctuations
    • Debris prevention – Sealed structure blocks leaves, dirt, and airborne contaminants

    This weather barrier extends your swimming season year-round, eliminating closures due to storms, cold snaps, or seasonal changes.

    You’ll maximize facility usage while minimizing weather-related maintenance costs.

    Must-Have Features: Dehumidification And Chlorine-Resistant Materials

    Although swimming pool air domes offer excellent year-round protection, they’ll fail without two critical components that address the unique challenges of indoor pool environments.

    First, you need continuous dehumidification systems. Pool water creates constant moisture that’ll cause condensation, mold growth, and structural damage without proper humidity control. Your dehumidification system must run 24/7 to maintain safe moisture levels and prevent your dome from becoming a breeding ground for harmful microorganisms.

    Second, you can’t compromise on chlorine-resistant materials. Standard dome fabrics won’t survive the harsh chemical environment. You need specialized materials engineered to withstand chlorine exposure, preventing deterioration and costly replacements.

    Your hardware must also feature corrosion-resistant coatings.

    These features aren’t optional upgrades—they’re essential investments that determine whether your dome lasts years or fails within months.

    Pool Air Dome Size Requirements For Different Pool Dimensions

    You’ll need to determine the right dome size based on your pool’s specific dimensions to guarantee complete coverage and structural integrity.

    A 25-meter pool typically requires an 82′ x 50′ dome covering 4,100 square feet, but your measurements will vary depending on your pool’s length, width, and surrounding deck space.

    Most manufacturers offer both standard sizing options for common pool dimensions and custom solutions for unique layouts or oversized installations.

    Standard Pool Dimensions

    Pool dimensions directly determine the size and cost of your air dome installation.

    You’ll need to account for adequate clearance beyond your pool’s perimeter to guarantee proper coverage and structural integrity.

    Common residential pool sizes require these air dome dimensions:

    • 25-foot pools: Need 50′ x 82′ coverage (4,100 sq ft)
    • 30-foot pools: Require 60′ x 90′ coverage (5,400 sq ft)
    • Olympic-sized pools: Demand 164′ x 82′ coverage (13,448 sq ft)
    • Lap pools: Typically need 75′ x 25′ coverage (1,875 sq ft)
    • Custom shapes: Require individual measurements plus 10-15′ clearance

    Your dome must extend beyond the pool deck to accommodate entry points, equipment access, and proper anchoring.

    Irregular pool shapes increase complexity and cost since you’ll need custom engineering.

    Always measure your entire pool area, including decking and surrounding features, before selecting dome specifications.

    Coverage Area Calculations

    Calculating your air dome’s coverage area requires precise measurements that extend well beyond your pool’s actual dimensions.

    You’ll need additional space around your pool’s perimeter for safety zones, equipment access, and structural anchoring points.

    For a standard 25-meter pool, you’ll require coverage of approximately 82′ x 50′ (25m x 15.2m), totaling 4,100 square feet.

    This accounts for the pool itself plus necessary clearance zones. The extra width accommodates pool decking, lane rope storage, and maintenance access.

    Don’t underestimate these buffer zones – they’re essential for proper dome installation and daily operations.

    Your coverage calculations should include walkways around the pool perimeter, space for diving boards or starting blocks, and room for poolside equipment.

    Measure twice, as undersized domes create operational headaches and safety concerns.

    Custom Size Solutions

    Since every pool presents unique dimensional challenges, standard air dome sizes rarely provide perfect fits for residential, commercial, or Olympic-scale installations. You’ll need customized solutions that account for your pool’s specific length, width, and surrounding deck space.

    Custom sizing considerations include:

    • Deck overhang requirements – Additional 3-6 feet beyond pool edges for proper anchoring and maintenance access
    • Height specifications – Minimum 8-foot clearance at shallow end, 12+ feet at diving areas
    • Shape accommodations – Kidney, L-shaped, or irregularly contoured pools need specialized pattern cutting
    • Utility integration – Custom placement of air intake, exhaust, and access door locations
    • Foundation modifications – Anchoring systems adapted to existing concrete, pavers, or landscaping

    Professional manufacturers create detailed site plans ensuring your dome maximizes coverage while maintaining structural integrity and operational efficiency.

    Pool Air Dome Installation: Process And Timeline Breakdown

    Three distinct phases define the air dome installation process, each requiring specialized expertise and precise coordination. You’ll work with certified installers who manage foundation preparation, fabric assembly, and system commissioning over several weeks.

    Phase Duration Key Activities
    Site Preparation 3-5 days Foundation anchoring, electrical connections, equipment positioning
    Fabric Installation 2-3 days Dome assembly, inflation testing, seal verification
    System Commissioning 1-2 days HVAC calibration, dehumidification setup, safety checks
    Final Testing 1 day Full system operation, emergency procedures, handover training

    Weather conditions considerably impact your timeline—you’ll need dry conditions during fabric installation. The entire process typically takes 7-11 days, though complex installations may require additional time for custom features or challenging site conditions.

    Pool Air Dome Costs: Equipment, Installation, And Operating Expenses

    Understanding the installation timeline sets the stage for planning your budget—pool air dome investments involve substantial upfront costs plus ongoing operational expenses.

    Equipment costs typically range from $250,000 to $500,000 for a standard 25-meter pool setup. You’ll need specialized chlorine-resistant fabric, continuous dehumidification systems, and corrosion-resistant hardware designed for harsh pool environments.

    Your total investment includes:

    • Initial equipment purchase ($250K-$500K depending on size and features)
    • Professional installation labor (20-30% of equipment cost)
    • Site preparation and foundation work ($15K-$25K)
    • Electrical connections for climate control systems ($8K-$12K)
    • Annual operating expenses including electricity, maintenance, and fabric replacement reserves ($25K-$40K)

    Factor in energy costs for maintaining ideal 75-85°F temperatures year-round when calculating your long-term financial commitment.

    Pool Air Dome Maintenance: Essential Tasks And Schedules

    While your air dome investment protects your pool year-round, it’ll only deliver reliable performance through consistent maintenance. You’ll need to establish regular schedules for critical tasks that keep your dome operating efficiently.

    Maintenance Task Frequency Key Focus Areas
    Fabric Inspection Monthly Tears, wear spots, anchor points
    Blower System Check Weekly Motor function, air pressure levels
    Dehumidification Service Quarterly Filter replacement, system calibration
    Hardware Assessment Bi-annually Corrosion, fasteners, seals

    Your fabric requires gentle cleaning with mild detergents to remove chlorine residue and environmental buildup. Monitor air pressure constantly—low pressure can cause structural stress, while excessive pressure wastes energy. Replace worn components immediately to prevent minor issues from becoming costly repairs that compromise your dome’s integrity.

    How To Choose The Best Pool Air Dome Manufacturer

    Selecting the right manufacturer determines whether your air dome investment delivers decades of reliable service or becomes a source of ongoing headaches.

    You’ll want to evaluate potential partners based on their track record and specialized expertise in pool environments.

    Research manufacturers who demonstrate proven experience with swimming pool domes specifically. Look for companies that understand the unique challenges of chlorinated, humid environments and offer appropriate material solutions.

    Key factors to evaluate include:

    • Experience and portfolio – Review completed pool dome projects and client testimonials
    • Material quality – Verify they use chlorine-resistant, specialized fabrics designed for aquatic facilities
    • Engineering capabilities – Guarantee proper structural calculations for your specific dimensions and climate
    • Support services – Confirm installation training, maintenance programs, and replacement part availability
    • Warranty coverage – Compare terms for fabric, hardware, and structural components
  • Air Dome Features and Customization Options

    Air Dome Features and Customization Options

    You’re investing in an air dome, but the standard options won’t cut it for your specific needs. Whether you’re powering a sports facility or industrial workspace, the choices you make regarding insulation layers, entry systems, lighting, and ventilation will directly impact your operational costs and user experience. The difference between selecting double-layer construction versus single-layer alone could save you thousands annually, and that’s just the beginning of what you’ll need to contemplate.

    Double-Layer vs Single-Layer Air Dome Energy Efficiency

    When you’re deciding between single and double-layer air dome construction, the energy efficiency difference becomes immediately apparent in your utility bills.

    Double-layer vs single-layer air dome energy efficiency creates a significant performance gap that directly impacts your operating costs.

    Double-layer systems provide 30-40% energy savings compared to single-layer alternatives, particularly noticeable in 20,000 square foot facilities.

    You’ll benefit from superior insulation properties that reduce heating and cooling demands throughout the year. The air gap between layers acts as a thermal barrier, maintaining consistent internal temperatures with less HVAC workload.

    Single-layer domes offer lower upfront costs but higher ongoing energy expenses.

    You’re trading initial savings for increased monthly utility bills. For year-round facilities, double-layer construction typically pays for itself through reduced energy consumption within three years.

    Air Dome Door Systems: Zipper vs Airlock Entry

    Your door system choice fundamentally determines how users access your air dome while maintaining internal pressure and climate control.

    Air dome door systems come in two primary configurations: zipper and airlock entries, each serving different operational needs.

    Zipper doors offer cost-effective access with simple operation. You’ll find them suitable for facilities requiring occasional entry and exit. However, they compromise pressure integrity during use, temporarily affecting climate control.

    Airlock systems provide superior pressure maintenance through double-door chambers. You enter the first door, allow it to seal, then proceed through the second door. This prevents pressure loss and maintains consistent internal conditions.

    Standard dimensions typically measure 6′ x 8′ (1.8m x 2.4m) for both systems.

    Choose zipper doors for budget-conscious projects with limited traffic. Select airlocks for facilities demanding continuous climate control and frequent access.

    Air Dome Lighting: LED vs Metal Halide Systems

    Two primary lighting technologies compete for air dome installations: LED systems and traditional metal halide fixtures.

    When selecting air dome features, you’ll find LED systems offer superior energy efficiency, consuming 50-70% less power than metal halide alternatives. LED fixtures provide instant-on capability, eliminating the warm-up time metal halides require. You’ll achieve better light distribution with LEDs, reducing dark spots and shadows across your dome’s interior.

    Metal halide systems cost less upfront but carry higher operational expenses through increased energy consumption and frequent bulb replacements.

    Among essential air dome upgrades, switching to LED technology delivers long-term savings and improved performance. Your choice between air dome lighting: LED vs metal halide systems depends on budget priorities and operational requirements, though LED technology increasingly dominates new installations.

    Ventilation and Custom Logo Options for Air Domes

    Although lighting systems grab attention during air dome planning, ventilation and branding elements greatly impact both functionality and visual appeal. When exploring ventilation and custom logo options for air domes, you’ll find sidewall vents provide essential airflow control while maintaining structural integrity. These dome accessories work alongside your HVAC system to regulate temperature and humidity effectively.

    Feature Standard Option Premium Option
    Sidewall Vents Manual operation Automated controls
    Logo Placement Single location Multiple positions
    Printing Method Vinyl application Heat-sealed graphics
    Ventilation Size 24″ x 24″ Custom dimensions
    Color Options Limited palette Full-color matching

    Custom logo printing transforms your dome into a branded facility, while proper ventilation guarantees peak air quality. You can specify logo placement, colors, and sizing to match your organization’s identity perfectly.

  • Sports Dome Heating System Cost Options

    Sports Dome Heating System Cost Options

    You’re facing a heating decision that’ll impact your sports dome’s budget for years to come. While forced air systems tempt you with their low $8,000 installation cost, they’ll hit your wallet harder each month at $2,500. Heat pumps demand $50,000 upfront but slash monthly bills to just $800. Here’s the catch: the “cheapest” option today might cost you thousands more over the next decade, and the math isn’t what you’d expect.

    Dome Heating Costs: Installation Vs. Monthly Operating Expenses

    When evaluating heating systems for your 20,000 square foot sports dome, you’ll face a classic trade-off between upfront installation costs and ongoing monthly expenses.

    Forced air systems offer the lowest dome heating installation price at $8,000-$20,000, but you’ll pay $1,500-$2,500 monthly in gas costs to maintain comfortable temperatures of 60-70°F.

    Infrared heating requires a higher initial investment of $15,000-$35,000, yet reduces monthly operating costs to $1,200-$2,000.

    Heat pumps represent the steepest upfront expense at $20,000-$50,000, but they’ll deliver the lowest monthly costs of $800-$1,500.

    Your decision should factor in long-term projections.

    While forced air systems seem budget-friendly initially, heat pumps often prove more economical over several years despite their substantial installation requirements.

    Forced Air Systems: Lowest Installation Cost For Large Dome Spaces

    Although forced air systems require the highest monthly operating costs, they’ll get your 20,000 square foot sports dome heated with minimal upfront investment.

    You’ll spend between $8,000-$20,000 for installation, making forced air systems the most budget-friendly option initially. These systems work by circulating heated air throughout your dome space using ductwork and powerful blowers.

    You’ll pay $1,500-$2,500 monthly in gas costs to maintain comfortable temperatures between 60-70°F. The system’s efficiency depends on your dome’s insulation quality and local gas rates.

    Forced air systems heat large spaces quickly, making them ideal when you need rapid temperature control for events. However, you’ll face higher long-term operating expenses compared to infrared or heat pump alternatives.

    Infrared Vs. Heat Pump Heating: Comparing Mid And Premium Options

    Beyond forced air systems, infrared and heat pump technologies offer you better long-term value despite higher installation costs.

    Infrared heat dome cost ranges from $15K-$35K upfront, but you’ll save on monthly bills at $1,200-$2,000 compared to forced air’s $1,500-$2,500. These systems heat objects directly rather than air, making them ideal for high-ceiling domes where warm air typically rises.

    Heat pumps represent the premium choice at $20K-$50K installation, delivering the lowest operating costs of $800-$1,500 monthly. They’re most efficient in moderate climates and provide both heating and cooling capabilities.

    While infrared systems excel in spot heating for active play areas, heat pumps offer consistent temperature control throughout your entire dome space.

    Real Monthly Heating Bills: Gas, Electric, And Heat Pump Costs

    How much will you actually spend each winter heating your 20,000 square foot dome? Your monthly bills will vary dramatically based on your chosen system and local utility rates.

    Gas-powered forced air systems typically cost $1,500-$2,500 monthly during peak winter months. You’ll maintain comfortable temperatures around 60-70°F, but gas price fluctuations can impact your budget considerably.

    Electric infrared heating runs $1,200-$2,000 monthly. While electricity rates are generally more stable than gas, your costs depend heavily on your local utility company’s pricing structure.

    Heat pumps offer the most economical operation at $800-$1,500 monthly. They’re particularly efficient in moderate climates, though performance decreases in extremely cold conditions.

    When evaluating sports dome heating options, remember that actual costs depend on your climate zone, insulation quality, and local energy prices.

    Best Dome Heating System For 10-Year Savings

    Over a decade, heat pumps deliver the strongest return on investment despite their higher upfront costs. When calculating your air dome heating system cost over 10 years, heat pumps save you thousands compared to forced air and infrared options.

    System Type 10-Year Total Cost Your Savings
    Heat Pump $116,000-$230,000 Best Choice
    Infrared $159,000-$275,000 $43,000+ more
    Forced Air $188,000-$320,000 $72,000+ more

    You’ll spend $35,000 more upfront for heat pumps, but you’ll recoup that investment within 3-4 years through lower monthly bills. After that, you’re banking serious savings every month. Heat pumps also provide consistent temperatures and require less maintenance, making them the smart long-term choice for your facility’s budget.

  • Sports Dome Energy Costs by Climate Zone

    Sports Dome Energy Costs by Climate Zone

    You’re probably underestimating just how dramatically your sports dome’s location affects your energy bills. A 20,000 square foot facility in Florida might cost you $1,000 monthly to operate, while that same dome in Minnesota could hit $3,000 during peak winter months. The difference isn’t just about temperature—it’s about understanding how climate zones, insulation strategies, and regional energy rates create a complex puzzle that determines whether your facility turns a profit or drains your budget.

    Sports Dome Energy Costs: Florida Vs Minnesota Breakdown

    When you’re planning a sports dome, location dramatically affects your energy budget. Florida’s Zone 1 climate keeps temperatures between 60-90°F, resulting in sports dome energy costs of $800-$1,200 monthly for a 20,000 square foot facility.

    You’ll primarily spend on air conditioning during summer months, but mild winters reduce heating expenses considerably.

    Minnesota’s Zone 5 climate presents a stark contrast. With temperatures ranging from -10 to 75°F, you’re looking at $2,500-$3,500 monthly for the same facility size.

    Harsh winters demand intensive heating, while summers still require cooling systems.

    Here’s where smart planning pays off: double-layer insulation reduces sports dome energy costs by 30-40% in both climates.

    In Minnesota, this translates to potential savings of $750-$1,400 monthly, making insulation upgrades essential for cold-climate facilities.

    Why Double-Layer Insulation Cuts Sports Dome Bills 30-40

    Double-layer insulation creates a thermal barrier system that dramatically reduces heat transfer through your sports dome’s envelope. This advanced insulation method traps air between two layers, creating superior resistance to temperature fluctuations and cutting your energy bills by 30-40%.

    Here’s why double-layer insulation delivers exceptional savings:

    • Air gap barrier – Creates dead air space that prevents heat conduction
    • Reduced thermal bridging – Eliminates weak points where heat escapes
    • Enhanced R-value – Doubles thermal resistance compared to single-layer systems
    • Moisture control – Prevents condensation that reduces insulation effectiveness

    You’ll see immediate cost reductions in both heating and cooling expenses.

    In Minnesota’s harsh climate, double-layer insulation can save you $750-$1,400 monthly, while Florida facilities typically save $240-$480 monthly through reduced air conditioning demands.

    Real Monthly Energy Budgets For 20,000 Sq Ft Sports Domes

    Understanding these savings potential helps you plan realistic energy budgets for your 20,000 square foot sports dome. Your air dome heating expenses vary dramatically based on location and insulation choices.

    Climate Zone Standard Insulation Double-Layer Insulation
    Zone 1 (Florida) $800-$1,200/month $480-$720/month
    Zone 5 (Minnesota) $2,500-$3,500/month $1,500-$2,100/month

    Minnesota facilities face the highest costs due to extreme temperature swings from -10°F to 75°F, requiring constant heating and cooling adjustments. Florida’s moderate 60-90°F range keeps expenses manageable year-round.

    You’ll save $1,000+ monthly in harsh climates with proper insulation upgrades. These numbers help you calculate payback periods and justify initial investment costs for energy-efficient dome construction.

    Cold Climate Sports Dome Heating: Managing Winter Cost Spikes

    Although Minnesota’s annual averages show $2,500-$3,500 monthly costs, your actual winter heating bills can spike 40-60% higher during January and February cold snaps.

    These extreme cold periods push winter sports dome heating systems to their limits, creating budget-breaking utility bills that can exceed $5,000 monthly.

    Smart operators implement these cost-control strategies:

    • Install programmable thermostats with zone controls to heat only active areas
    • Schedule intensive activities during peak cold periods to maximize body heat contribution
    • Implement double-layer insulation retrofits for 30-40% energy savings
    • Consider backup heating sources like radiant floor systems for efficiency

    Your winter sports dome heating strategy should include emergency fund reserves of 25-30% above projected costs.

    This buffer prevents operational disruptions when Arctic blasts hit your facility unexpectedly.

    5 Regional Cost-Cutting Strategies Sports Dome Operators Swear By

    Three proven regional strategies can slash your sports dome energy costs by 25-50%, according to operators who’ve weathered decades of utility bill surprises.

    Northern operators swear by programmable setbacks, dropping temperatures 10-15°F during off-peak hours. Southern facilities focus on peak-hour shifting, running major systems during cheaper overnight rates to reduce tennis bubble electricity costs.

    Smart zoning delivers consistent savings across all climates. You’ll partition your dome into sections, heating or cooling only occupied areas.

    Strategy Cold Zones Warm Zones
    Temperature Setbacks 15°F drops save $400/month 8°F drops save $150/month
    Peak-Hour Shifting 20% savings on heating 35% savings on cooling
    Smart Zoning 30% reduction overall 25% reduction overall
    Double Insulation Essential investment Optional upgrade