Author: Robert

  • Single vs Double Layer Air Dome

    Single vs Double Layer Air Dome

    You’re facing a significant decision that’ll impact your facility’s operating costs for decades. While that single-layer air dome might save you $700,000 upfront, it could cost you far more in heating bills if you’re in a cold climate. The math isn’t as straightforward as it appears—energy consumption patterns, local utility rates, and seasonal temperature variations all factor into which option actually delivers better value for your specific situation.

    Climate Guide: Does Your Location Need Double Layer Air Domes?

    Where you’re located determines whether you’ll need the extra insulation of a double-layer air dome or if a single-layer structure will suffice. If your facility operates in temperatures regularly dropping below freezing, double-layer construction becomes essential for maintaining comfortable indoor conditions while controlling heating costs.

    Single layer vs double layer decisions hinge on your winter climate severity. Northern climates with sustained sub-zero temperatures demand double-layer systems to prevent excessive heat loss and condensation issues. The superior insulation keeps operating costs manageable when heating from -10°F to 70°F.

    Conversely, you’ll find single-layer domes adequate in moderate climates where winter temperatures rarely dip below 20°F. These locations won’t justify the additional 40% upfront investment since heating demands remain reasonable throughout the season.

    Air Dome Performance: Energy Costs In Different Weather Conditions

    When temperatures plummet below freezing, you’ll see dramatic differences in energy consumption between single and double-layer air domes. Single-layer structures require considerably more heating power to maintain comfortable interior temperatures, especially when outside conditions drop to -10°F or below. Your heating costs can skyrocket during extended cold periods, making single-layer domes expensive to operate in northern climates.

    Double-layer insulated domes reduce energy consumption by 30-40% compared to single-layer alternatives. The insulation gap between layers creates a thermal barrier that retains heat more effectively, lowering your operational expenses throughout winter months.

    • Single vs double layer dome energy efficiency becomes most apparent during extreme weather events
    • Operating costs compound over time, affecting your facility’s long-term profitability
    • Climate zone determines whether energy savings justify higher upfront investment

    Air Dome Pricing: Single Layer ($700K) Vs Double Layer ($1.4M)

    The initial investment for a 20,000 square foot air dome varies considerably between single and double-layer options, with single-layer structures typically costing $700,000 to $1 million compared to $1 million to $1.4 million for double-layer insulated versions.

    This represents approximately a 40% price increase when you choose the insulated air dome configuration.

    While the upfront cost difference seems substantial, you’ll need to evaluate long-term operating expenses.

    Double-layer systems deliver 30-40% lower heating costs, which becomes essential in northern climates where temperatures drop markedly.

    The return on investment typically occurs within 3-4 years in cold weather regions.

    Your climate determines whether the premium pricing makes financial sense.

    In warmer areas, single-layer domes offer adequate performance at lower initial cost.

    Air Dome ROI: How Long Before Double Layer Pays For Itself?

    Understanding your payback timeline helps justify the higher upfront investment in double-layer air dome technology. Your air dome insulation comparison reveals that double-layer systems typically pay for themselves within 3-4 years in northern climates through significant energy savings.

    You’ll spend an additional $300K-$400K upfront for double-layer construction, but you’ll save 30-40% on operating costs annually. These savings primarily come from reduced heating expenses during winter months when single-layer domes struggle with efficiency.

    • Climate dependency: Colder regions see faster ROI due to extreme temperature differentials requiring intensive heating.
    • Usage patterns: Year-round facilities accelerate payback compared to seasonal operations through consistent energy savings.
    • Energy costs: Rising utility rates improve double-layer ROI calculations over time.

    Your investment decision should factor in local climate conditions and intended facility usage patterns.

  • Tension Fabric vs Air Dome Detailed

    Tension Fabric vs Air Dome Detailed

    You’re facing a critical decision that’ll impact your facility’s budget for years to come. While air domes might seem like the obvious choice with their lower upfront costs, you’d be surprised how quickly those monthly operational expenses add up. The real story isn’t just about initial investment—it’s about understanding which structure type aligns with your long-term goals and operational reality. Here’s what the numbers actually reveal about your total cost of ownership.

    When Fabric Structures Beat Air Domes (And Vice Versa)

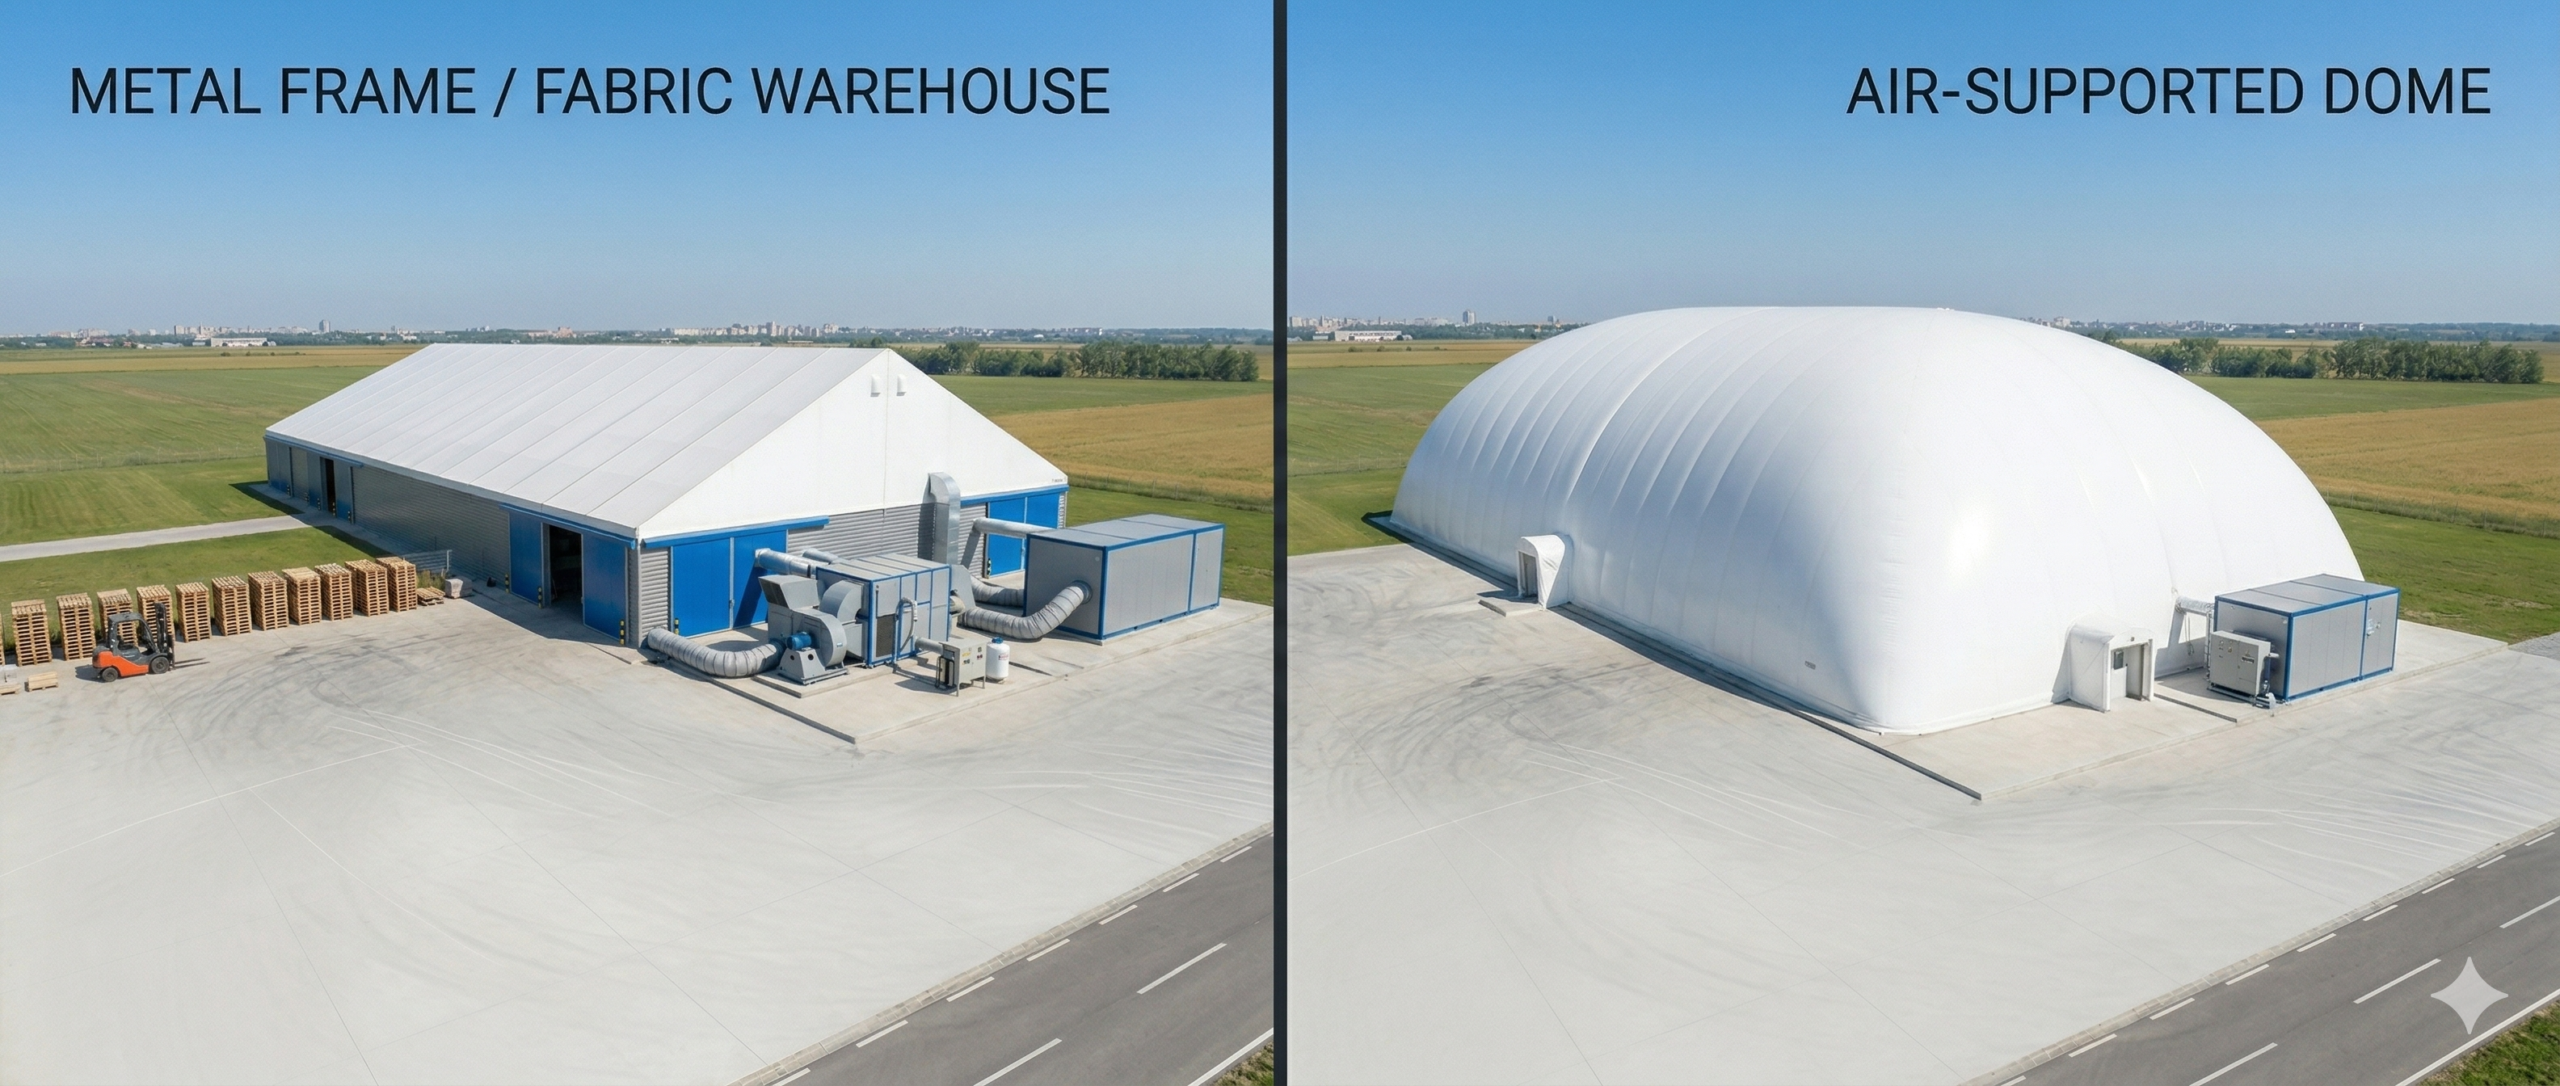
    When you’re weighing a 10+ year commitment, tension fabric structures offer clear advantages with their permanent frames, elimination of constant air pressure systems, and potential for operable walls that air domes simply can’t match.

    The tension fabric vs air dome decision hinges on your timeline and priorities.

    Choose fabric structures when you need year-round operation, want design flexibility, or require minimal ongoing maintenance. Their rigid frame vs inflatable design means no blower dependency and lower long-term operating costs.

    Air domes excel for seasonal use, temporary applications, or when upfront capital is limited. They’re faster to install and cost $500,000 less initially.

    However, this permanent vs seasonal comparison shifts dramatically after decade one, when fabric structures’ economic advantages become undeniable through reduced energy and maintenance expenses.

    Upfront Investment: Fabric vs Air Dome Costs

    Your upfront investment varies considerably between these two options, with air domes typically requiring $700K-$1.2M compared to fabric structures at $1.2M-$1.8M for a 20,000 square foot facility.

    You’ll also face different installation timelines – air domes can be deployed much faster than permanent fabric structures that require substantial foundation work and frame construction.

    These initial capital requirements and timeline differences directly impact your project’s cash flow and operational readiness.

    Initial Capital Requirements

    Two dramatically different price points separate tension fabric structures from air domes when you’re planning your initial investment.

    You’ll face $1.2M to $1.8M for a 20,000 square foot tension fabric building, while air domes cost considerably less at $700K to $1.2M for the same coverage.

    This fabric structure vs air supported cost difference stems from construction complexity.

    Tension fabric buildings require permanent steel frameworks, concrete foundations, and extensive engineering. You’re fundamentally building a permanent structure that’ll last decades without major renovations.

    Air domes offer immediate savings because they don’t need permanent foundations or complex structural systems.

    You’ll get faster installation and lower upfront capital requirements, making them attractive for organizations with limited budgets or seasonal needs.

    Installation Timeline Differences

    Since air domes don’t require permanent foundations or complex steel frameworks, they’ll have your facility operational in 2-4 weeks compared to 6-12 months for tension fabric structures.

    You’ll watch air dome installation unfold rapidly—site preparation, anchor system setup, and inflation happen consecutively with minimal delays.

    Tension fabric installations involve extensive planning phases, permit approvals, and coordinated construction sequences.

    You’re looking at foundation curing times, steel erection schedules, and fabric tensioning procedures that can’t be rushed.

    Consider these timeline realities:

    1. Air dome crews arrive with pre-manufactured components ready for immediate assembly.
    2. Weather delays impact tension fabric construction more greatly due to exposed structural work.
    3. Site disruption remains minimal with air domes versus months of heavy construction activity.

    If you need your facility operational quickly, air domes deliver faster occupancy.

    Monthly Operating Costs: $800-$3,500 Breakdown

    Monthly operating expenses between tension fabric structures and air domes vary dramatically, with fabric buildings running $800-$2,000 per month while air domes cost $1,500-$3,500 monthly.

    Your tension fabric structure’s lower costs stem from its permanent frame design. You won’t need continuous blower operation, eliminating the massive energy consumption that drives air dome expenses. Basic maintenance, lighting, and occasional heating represent your primary monthly outlays.

    Air domes require 24/7 blower systems to maintain structural integrity. You’ll face substantial electricity bills, often doubling or tripling fabric structure costs.

    Fan motor maintenance, backup system upkeep, and higher insurance premiums add further expenses.

    Over ten years, you’ll save $84,000-$252,000 in operating costs with tension fabric versus air domes, making the higher upfront investment financially advantageous long-term.

    Installation Timeline: Permanent vs Seasonal Setup

    When you’re planning your facility timeline, you’ll find dramatic differences between these two options.

    Tension fabric structures require several months for construction due to permanent foundation work and frame assembly, while air domes can be fully operational within days of delivery.

    Weather conditions will greatly impact fabric construction schedules, but they’ll barely affect your air dome’s quick inflation process.

    Fabric Frame Construction Time

    Although both structures serve the same functional purpose, their installation timelines differ dramatically due to fundamental design differences.

    When you choose a tension fabric structure, you’re committing to a thorough construction process that creates a permanent installation.

    Your fabric structure project typically requires 4-6 months from groundbreaking to completion. This extended timeline stems from the multi-phase construction approach:

    1. Foundation and structural work – Concrete footings, steel framework assembly, and anchor point installation
    2. Mechanical systems integration – HVAC, electrical, and lighting infrastructure permanently installed within the frame
    3. Fabric installation and tensioning – Precise membrane attachment and adjustment for ideal performance

    While this longer timeline requires patience, you’ll gain a permanent facility that doesn’t need seasonal reinstallation.

    The upfront time investment delivers decades of reliable service without recurring setup costs.

    Air Dome Setup Speed

    Air domes offer a dramatically different approach with their rapid deployment capability. You’ll find installation timelines greatly compressed compared to traditional construction methods. Most air dome systems can be fully operational within 2-4 weeks from groundbreaking to occupancy.

    The process begins with minimal site preparation – you’re fundamentally creating a level foundation pad rather than extensive excavation work. Once the concrete pad cures, technicians can inflate and secure the dome structure in just days. This speed comes from the pre-manufactured nature of air domes, where components arrive ready for assembly.

    However, you’ll need to take into account the seasonal limitations. Many air dome installations are temporary, requiring annual setup and takedown cycles. This impacts your long-term planning but provides flexibility for seasonal facilities or temporary expansions.

    Weather Impact Considerations

    Weather conditions greatly influence your installation timeline choices between permanent tension fabric structures and seasonal air domes.

    Your tension fabric structure withstands harsh conditions year-round, requiring careful weather planning during initial construction but offering long-term stability afterward.

    Air domes demand strategic seasonal timing since you’ll need ideal weather windows for installation and removal.

    Consider these weather-related factors:

    1. Spring storms can delay air dome setup by weeks, pushing your opening schedule into peak season.
    2. Winter snow loads require immediate air dome deflation, leaving you without coverage during unexpected weather events.
    3. High wind conditions make air dome installation dangerous and nearly impossible, while fabric structures handle sustained winds once erected.

    You’ll find tension fabric structures provide weather independence after installation, while air domes keep you constantly monitoring forecasts and adjusting operational schedules.

    10-Year Cost Analysis: Why Fabric Wins Long-Term

    When you’re evaluating these two options for a 20,000 sq ft facility, the numbers reveal a clear winner over time.

    Tension fabric structures require $1.2M-$1.8M upfront but cost only $800-$2K monthly to operate.

    Air domes start cheaper at $700K-$1.2M, yet they’ll drain $1.5K-$3.5K monthly from your budget.

    Here’s where it gets interesting: after 10-12 years, fabric structures become the more economical choice.

    You’re paying considerably less in ongoing operational expenses, primarily because there’s no need for continuous air blowers or the associated energy costs.

    The break-even point occurs when fabric’s lower operating costs offset its higher initial investment.

    Beyond that threshold, you’ll save thousands annually while enjoying a permanent, versatile structure that doesn’t require seasonal setup or takedown.

    Design Flexibility: Operable Walls vs Quick Setup

    Beyond the financial calculations lies another critical decision factor: how each structure adapts to your operational needs.

    Tension fabric structures offer unmatched design flexibility. You’ll get permanent frames that accommodate operable walls, allowing you to section off areas or open entire spaces as needed. This adaptability means you can host multiple events simultaneously or adjust layouts for different seasons without structural limitations.

    Air domes prioritize speed over customization. You’ll achieve rapid deployment—often within days rather than months. However, you’re locked into a fixed dome shape with limited modification options once inflated.

    Consider these operational scenarios:

    1. Winter training camps requiring sectioned practice areas
    2. Multi-sport facilities needing convertible spaces
    3. Event venues demanding quick seasonal setup

    Your choice depends on whether you prioritize long-term flexibility or immediate deployment speed.

    Fabric Structure vs Air Dome Decision Framework

    How do you determine which structure aligns with your specific project requirements? Start by evaluating your timeline and budget constraints.

    If you need immediate coverage and have limited upfront capital, air domes offer faster installation at $700K-$1.2M versus fabric structures at $1.2M-$1.8M. However, consider long-term operational costs – air domes require continuous power for blowers, costing $1.5K-$3.5K monthly compared to fabric’s $800-$2K.

    Assess your facility’s permanence needs. Fabric structures provide year-round stability with operable walls, while air domes work best for seasonal applications.

    Factor in your 10-year projection: fabric structures become more cost-effective after 10-12 years due to lower operating expenses.

    Choose air domes for temporary solutions or immediate needs, fabric structures for permanent installations requiring design flexibility.
  • Air Dome vs Permanent Building Comparison

    Air Dome vs Permanent Building Comparison

    You’re facing a critical decision that’ll impact your facility for years to come. Air domes promise quick installation and lower upfront costs, while permanent buildings offer long-term value and stability. The $700,000 versus $2 million price difference seems straightforward, but there’s more beneath the surface. Hidden operational costs, maintenance expenses, and property value implications can completely flip your initial calculations. Before you commit to either option, you need to understand what these numbers really mean for your specific situation.

    Air Dome Vs Permanent Building: Complete Cost Comparison

    When you’re evaluating a 20,000 square foot facility, the cost difference between air domes and permanent buildings becomes strikingly apparent.

    You’ll spend approximately $700,000 for an air dome versus $2 million for a permanent structure—that’s 50-75% savings upfront. This air dome vs permanent structure comparison reveals significant financial advantages for budget-conscious projects.

    Your installation timeline differs dramatically too. Air domes require just 2-6 weeks compared to 12-18 months for traditional construction.

    This temporary vs permanent facility comparison shows air domes offer immediate functionality without lengthy delays.

    However, permanent buildings provide long-term value through increased property worth and lower operating costs.

    The inflatable vs traditional building decision ultimately depends on your budget constraints. If you’re working with less than $1 million, air domes present the most viable solution.

    Installation Speed: 2-Week Air Domes Vs 18-Month Construction

    While permanent buildings trap you in lengthy construction cycles, air domes deliver operational facilities in a fraction of the time.

    When comparing air dome vs building installation speed, you’ll find dramatic differences that impact your project timeline and cash flow.

    Air domes require just 2-6 weeks for complete installation. You’ll have your facility operational within a month, generating revenue immediately.

    The streamlined process involves site preparation, foundation work, and dome inflation – no complex structural work needed.

    Permanent buildings demand 12-18 months of construction time. You’ll face permit delays, weather interruptions, and material shortages that extend timelines.

    Complex structural work, electrical systems, and finishing touches create bottlenecks.

    This speed advantage means you’ll start operations 15 months earlier with air domes, maximizing your return on investment.

    When Air Dome Flexibility Beats Permanent Structures

    Beyond speed advantages, air domes provide operational flexibility that permanent structures simply can’t match. You can relocate your dome when needs change, whether moving to a better location or following seasonal demand patterns.

    Flexibility Factor Air Dome Permanent Building
    Relocation Move anywhere with proper permits Fixed location permanently
    Seasonal Use Deflate during off-seasons Year-round maintenance costs
    Expansion Easy size modifications Requires major construction
    Purpose Changes Quick reconfiguration Costly renovations needed

    If you’re running sports camps, seasonal training programs, or temporary events, this adaptability becomes invaluable. You’re not locked into a single use case or location for decades. This flexibility particularly benefits organizations with changing needs or those testing market demand before committing to permanent infrastructure investments.

    Long-Term Costs: Air Dome Operations Vs Permanent Maintenance

    You’ll face different cost structures when operating air domes versus maintaining permanent buildings over time.

    Air domes require continuous energy for inflation and climate control, while permanent structures need periodic repairs, HVAC maintenance, and eventual roof replacements.

    Your long-term financial picture depends on balancing these ongoing operational expenses against traditional building maintenance cycles.

    Annual Operating Expenses

    Although air domes cost considerably less upfront, you’ll face higher annual operating expenses compared to permanent buildings. Your air dome requires continuous electricity to maintain structural integrity through constant air pressure, typically consuming 20-30% more energy than heating a comparable permanent facility.

    Your main ongoing costs include:

    1. Blower system maintenance – Regular filter changes, motor servicing, and backup system checks
    2. Higher insurance premiums – Specialized coverage for air-supported structures costs 15-25% more annually
    3. Membrane replacement – Every 12-15 years, you’ll need fabric replacement costing $150K-$200K
    4. Emergency repairs – Weather damage, tears, or equipment failures require immediate professional response

    Despite these higher operating costs, most facilities still save money overall due to the dramatically lower initial investment.

    Maintenance Cost Breakdown

    Breaking down maintenance costs over a 20-year period reveals significant differences between air domes and permanent buildings.

    You’ll spend approximately $15,000-25,000 annually maintaining an air dome, primarily on fabric repairs, blower system upkeep, and energy costs for continuous pressurization.

    Your permanent building maintenance averages $8,000-15,000 yearly, focusing on HVAC systems, roofing, and structural elements.

    However, you’ll face major fabric replacement every 15-20 years with air domes, costing $200,000-300,000.

    Permanent structures require periodic roof replacement ($150,000-200,000) every 25-30 years but offer superior durability.

    Your total 20-year maintenance investment typically reaches $500,000-800,000 for air domes versus $400,000-600,000 for permanent buildings.

    While permanent structures cost less long-term, air domes provide flexibility that may justify higher maintenance expenses.

    Energy Efficiency Comparison

    When comparing energy efficiency between air domes and permanent buildings, the continuous pressurization system becomes your largest operational expense. Air domes require 24/7 blower operation to maintain structural integrity, consuming considerable electricity year-round.

    However, their superior insulation properties often offset this cost during heating and cooling seasons.

    Energy efficiency factors to evaluate:

    1. Air dome blowers consume 15-25 kW continuously, adding $15,000-30,000 annually to electricity bills
    2. Double-membrane insulation in air domes provides R-values of 8-12, reducing HVAC loads by 30-40%
    3. Permanent buildings eliminate pressurization costs but may require more heating/cooling due to thermal bridging
    4. Climate impact varies greatly – air domes excel in moderate climates but struggle in extreme temperatures

    Your location’s utility rates and climate conditions ultimately determine which option delivers better long-term energy efficiency.

    Property Value Impact Of Air Domes Vs Permanent Buildings

    If you’re evaluating facility options with resale value in mind, permanent buildings deliver markedly higher property appreciation than air domes.

    Lenders and appraisers classify permanent structures as real property improvements, directly boosting your land’s assessed value and marketability. You’ll see this reflected in higher property tax assessments, but also substantial equity gains over time.

    Air domes, conversely, don’t enhance property values since they’re considered temporary installations. Banks won’t factor them into property valuations for refinancing or sales purposes.

    However, this distinction works both ways – you won’t face increased property taxes with an air dome.

    Your choice depends on investment strategy. If you’re planning to sell within 5-10 years, permanent construction offers better ROI through appreciation.

    For shorter-term needs, air domes preserve capital flexibility.

    Space Size Requirements For Air Dome Vs Permanent Options

    Beyond financial considerations, the physical footprint requirements differ considerably between air domes and permanent buildings.

    You’ll find that air domes offer remarkable flexibility in sizing and placement that permanent structures simply can’t match.

    Here’s how space requirements compare:

    1. Minimum viable size – Air domes work efficiently from 5,000 sq ft up, while permanent buildings become cost-effective around 15,000 sq ft.
    2. Site preparation – You’ll need minimal ground work for air domes versus extensive foundation excavation for permanent structures.
    3. Expansion capability – Air domes can’t be expanded, but you can relocate them; permanent buildings allow additions but at significant cost.
    4. Irregular lot accommodation – Air domes adapt better to oddly-shaped properties since they don’t require traditional foundation layouts.

    Your available space directly impacts which option makes financial sense.

    Budget Under $1M? Why Air Domes Win Every Time

    Why do air domes dominate the sub-$1M market so decisively?

    You’re looking at a $700K air dome versus a $2M permanent structure for 20,000 square feet – that’s 65% less upfront investment.

    You’ll get your facility operational in 2-6 weeks instead of waiting 12-18 months for construction completion.

    Your budget constraints make this decision straightforward.

    While permanent buildings offer long-term value and prestige, you can’t justify spending triple the cost when you’re working within financial limits.

    Air domes deliver immediate functionality without the massive capital commitment.

    You’re also getting flexibility that permanent structures can’t match.

    If your needs change or you want to relocate, you’re not stuck with an immovable asset.

    For budget-conscious projects, air domes eliminate the financial risk while providing the space you need.

    Air Dome Vs Permanent Building: Which Fits Your Needs?

    How do you determine whether an air dome or permanent building aligns with your specific project requirements? Your decision hinges on four critical factors that’ll shape your investment’s success.

    1. Timeline urgency – Need facility operational within 2-6 weeks? Air domes deliver fast deployment versus 12-18 months for permanent construction.
    2. Budget constraints – Working with under $1M? Air domes cost $700K compared to $2M for permanent structures, saving you 50-75%.
    3. Usage flexibility – Require seasonal operation or future relocation? Air domes offer adaptability that permanent buildings can’t match.
    4. Long-term vision – Planning for property value appreciation and prestige? Permanent buildings provide lasting investment returns despite higher upfront costs.

    Match these factors against your priorities to make the right choice.

  • Cleaning and Care for Sports Domes

    Cleaning and Care for Sports Domes

    You’ve invested substantially in your sports dome, but without proper maintenance, that investment can deteriorate faster than you’d expect. The cleaning methods you choose today will determine whether your facility thrives for decades or requires costly repairs within just a few years. Most facility managers make important mistakes during routine cleaning that actually accelerate wear and damage. Before you grab that pressure washer or harsh detergent, there’s something vital you need to understand about dome materials.

    Professional Air Dome Cleaning vs DIY: Costs and Considerations

    Most sports dome owners face a critical decision when their facility needs cleaning: hire professionals or tackle the job themselves.

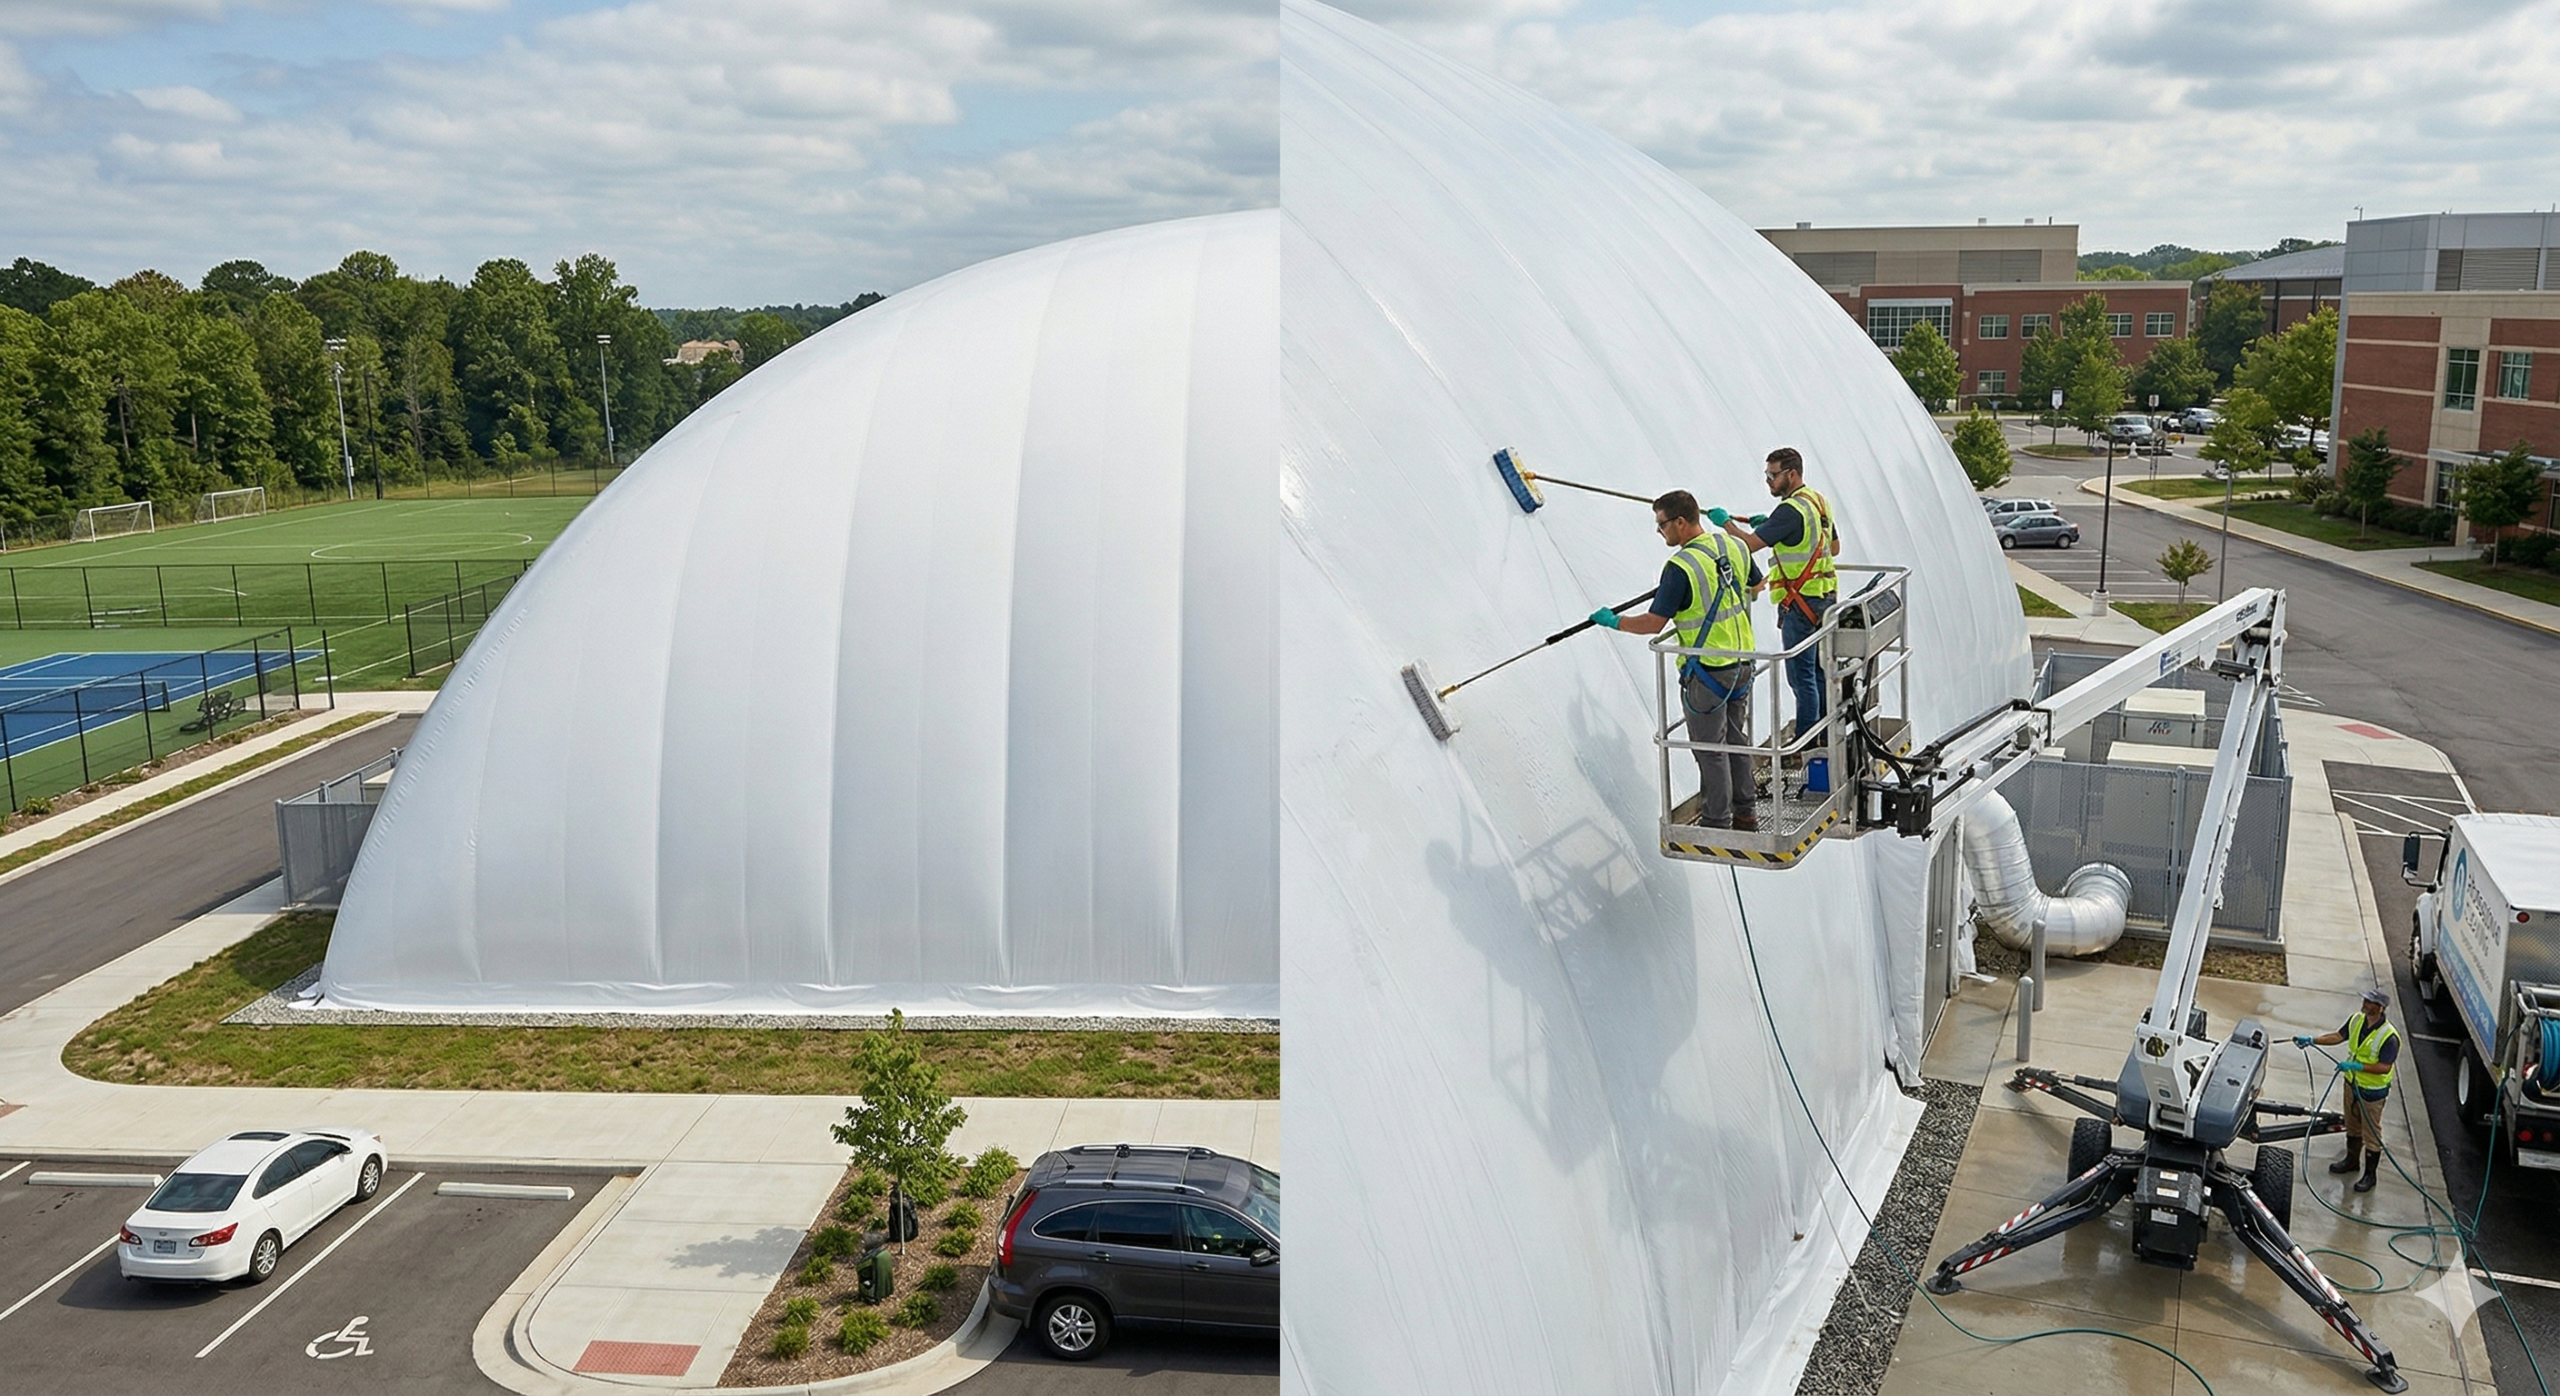
    Professional air dome cleaning services cost $2,000-$5,000 for a 20,000 square foot facility, but they bring specialized equipment and expertise that prevents costly damage. They understand proper pressure settings, pH-neutral soap requirements, and safe cleaning techniques that extend your dome’s life by 5-10 years.

    DIY cleaning appears cheaper initially, but you’ll need specific equipment and knowledge to avoid damaging the coating. High-pressure washers and harsh chemicals can cause irreparable harm.

    You’ll also need scaffolding or lifts for safe access. While you’ll save on labor costs, consider whether you have the time, equipment, and expertise to clean safely and effectively without compromising your dome’s integrity.

    Supplies and Equipment Needed for Air Dome Cleaning

    Whether you choose professional service or handle the cleaning yourself, understanding the right supplies and equipment makes the difference between success and disaster.

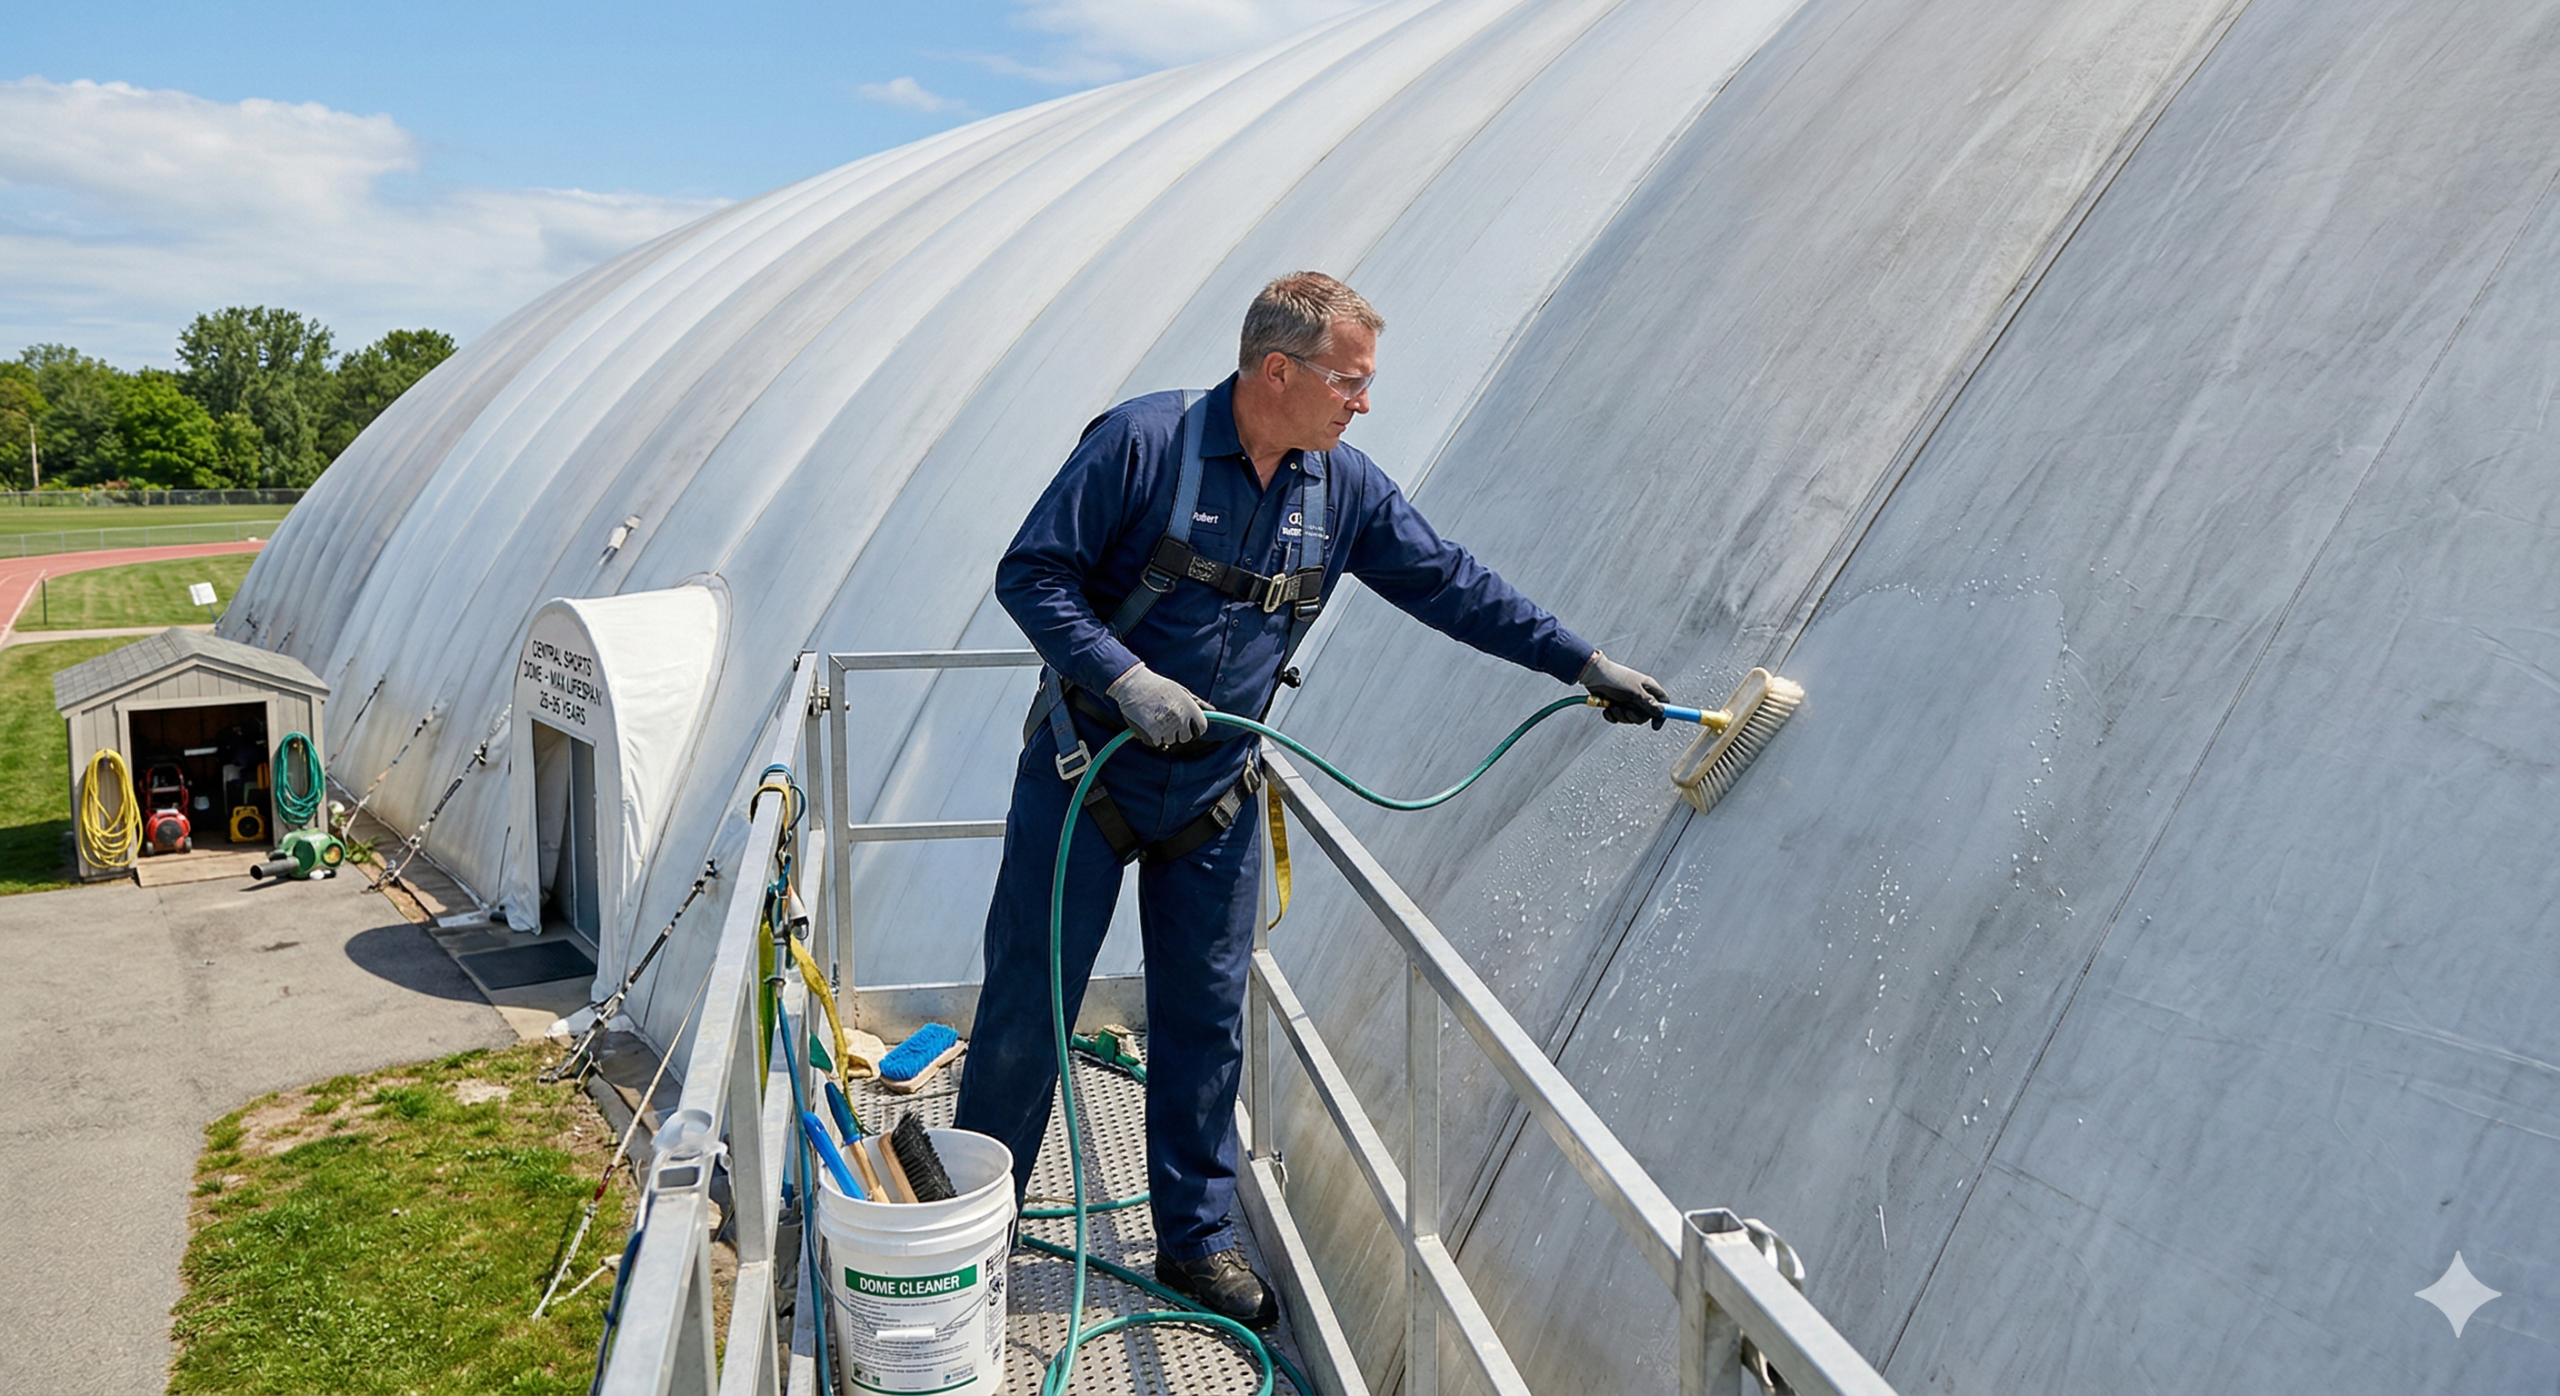
    For effective sports dome washing, you’ll need pH-neutral mild soap specifically designed for fabric structures. Never use harsh chemicals or acidic cleaners that’ll damage the dome’s protective coating.

    Essential equipment includes soft-bristled brushes, low-pressure hoses, and extension poles for reaching higher areas. Skip pressure washers entirely—they’re too aggressive and will compromise the material’s integrity.

    You’ll also need clean water for thorough rinsing and possibly scaffolding or lifts for larger domes.

    Stock microfiber cloths for spot cleaning and gentle squeegees for water removal. Having proper supplies guarantees you’ll extend your dome’s lifespan while maintaining its appearance and structural integrity.

    Step-by-Step Air Dome Cleaning Process for Large Facilities

    Seven critical steps guarantee your large air dome cleaning project runs smoothly and safely.

    First, you’ll inspect the entire structure for damage, noting tears or weak spots that need repair before cleaning.

    Second, gather your pH-neutral soap, soft brushes, and low-pressure equipment – never use harsh chemicals or pressure washers that’ll damage the coating.

    Third, start cleaning from the top down, working in manageable sections.

    Fourth, apply mild soap solution with gentle circular motions using soft brushes.

    Fifth, rinse thoroughly with low-pressure water to remove all soap residue.

    Sixth, allow complete air drying before moving to the next section.

    Finally, document the process and schedule your next maintenance.

    Professional tennis bubble cleaning service typically costs $2,000-$5,000 but extends your dome’s lifespan considerably.

    Air Dome Cleaning Schedules That Maximize Lifespan

    Strategic timing transforms routine maintenance into a powerful investment that doubles your air dome’s operational lifespan.

    You’ll maximize your dome’s longevity by establishing a bi-annual cleaning schedule, ideally during spring and fall when weather conditions are ideal.

    For facilities with heavy usage or harsh environmental conditions, quarterly inspections with annual deep cleaning provide superior protection.

    Schedule major cleaning during off-seasons to avoid disrupting operations while ensuring thorough dome fabric care.

    Professional services cost $2,000-$5,000 but extend operational life by 5-10 years, delivering exceptional return on investment.

    Document each cleaning session to track fabric condition and adjust frequency as needed.

    Consistent maintenance prevents minor issues from becoming costly replacements, keeping your facility operational and profitable for decades.

  • Air Dome Emergency Procedures

    Air Dome Emergency Procedures

    You’ve invested in an air dome for good reasons—protection from weather, year-round facility use, and cost savings. But when severe weather strikes or systems fail, you’ll need more than hope to keep everyone safe. Vital decisions about evacuation, backup power, and emergency repairs can’t wait for manuals or phone calls. The difference between a manageable incident and a disaster often comes down to knowing exactly what to do in those first vital minutes.

    When Air Dome Emergencies Require Immediate Evacuation

    Although air domes are designed to withstand significant weather conditions, you’ll need to evacuate immediately when wind speeds exceed the structure’s design limits of 100 mph (160 km/h).

    Don’t wait for official warnings—monitor weather conditions continuously and act decisively when severe storms approach.

    You must also evacuate when the backup blower system fails during power outages, creating rapid deflation scenarios.

    If you notice major fabric tears that can’t be controlled with emergency patches, initiate evacuation protocols immediately.

    Fire emergencies require instant evacuation due to the fabric’s vulnerability to heat damage.

    These air dome emergency procedures aren’t optional—your safety depends on recognizing critical situations quickly.

    Always prioritize human life over equipment or activities when facing structural compromise or extreme weather conditions.

    Power Outage Response: Backup Systems and Safe Deflation

    When power outages strike your air dome facility, you’ll rely on backup blower systems that automatically engage within 30 seconds to maintain structural integrity. Your power outage response plan should include regular testing of these emergency systems to verify they’re operational when needed.

    If backup systems fail, don’t panic—safe deflation takes 45-90 minutes for a 20,000 sq ft facility, giving you ample time to evacuate occupants safely.

    Time Frame Action Required System Status
    0-30 seconds Monitor backup activation Auto-start engaging
    30-45 minutes Begin controlled evacuation Backup operational
    45-90 minutes Complete facility clearance Safe deflation period

    Always maintain emergency lighting and clear exit pathways during your power outage response procedures.

    Managing Air Dome Pressure During Severe Weather

    Beyond power-related challenges, severe weather presents unique pressure management demands that require immediate attention and strategic adjustments.

    You’ll need to continuously monitor internal pressure readings during storms, as external wind forces can create dangerous fluctuations. When snow accumulates on your dome’s surface, increase heating systems immediately to prevent excessive weight buildup that could compromise structural integrity.

    Your sports dome safety protocols must include real-time weather tracking and predetermined evacuation triggers. If wind speeds approach your facility’s design limits of 100 mph, initiate immediate evacuation procedures.

    Don’t wait for conditions to worsen. During severe weather events, maintain constant communication with local emergency services and have your emergency patch kit readily accessible. Quick response to pressure changes can mean the difference between minor repairs and catastrophic failure.

    Emergency Fabric Repair: Quick Fixes vs. Full Evacuation

    While fabric damage presents one of the most critical decisions you’ll face as an air dome operator, understanding the difference between manageable tears and evacuation-worthy breaches can save both time and lives.

    Your tennis bubble emergency response depends on quickly evaluating the damage severity and acting appropriately.

    For minor damage, you can implement temporary fixes:

    1. Small punctures (under 6 inches) – Apply emergency patch kit immediately while maintaining normal operations.
    2. Seam separations – Use temporary tape reinforcement and monitor pressure levels closely.
    3. Weather-related tears – Evaluate structural integrity before deciding between repair or evacuation.

    However, large rips exceeding 12 inches, multiple breach points, or any damage compromising structural zones require immediate evacuation.

    Don’t risk lives attempting repairs on major damage – evacuate first, then evaluate repair options once the structure is safely deflated.

  • Extending Air Dome Lifespan Tips

    Extending Air Dome Lifespan Tips

    Your air dome represents a significant investment—potentially lasting 25 years or more with proper care. Yet most owners don’t realize they’re unknowingly cutting their structure’s lifespan in half through common maintenance oversights. The difference between a dome that fails in 12 years versus one that thrives for decades often comes down to a few critical practices that take minutes to implement but save thousands in premature replacement costs.

    Why Air Dome Maintenance Matters (Your 25-Year Investment Protection Plan)

    A 20,000 square foot air dome represents a substantial investment—one that can serve you reliably for 25 to 35 years with proper care. Without maintenance, you’re looking at costly repairs, premature replacement, and potential safety hazards that’ll drain your budget.

    Think of maintenance as insurance for your investment. Regular cleaning prevents UV degradation that weakens fabric integrity. Proper snow removal protects against catastrophic collapse from excessive weight loads.

    Maintaining correct air pressure guarantees structural stability while preventing unnecessary stress on seams and anchoring systems.

    When you extend air dome life through proactive maintenance, you’re protecting decades of reliable service. A well-maintained dome delivers consistent performance, reduces emergency repair costs, and maximizes your return on investment.

    Neglect these basics, and you’ll face expensive consequences that could’ve been easily prevented.

    Clean Your Air Dome Like A Pro (UV Protection And Debris Removal)

    Cleaning your air dome regularly forms the foundation of that maintenance strategy we just discussed.

    You’ll maximize dome lifespan by removing dirt, leaves, and debris that trap moisture and accelerate material breakdown. Clean your dome every 3-4 months using mild soap and water – harsh chemicals damage the fabric.

    Start at the top and work downward with a soft brush or cloth. Pay special attention to seams where debris accumulates.

    Remove organic matter like leaves immediately, as they retain moisture and promote UV damage when left sitting.

    Winter cleaning’s essential too. Clear snow buildup exceeding 35 PSF to prevent structural stress.

    Don’t use sharp tools that could puncture the membrane. After cleaning, inspect for small tears or wear spots that need immediate attention.

    Master Air Dome Pressure And Snow Load Management

    Monitor your air dome’s pressure religiously – it’s the critical factor that prevents costly structural damage and extends your dome’s operational life. Maintain pressure between 2-5 PSF (0.1-0.24 kPa) consistently. Install backup blowers to prevent deflation during power outages or equipment failures.

    Snow management requires vigilance. Never exceed 35 PSF (1.67 kPa) load capacity. Remove snow when accumulation threatens structural integrity.

    Pressure Range Snow Load Limit Action Required
    2-3 PSF Light snow acceptable Monitor only
    3-4 PSF Moderate snow tolerance Clear if >12″
    4-5 PSF Maximum safe pressure Immediate removal
    Below 2 PSF Structural risk Emergency inflation

    These air dome longevity tips prevent membrane stress, reduce wear patterns, and maintain proper aerodynamics. Document pressure readings daily and establish snow removal protocols before winter arrives.

    Handle Air Dome Repairs And Off-Season Storage

    Two critical maintenance practices will determine whether your air dome reaches its maximum 25-35 year lifespan: immediate repair response and proper off-season storage protocols.

    When you spot tears, punctures, or wear patterns, address them within 24-48 hours. Small issues become major problems fast, potentially compromising your dome’s structural integrity.

    Use manufacturer-approved patch kits and techniques to maintain fabric strength.

    For seasonal storage, follow these dome care best practices:

    • Clean thoroughly and dry completely before folding to prevent mold and mildew
    • Store in rodent-free, temperature-controlled environment away from sharp objects
    • Fold loosely following manufacturer guidelines to avoid permanent creases

    Proper storage prevents fabric degradation during off-months.

    You’ll protect your investment while ensuring reliable performance when reinstalling your dome for the next season.

  • Air Dome Blower Maintenance Guide

    Air Dome Blower Maintenance Guide

    You’ve invested thousands in your air dome, but you’re probably overlooking the one component that keeps it standing—your blower system. When that motor fails at 2 AM during winter operations, you’ll quickly realize that a few minutes of weekly maintenance could’ve saved you from emergency repair costs and potential dome collapse. The difference between a blower that lasts two years versus ten years isn’t luck—it’s following a proven maintenance protocol that most operators never discover.

    Complete Air Dome Blower Maintenance Schedule and Timeline

    Since your air dome’s structural integrity depends entirely on consistent blower operation, you’ll need to follow a systematic maintenance schedule that prevents costly downtime and extends equipment life.

    Your air dome blower maintenance should follow three distinct intervals.

    Weekly inspections require checking overall operation and listening for unusual sounds or vibrations.

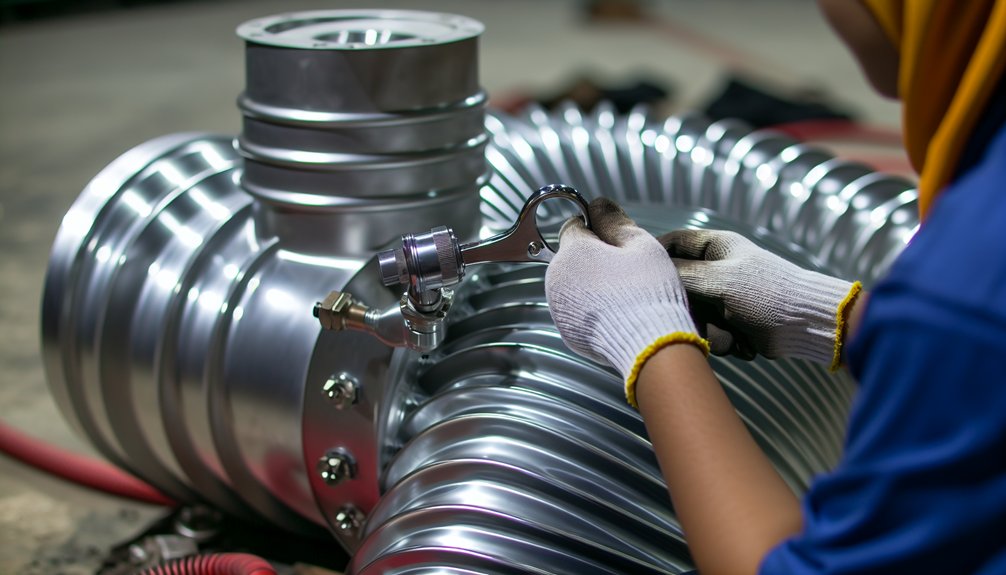
    Monthly tasks include lubricating bearings, verifying proper belt tension, and cleaning intake filters to maintain peak airflow.

    Annual maintenance demands more intensive work: replace bearings after 8,000-10,000 operating hours, install new belts, and conduct thorough motor inspections.

    For a 20,000 square foot facility, budget $100-$200 for replacement bearings as essential spare parts.

    This structured approach guarantees your blower system operates reliably year-round, maintaining proper dome pressurization and avoiding unexpected failures that could compromise your facility’s structural integrity.

    Weekly and Monthly Blower Care Tasks That Prevent Breakdowns

    While thorough annual maintenance keeps your air dome blower running long-term, it’s the consistent weekly and monthly tasks that actually prevent most equipment failures. These routine checks catch problems before they escalate into costly dome blower repair situations.

    Your weekly inspection should focus on basic operation verification, while monthly tasks dive deeper into mechanical components that experience regular wear.

    Frequency Task Time Required Critical Focus
    Weekly Check operation 10 minutes Listen for unusual sounds
    Monthly Lubricate bearings 15 minutes Proper grease application
    Monthly Check belt tension 10 minutes Prevent slippage/wear
    Monthly Clean intake filters 20 minutes Maintain airflow efficiency

    Staying consistent with this schedule greatly reduces unexpected breakdowns and extends your blower’s operational life considerably.

    Annual Air Dome Blower Component Replacement Guide

    Beyond routine weekly and monthly care, your air dome blower requires strategic annual component replacements to maintain peak performance.

    Replace bearings after 8,000-10,000 operating hours to prevent catastrophic failure. Keep spare bearings on hand, as they cost $100-$200 and guarantee minimal downtime during replacement.

    Belt replacement is equally critical during your annual maintenance cycle. Worn belts reduce efficiency and can snap unexpectedly, compromising your facility’s air pressure.

    Schedule motor inspections alongside component replacements to identify potential issues before they become costly problems.

    Proper tennis bubble blower care depends on this annual replacement schedule. For a 20,000 square foot facility, these proactive measures protect your investment and maintain consistent operation.

    Document replacement dates and operating hours to optimize future maintenance timing and avoid emergency repairs.

    Common Blower Problems and Maintenance-Based Solutions

    Although preventive maintenance reduces most issues, air dome blowers can still develop problems that require targeted solutions. When you encounter blower malfunctions, systematic troubleshooting helps identify root causes quickly. Most problems stem from neglected maintenance schedules or component wear.

    Problem Solution
    Excessive vibration Check belt tension, replace worn bearings
    Reduced airflow Clean intake filters, inspect for blockages
    Unusual noise Lubricate bearings, examine motor alignment
    Overheating motor Clear ventilation areas, check electrical connections
    Belt slipping Adjust tension, replace stretched belts

    Professional sports dome fan service becomes necessary when problems persist despite proper maintenance. Keep detailed maintenance logs to track recurring issues and schedule professional inspections annually. Address minor problems immediately to prevent costly repairs and facility downtime.

  • Common Air Dome Problems and Solutions

    Common Air Dome Problems and Solutions

    You’ve invested in an air dome for your facility, but like any complex structure, problems will eventually surface. Whether it’s a sudden pressure drop during peak hours, a stubborn zipper door that won’t budge, or mysterious tears appearing in the fabric, these issues can shut down operations and cost you money. The good news? Most air dome problems have straightforward solutions if you know what to look for and how to respond quickly.

    Common Fabric Tears: Causes and Quick Fixes

    Although air domes are built to withstand various weather conditions, fabric tears remain one of the most frequent issues you’ll encounter with your 20,000 square foot facility. These common dome issues typically result from sharp objects, excessive wind stress, or UV degradation over time.

    When you notice small punctures or tears, don’t panic. Most tennis bubble repairs can be handled quickly with basic repair kits costing between $35-$100. You’ll find these kits contain fabric patches, adhesive, and detailed instructions for temporary fixes.

    For immediate solutions, clean the damaged area thoroughly, apply the patch following manufacturer guidelines, and guarantee proper adhesion.

    However, larger tears require professional assessment. Regular inspections help you catch air dome problems early, preventing minor damage from becoming costly structural issues.

    Blower Motor Failures: Symptoms and Solutions

    While fabric tears affect your air dome’s exterior, blower motor failures strike at the heart of your facility’s operation. When your blower system malfunctions, you’ll notice immediate pressure drops and potential structural collapse risks.

    Key symptoms include unusual grinding noises, excessive vibration, and inconsistent airflow. Bearing failures account for most issues, typically costing $500-$1,500 to repair. You’ll want to monitor motor temperature and listen for irregular sounds during routine inspections.

    For effective sports dome troubleshooting, check electrical connections first, then examine belt tension and alignment. Replace worn bearings immediately to prevent complete motor failure.

    Your air dome problem solving strategy should include backup blower systems for critical situations. Regular maintenance prevents most failures, but when problems arise, quick response protects your entire facility investment.

    When Zipper Doors Jam or Stick

    As blower motors keep your dome pressurized, zipper door mechanisms provide essential access control that can quickly become problematic.

    When your zipper doors jam or stick, you’re facing one of the most common maintenance issues in air dome facilities.

    Most zipper problems stem from dirt accumulation, fabric misalignment, or worn zipper teeth.

    Here’s your troubleshooting approach:

    1. Clean the zipper track thoroughly with a stiff brush to remove debris, ice, or fabric particles.
    2. Apply silicone-based lubricant to zipper teeth and slider mechanisms monthly.
    3. Check fabric tension around the door frame for proper alignment.
    4. Inspect zipper slider for damage or wear that prevents smooth operation.

    Regular maintenance prevents most jamming issues.

    You’ll save time and avoid emergency repairs by implementing a monthly zipper inspection routine.

    Pressure Loss: Finding and Sealing Leaks

    Beyond door mechanisms, your air dome’s structural integrity depends on maintaining proper internal pressure between 2-5 PSF (0.1-0.24 kPa).

    When you notice sagging or deflation, pressure loss is likely occurring through base seal leaks, fabric punctures, or connection points.

    Start your inspection at ground level where the dome meets its foundation. Check the entire perimeter for gaps, loose anchor points, or damaged sealing material.

    Listen for air escaping—it’ll create a distinct hissing sound. Use soapy water to identify small leaks; bubbles will form where air escapes.

    Examine fabric panels for tears, worn areas, or punctures from debris. Pay attention to seams and reinforced sections where stress concentrates.

    Check blower connections, electrical penetrations, and emergency exits. Temporary patches work for small holes, but schedule permanent repairs quickly to prevent larger problems.

    Snow Load Removal and Weight Limits

    When snow accumulates beyond 12 inches (30 cm) on your air dome, you’re approaching dangerous weight limits that can compromise structural integrity.

    Snow’s weight varies dramatically based on moisture content, with wet snow weighing up to three times more than dry powder. You’ll need immediate action to prevent costly damage or collapse.

    Snow Load Management Protocol:

    1. Monitor accumulation – Check snow depth every 4-6 hours during storms using marked reference points around your dome’s perimeter.
    2. Increase internal pressure – Boost air pressure by 0.5-1.0 PSF to help shed light snow naturally before it becomes problematic.
    3. Deploy removal equipment – Use foam brushes or specialized dome rakes to gently remove snow, working from bottom to top in sections.
    4. Document conditions – Record snow type, depth, and weather forecasts to anticipate future loading events.

    Repair Costs and Essential Emergency Tools

    You’ll need specific tools and spare parts on hand to address air dome emergencies quickly before they escalate into costly structural damage.

    Your emergency repair kit should include fabric patches, sealants, and basic tools, while understanding professional service costs helps you budget for major repairs like blower replacements.

    Preparing for both minor fixes you can handle yourself and larger issues requiring expert intervention guarantees you’re ready for any air dome problem.

    Emergency Repair Kit Essentials

    Three critical repair scenarios can threaten your air dome’s structural integrity without warning.

    You’ll need an extensive emergency repair kit to address fabric tears, pressure loss, and mechanical failures that could compromise your 20,000 sq ft facility’s operation.

    Your emergency repair kit must include these essential components:

    1. Fabric repair patches and adhesive – Waterproof patches in multiple sizes with industrial-grade adhesive for immediate tear repairs ($35-$100 investment)
    2. Pressure monitoring tools – Digital manometer to detect the 2-5 PSF pressure drops that signal base leaks or blower issues
    3. Basic blower maintenance supplies – Replacement bearings, belts, and lubricants for $500-$1,500 blower repairs
    4. Door hardware kit – Zipper lubricant, replacement pulls, and cleaning supplies to prevent costly lockouts

    Keep these supplies readily accessible for immediate deployment.

    Professional Service Cost Breakdown

    Professional air dome repair services typically charge $150-$300 per hour, making DIY maintenance knowledge essential for managing your facility’s operating costs.

    For a 20,000 sq ft facility, you’ll face predictable repair scenarios. Fabric tear repairs cost $35-$100 for materials when you handle them yourself, but professional patching runs $400-$800 including labor.

    Blower bearing replacements range from $500-$1,500 in parts, yet service calls add $300-$600 in labor charges.

    Zipper door maintenance requires only cleaning and lubrication—a $5 fix versus $200-$400 for professional service.

    Pressure loss diagnostics cost $150-$300 professionally, though you can check base seals yourself.

    Snow removal services charge $50-$150 per visit, making preventive monitoring vital for your budget.

    Preventing Major Air Dome Breakdowns

    While air dome issues can range from minor inconveniences to costly repairs, implementing a proactive maintenance strategy will help you avoid the most expensive breakdowns.

    Regular inspections catch problems before they escalate. You’ll save thousands by addressing fabric tears with $35-$100 repair kits rather than replacing entire sections. Similarly, monitoring blower performance prevents bearing failures that cost $500-$1,500.

    Here’s your essential prevention checklist:

    1. Monthly fabric inspections – Look for small tears, worn areas, and stress points around anchor systems.
    2. Quarterly blower maintenance – Check bearings, belts, and filters to prevent costly failures.
    3. Seasonal pressure monitoring – Test for base leaks when pressure drops below 2-5 PSF.
    4. Weather preparation – Remove snow accumulation exceeding 12 inches to prevent structural damage.

    Consistent maintenance protects your investment long-term.

  • Air Dome Maintenance Schedule Guide

    Air Dome Maintenance Schedule Guide

    You’ve invested considerably in your air dome facility, but without proper maintenance scheduling, you’re risking catastrophic failure and costly emergency repairs. Most facility managers don’t realize that a systematic approach to monthly, quarterly, and annual maintenance tasks can extend their dome’s lifespan by decades while preventing the kind of sudden deflation that shuts down operations for weeks. The difference between proactive maintenance and reactive crisis management comes down to following a proven schedule that addresses critical warning signs before they become disasters.

    Essential Air Dome Maintenance Tasks By Schedule

    Maintaining your 20,000 square foot air dome requires a systematic approach that breaks down essential tasks into manageable monthly, quarterly, and annual schedules.

    Your air dome maintenance schedule should include monthly blower inspections, pressure checks, and door operation testing to guarantee peak performance.

    Every quarter, you’ll need to conduct thorough fabric inspections for tears and UV damage, check rope tension, and perform deep cleaning procedures.

    Your dome inspection schedule must also incorporate annual tasks like professional fabric assessments and complete blower overhauls.

    This tennis bubble maintenance guide emphasizes that following these scheduled intervals prevents costly emergency repairs and extends your dome’s lifespan.

    Consistent adherence to these maintenance protocols keeps your facility safe, functional, and compliant with manufacturer warranties while maximizing your investment’s long-term value.

    Monthly Inspections That Keep Your Facility Running

    Your monthly inspections form the backbone of reliable air dome operation, focusing on three critical systems that can’t afford to fail.

    You’ll need to examine your blower system for wear, verify pressure levels stay within ideal ranges, and test all door mechanisms for smooth operation.

    These quick but essential checks catch problems early, preventing costly failures that could compromise your entire facility.

    Blower System Inspection

    Since your air dome’s blower system serves as the heart of your facility’s structural integrity, regular monthly inspections become critical for preventing costly downtime and emergency repairs.

    Your sports dome upkeep calendar should prioritize checking air filters for debris accumulation, as clogged filters reduce efficiency and strain the motor.

    Inspect belts for proper tension, cracking, or fraying that could lead to sudden failure. Listen for unusual noises, vibrations, or grinding sounds that indicate bearing problems or loose components.

    Check electrical connections for corrosion or looseness, and verify amperage readings match manufacturer specifications. Document motor temperature during operation to identify overheating issues early.

    Test emergency backup systems if equipped, ensuring seamless shift during primary blower maintenance. Clean intake vents and remove any obstructions that could restrict airflow and compromise your dome’s pressure stability.

    Pressure Level Monitoring

    When pressure levels drop below ideal thresholds, your air dome’s structural integrity becomes compromised, making consistent monitoring essential for safe operations.

    You’ll need to check pressure readings monthly using your system’s gauges or digital monitoring equipment.

    Monitor these critical pressure indicators during your monthly inspections:

    • Operating pressure range – Verify readings stay within manufacturer specifications (typically 0.3-0.5 PSI)
    • Pressure differential alerts – Watch for sudden drops that indicate leaks or blower issues
    • Emergency backup activation – Test automatic systems that engage when primary pressure falls

    Document all pressure readings in your maintenance log, noting any fluctuations or irregularities.

    If you discover pressure levels consistently falling outside normal parameters, investigate immediately for fabric damage, seal failures, or blower performance issues before structural problems develop.

    Door Operation Testing

    While monitoring pressure keeps your dome inflated properly, door systems require equally rigorous attention to maintain safe entry and exit operations.

    You’ll need to test each door’s opening and closing mechanism monthly, ensuring smooth operation without binding or hesitation. Check that emergency exits function correctly and can’t be accidentally locked from the inside.

    Inspect door seals for air leaks that compromise pressure stability. Look for worn weatherstripping, damaged gaskets, or loose connections.

    Test automatic door systems if equipped, verifying sensors work properly and doors respond to commands immediately.

    Examine hinges, handles, and locking mechanisms for wear or corrosion. Lubricate moving parts as needed and tighten loose hardware.

    Document any issues requiring repair, as malfunctioning doors pose serious safety risks during emergencies.

    Quarterly Air Dome Checks That Prevent Major Repairs

    Every three months, you’ll need to conduct thorough fabric inspections to catch tears and UV damage before they compromise your dome’s integrity.

    Check all rope tension points systematically, as loose or overly tight ropes can create stress concentrations that lead to fabric failure.

    These quarterly assessments are your best defense against costly emergency repairs that could shut down your facility unexpectedly.

    Fabric Inspection Protocol

    Since fabric represents your air dome’s most vulnerable component, establishing a rigorous quarterly inspection protocol will save you thousands in emergency repairs.

    You’ll need to systematically examine every section for tears, punctures, and UV damage that compromise structural integrity.

    Start by walking the dome’s perimeter during daylight hours, checking for discoloration or fabric thinning.

    Pay special attention to high-stress areas like anchor points and seams where failures typically originate.

    • Document damage locations with photos and measurements for tracking deterioration patterns over time
    • Test fabric flexibility by gently stretching suspected weak areas to identify brittleness before catastrophic failure
    • Inspect reinforcement patches from previous repairs to verify they’re holding securely without creating new stress points

    Address minor issues immediately—small tears become major ruptures when ignored.

    Rope Tension Assessment

    How often do you check the rope tensions that keep your air dome properly anchored? Quarterly rope tension assessments prevent catastrophic failures that’ll cost thousands in repairs.

    Walk the perimeter and examine each anchor point systematically. You’re looking for loose ropes, frayed sections, or hardware showing wear.

    Use a tension gauge to measure rope tightness at critical stress points. Proper tension maintains structural integrity during wind loads and pressure fluctuations.

    Don’t rely on visual inspection alone—ropes can lose tension gradually without obvious signs.

    Tighten loose connections immediately and replace damaged ropes before they fail. Document tension readings to track deterioration patterns.

    This quarterly check takes two hours but prevents emergency repairs that’ll shut down your facility for days.

    Annual Professional Air Dome Service Requirements

    While monthly and quarterly maintenance tasks keep your air dome operating smoothly, annual professional service guarantees long-term structural integrity and peak performance.

    Professional technicians conduct thorough assessments that exceed basic maintenance capabilities, identifying potential issues before they become costly problems.

    Annual service includes three critical components:

    • Complete fabric evaluation – Professionals assess structural integrity, UV degradation patterns, and stress point wear using specialized equipment.
    • Blower system overhaul – Extensive motor inspection, belt replacement, electrical testing, and efficiency calibration.
    • Full system integration testing – Emergency procedures verification, backup system functionality, and safety protocol validation.

    This professional oversight extends your dome’s lifespan greatly while maintaining manufacturer warranty compliance.

    You’ll receive detailed documentation of all findings and recommendations, creating a maintenance history that supports insurance claims and helps plan future capital investments.

    Air Dome Warning Signs Requiring Immediate Action

    What happens when your air dome shows critical warning signs that demand immediate attention? You’ll need to act swiftly to prevent catastrophic failure and protect occupants inside.

    Watch for sudden pressure drops that your blower can’t compensate for – this indicates major fabric tears or seal failures.

    If you notice visible fabric sagging, ballooning, or flapping sections, evacuate immediately and shut down operations.

    Strange noises from the blower system, including grinding, squealing, or irregular cycling, signal mechanical failure.

    Don’t ignore fabric discoloration, brittle areas, or visible stress points around anchor connections.

    Water pooling on the dome surface creates dangerous weight loads that can cause collapse.

    Emergency protocols should include immediate evacuation procedures and backup blower activation.

    Contact professional technicians immediately when these critical signs appear.

    Budgeting Air Dome Maintenance For 20,000 Sq Ft Facilities

    Since proper air dome maintenance prevents costly emergencies and extends facility lifespan, you’ll need to allocate $15,000-25,000 annually for a 20,000 sq ft installation.

    Your budget breakdown should include:

    • Routine maintenance (40-50%): Monthly blower inspections, pressure checks, quarterly fabric assessments, and cleaning supplies.
    • Emergency repairs (25-35%): Unexpected fabric patches, blower component replacements, and urgent door mechanism fixes.
    • Professional services (20-25%): Annual fabric evaluations, complete blower overhauls, and specialized system testing.

    Factor in seasonal variations—winter demands increase due to snow loads and heating costs.

    You’ll also want to establish a separate capital reserve fund for major replacements like fabric renewal every 15-20 years or complete blower system upgrades.

    Smart budgeting guarantees uninterrupted facility operations.

  • How to Heat an Air Dome Efficiently

    How to Heat an Air Dome Efficiently

    You’re probably spending more on heating your air dome than necessary. Most facility managers don’t realize that standard heating methods can waste up to 60% of energy due to the dome’s unique curved structure and constant air pressure requirements. The good news? There are proven strategies that can slash your heating costs while maintaining ideal temperatures year-round. Let’s examine which heating system will deliver the best return on your investment.

    Compare Air Dome Heating Systems: Heat Pumps vs. Radiant vs. Gas

    When choosing a heating system for your air dome, you’ll need to weigh three primary options: heat pumps, radiant heating, and gas systems.

    Heat pumps excel in moderate climates (41-59°F), delivering exceptional energy efficiency by extracting warmth from outside air. They’re perfect for efficient dome heating when temperatures don’t drop below freezing consistently.

    Radiant infrared systems target the floor and occupants directly, creating comfortable warmth without heating the entire air volume. This approach reduces energy waste in high-ceiling spaces.

    Gas systems provide reliable heat regardless of outdoor temperature, making them ideal for cold climates. However, they typically cost more to operate than heat pumps in suitable conditions.

    Your climate, budget, and usage patterns determine the best choice for maximum efficiency.

    Upgrade Your Air Dome Insulation to Cut Bills 40

    While your heating system choice matters greatly, upgrading to double-layer insulated fabric delivers the most dramatic impact on your energy bills. When you upgrade your air dome insulation to cut bills 40%, you’re making the smartest investment possible. Double-layer fabric creates superior thermal barriers that standard single-layer domes simply can’t match.

    Single-Layer Dome Double-Layer Insulated
    $800 monthly heating $480 monthly heating
    Constant heat loss Trapped warm air
    Cold interior surfaces Comfortable temperatures
    High energy waste 40% energy savings

    Learning how to heat air dome facilities efficiently starts with proper insulation. The upgrade pays for itself within two seasons through reduced heating costs. Your players and staff will notice improved comfort immediately, while you’ll appreciate dramatically lower utility bills throughout winter months.

    Install Radiant Infrared Heat for Maximum Air Dome Efficiency

    After upgrading your insulation, radiant infrared heating becomes your next game-changing investment for air dome efficiency.

    Unlike traditional forced-air systems that waste energy heating empty space, radiant infrared heaters target the floor and people directly. You’ll feel warmth immediately while avoiding the energy losses that occur when heating vast air volumes.

    These systems work by emitting infrared waves that heat solid surfaces rather than air. Your floor absorbs this energy and radiates it back, creating consistent temperatures throughout your dome.

    You’ll achieve significant air dome energy savings because radiant heat eliminates stratification—hot air won’t rise uselessly to your dome’s peak.

    Install ceiling-mounted units for ideal coverage across your 20,000 square feet.

    You’ll reduce heating costs by 25-35% while maintaining superior comfort levels.

    Stop Heat Loss With Vestibules and Smart Air Dome Thermostats

    Heat escapes from your air dome every time someone opens the door, but vestibules act as thermal airlocks that trap cold air before it reaches your main space.

    These entry chambers create a buffer zone that prevents direct heat loss and maintains consistent internal temperatures. You’ll reduce dome heating costs by 10-15% with proper vestibule installation.

    Smart thermostats take efficiency further by automatically adjusting temperatures based on occupancy and usage patterns.

    Program lower temperatures during off-hours and gradually warm the space before activities begin.

    • Install double-door vestibules at all main entrances to minimize cold air infiltration
    • Use programmable thermostats with zone controls for different dome areas
    • Set automatic temperature reductions during unoccupied periods to maximize energy savings

    Calculate Your Air Dome Heating Costs and ROI

    Before investing in air dome heating upgrades, you need concrete numbers to justify the expense and measure your return on investment. Start by calculating your current heating costs per square foot. For a 20,000 sq ft dome, multiply your monthly energy bills by 12 to get annual expenses.

    Next, estimate potential savings from efficiency improvements—double-layer insulation and radiant heating typically reduce costs by 40-60%.

    Calculate payback periods by dividing upgrade costs by annual savings. Heat pumps might cost $15,000-25,000 but save $3,000-5,000 yearly in moderate climates.

    Solar panels offer 6-10 year paybacks while improving sports dome heating efficiency long-term. Track metrics like BTUs per square foot and temperature consistency to measure performance improvements and validate your investment decisions.