Author: Robert

  • Canada Sports Dome Market Guide

    Canada Sports Dome Market Guide

    You’re considering an air dome for your Canadian facility, but you’ve likely heard the horror stories—collapsed structures after heavy snowfall, skyrocketing heating costs, and construction delays that stretch into winter. The reality is that most failures stem from choosing the wrong manufacturer or underestimating Canada’s unique requirements. Before you invest hundreds of thousands of dollars, there’s critical information about climate engineering, provincial regulations, and cost factors that could make or break your project.

    What Makes Air Domes Work In Canada’s Extreme Climate?

    When temperatures plummet to -30°F and snow loads reach 60 PSF across Canadian provinces, air domes must incorporate specialized engineering features that standard southern structures simply can’t handle.

    Your Canadian sports facility needs heavy-duty insulation systems that maintain consistent internal temperatures while fighting brutal external conditions. You’ll require dual-layer membrane systems with thermal barriers that prevent heat loss and condensation buildup.

    Snow load calculations become critical for your Canada air dome design, demanding reinforced fabric materials and enhanced air pressure systems.

    These structures integrate advanced heating systems with backup power sources to guarantee your Canadian indoor sports venue stays operational during power outages.

    Additionally, specialized anchoring systems resist freeze-thaw cycles that can compromise foundation integrity, while emergency deflation procedures protect against catastrophic weather events.

    Air Dome Costs And Financing Options By Province

    Air dome construction costs across Canadian provinces vary considerably, with your investment typically running 15-25% higher than comparable US facilities due to enhanced climate specifications and specialized materials.

    Ontario and Quebec dominate Canada indoor sports markets, where a standard tennis dome ranges $150,000-$400,000 depending on size and features. Alberta’s extreme weather conditions push costs higher, while Maritime provinces offer more moderate pricing.

    Your Canadian tennis dome requires reinforced membranes for 40-60 PSF snow loads and superior insulation systems.

    Provincial financing options include government sports infrastructure grants, municipal recreation funding, and specialized equipment leasing.

    Many operators secure 5-10 year financing terms through equipment lenders familiar with seasonal sports facilities. Tax incentives vary by province, with some offering accelerated depreciation for recreational infrastructure investments.

    Choosing The Right Canadian Air Dome Manufacturer

    Your manufacturer selection greatly impacts both upfront costs and long-term performance of your Canadian sports dome facility.

    Prioritize manufacturers with proven Canadian climate expertise, as they’ll understand local snow loads, insulation requirements, and extreme temperature challenges that range from -30 to 85°F.

    Farley Group leads the Canadian market from British Columbia, offering specialized knowledge of provincial building codes and weather conditions.

    When evaluating manufacturers, examine their portfolio of existing Canadian installations, warranty terms, and local service capabilities.

    Request references from facilities in similar climate zones to yours.

    Consider manufacturers who provide thorough packages including design, installation, and maintenance services.

    This guarantees accountability and streamlines project management.

    Verify they can handle your province’s specific snow load requirements of 40-60 PSF and understand local permitting processes for faster approvals.

    Before breaking ground on your Canadian sports dome project, you’ll need to secure proper building permits and guarantee full compliance with local codes. Each province maintains distinct requirements, with Ontario and Quebec enforcing the strictest standards due to their large dome markets.

    Your structure must meet National Building Code specifications for snow loads (40-60 PSF), wind resistance, and fire safety. Municipal zoning bylaws often dictate setbacks, height restrictions, and usage classifications.

    Permit Stage Timeline Impact
    Zoning approval 2-4 months delay
    Structural review 1-3 months delay
    Fire safety compliance 2-6 weeks delay
    Environmental assessment 3-8 months delay
    Final inspection 1-2 weeks delay

    Engage local engineers familiar with air-supported structures early. They’ll navigate provincial variations and expedite approvals, preventing costly construction delays.

    Installation Timeline And Winter Weather Considerations

    While securing permits sets your project timeline, Canada’s harsh winter climate greatly impacts when you can actually install your sports dome.

    You’ll want to schedule installation during warmer months, typically May through September, when temperatures stay above freezing and ground conditions allow proper foundation work.

    Winter installations aren’t impossible but they’re considerably more challenging and expensive.

    You’ll face frozen ground that requires special excavation equipment, limited daylight hours, and harsh weather that slows crew productivity.

    Snow loads during installation can stress partially completed structures.

    Plan your project 12-18 months ahead to secure ideal installation windows.

    If you’re forced into winter installation, budget an additional 20-30% for weather delays, specialized equipment, and extended heating costs during construction.

  • Indoor Sports Facilities Europe Market

    Indoor Sports Facilities Europe Market

    You’re looking at a European indoor sports facility market that’s fundamentally different from what you’ll find across the Atlantic. While the UK, Germany, and Scandinavian countries control nearly three-quarters of the market activity, you’ll face stricter regulations, higher upfront costs, and completely different design priorities than American buyers expect. What’s driving these regional differences—and more importantly, how they’ll impact your facility investment—requires understanding Europe’s unique approach to indoor sports infrastructure.

    Top European Indoor Sports Facility Markets

    When you’re considering expansion into European indoor sports facilities, you’ll find that the UK leads the market with its robust demand for year-round sports infrastructure.

    Germany follows closely, driven by strong government support for community sports programs and athletic development initiatives.

    Scandinavian countries represent premium markets where you’ll encounter sophisticated buyers willing to invest in high-quality indoor facilities. Norway, Sweden, and Denmark prioritize energy-efficient designs that withstand harsh winter conditions.

    The Netherlands rounds out the top tier, offering consistent demand for versatile sports facilities solutions.

    You’ll discover that Dutch buyers often prefer sports dome structures for football training and multi-sport applications.

    These four regions account for approximately 70% of European market activity, presenting your best opportunities for sustainable growth and partnership development.

    Leading Indoor Sports Facility Suppliers in Europe

    Two major suppliers dominate Europe’s indoor sports facility landscape, each bringing distinct strengths to the market.

    DUOL, based in Slovenia, has established itself as a leading force in the European air dome market, specializing in innovative membrane structures that serve diverse sporting applications.

    Meanwhile, Broadwell from the UK offers extensive solutions with strong engineering expertise and local market knowledge.

    You’ll find these suppliers understand Europe’s stringent regulatory environment, ensuring all facilities meet CE marking requirements and comply with EN standards.

    Their experience maneuvering through these complex regulations gives them significant advantages over international competitors.

    Both companies have adapted their offerings to European preferences, providing energy-efficient solutions that address the region’s sustainability concerns while delivering the robust performance standards European clients demand.

    Indoor Sports Facility Costs and Budget Planning

    Planning your indoor sports facility budget requires understanding that European costs typically run 10-20% higher than comparable US projects.

    You’ll need to account for CE marking requirements and EN standards compliance, which add regulatory expenses but guarantee quality and safety.

    For a standard 2,000 square meter (21,528 square foot) facility, expect costs between €400,000-€800,000.

    This wide range depends on your chosen features, location, and complexity.

    Northern European markets like Germany, UK, and Scandinavia command premium pricing due to stricter regulations and higher labor costs.

    You should factor in additional expenses beyond basic construction: site preparation, utilities, permits, and ongoing maintenance.

    Consider partnering with established suppliers like DUOL or Broadwell who understand European compliance requirements and can streamline your approval process.

    European Indoor Sports Facility Standards and Regulations

    Before you can break ground on your European indoor sports facility, you’ll need to maneuver through the continent’s extensive regulatory framework. CE marking stands as your primary compliance requirement, ensuring your structure meets essential health and safety standards across all EU member states.

    You’ll must adhere to EN standards, which cover everything from structural integrity to fire safety protocols. These European Norms dictate specific requirements for load-bearing capacity, ventilation systems, and emergency egress routes.

    Building codes vary by country, but most follow similar foundational principles established by the European Committee for Standardization.

    Planning permission processes typically take 3-6 months longer than US equivalents. You’ll encounter stricter environmental impact assessments and noise regulations, particularly in densely populated areas.

    Working with local regulatory consultants becomes essential for maneuvering through country-specific requirements efficiently.

    Standard Indoor Sports Facility Sizes and Specifications

    You’ll find that European indoor sports facilities typically range from 1,500 to 3,000 square meters, with the standard 2,000 sq m facility being most common across the region.

    Your facility must meet specific technical requirements including minimum ceiling heights of 7-12 meters depending on the sport, proper ventilation systems, and adequate lighting levels measured in lux.

    When planning your space, you’ll need to account for playing areas, spectator zones, changing rooms, and equipment storage while ensuring compliance with EN standards for each component.

    Common Facility Dimensions

    Since European sports facilities must accommodate multiple activities within standardized dimensions, understanding common facility sizes becomes essential for project planning. You’ll find that most European indoor facilities follow standardized measurements that guarantee multi-sport functionality while meeting EN standards compliance requirements.

    Facility Type Dimensions (m) Square Meters
    Basketball/Volleyball Court 28 x 15 420
    Tennis Court 36 x 18 648
    Multi-Purpose Hall 40 x 20 800
    Football Training Facility 60 x 40 2,400
    Athletics Training Center 80 x 40 3,200

    You’ll notice that typical facilities range from 420 to 3,200 square meters, with the standard 2,000 square meter facility costing €400K-€800K. These dimensions accommodate CE marking requirements and allow for proper clearance zones essential in European markets.

    Technical Specification Requirements

    When designing indoor sports facilities across Europe, technical specifications must align with stringent EN standards that govern everything from structural integrity to environmental controls.

    You’ll need CE marking compliance for all structural components, ensuring your facility meets European Conformity requirements.

    Your building systems must incorporate proper ventilation rates, typically 6-8 air changes per hour for active sports areas, while maintaining temperature control between 16-20°C.

    You’ll require specific lighting standards, with minimum 300 lux for recreational activities and up to 750 lux for competitive sports.

    Acoustic performance standards demand noise reduction coefficients between 0.85-0.95 for ceiling materials.

    Safety specifications include emergency exits every 30 meters maximum, fire-resistant materials rated Class A1 or A2, and impact-resistant glazing.

    Floor specifications must meet EN 14904 standards for sports surfaces, ensuring proper shock absorption and ball rebound characteristics.

    Space Planning Standards

    Proper dimensioning forms the foundation of any successful indoor sports facility, with European standards dictating minimum court sizes that often exceed international norms.

    You’ll need to allocate 40m x 20m for basketball courts, while volleyball requires 18m x 9m playing areas plus 3m safety zones. Tennis courts demand 36.57m x 18.29m including run-off space.

    When planning multi-sport facilities, you should consider ceiling heights of 7-12 meters depending on activities.

    Football pitches need 40m x 20m minimum for 5-a-side games. Your typical 2,000 square meter facility accommodates two basketball courts or four badminton courts simultaneously.

    European facilities emphasize accessibility compliance, requiring wheelchair-accessible entrances, changing rooms, and spectator areas.

    You’ll also need designated spaces for equipment storage, first aid stations, and administrative offices to meet EN standards certification requirements.

    Key Indoor Sports Facility Cost Factors vs US Markets

    Although European indoor sports facilities offer comparable quality to their American counterparts, you’ll find construction costs running 10-20% higher across most markets. This premium stems from stricter regulatory requirements, including mandatory CE marking and EN standards compliance that don’t exist in US construction.

    Material costs contribute greatly to the price difference. European steel and specialized sports flooring typically cost more due to transportation expenses and local manufacturing limitations.

    You’ll also encounter higher labor rates, particularly in Germany, Scandinavia, and the Netherlands where skilled construction workers command premium wages.

    Regulatory complexity adds another cost layer. You must navigate country-specific building codes, environmental regulations, and safety standards that vary across EU markets.

    Despite these factors, a typical 2,000 square meter facility ranges from €400K-€800K, representing solid value given Europe’s quality standards.

  • Michigan Sports Dome Market Analysis

    Michigan Sports Dome Market Analysis

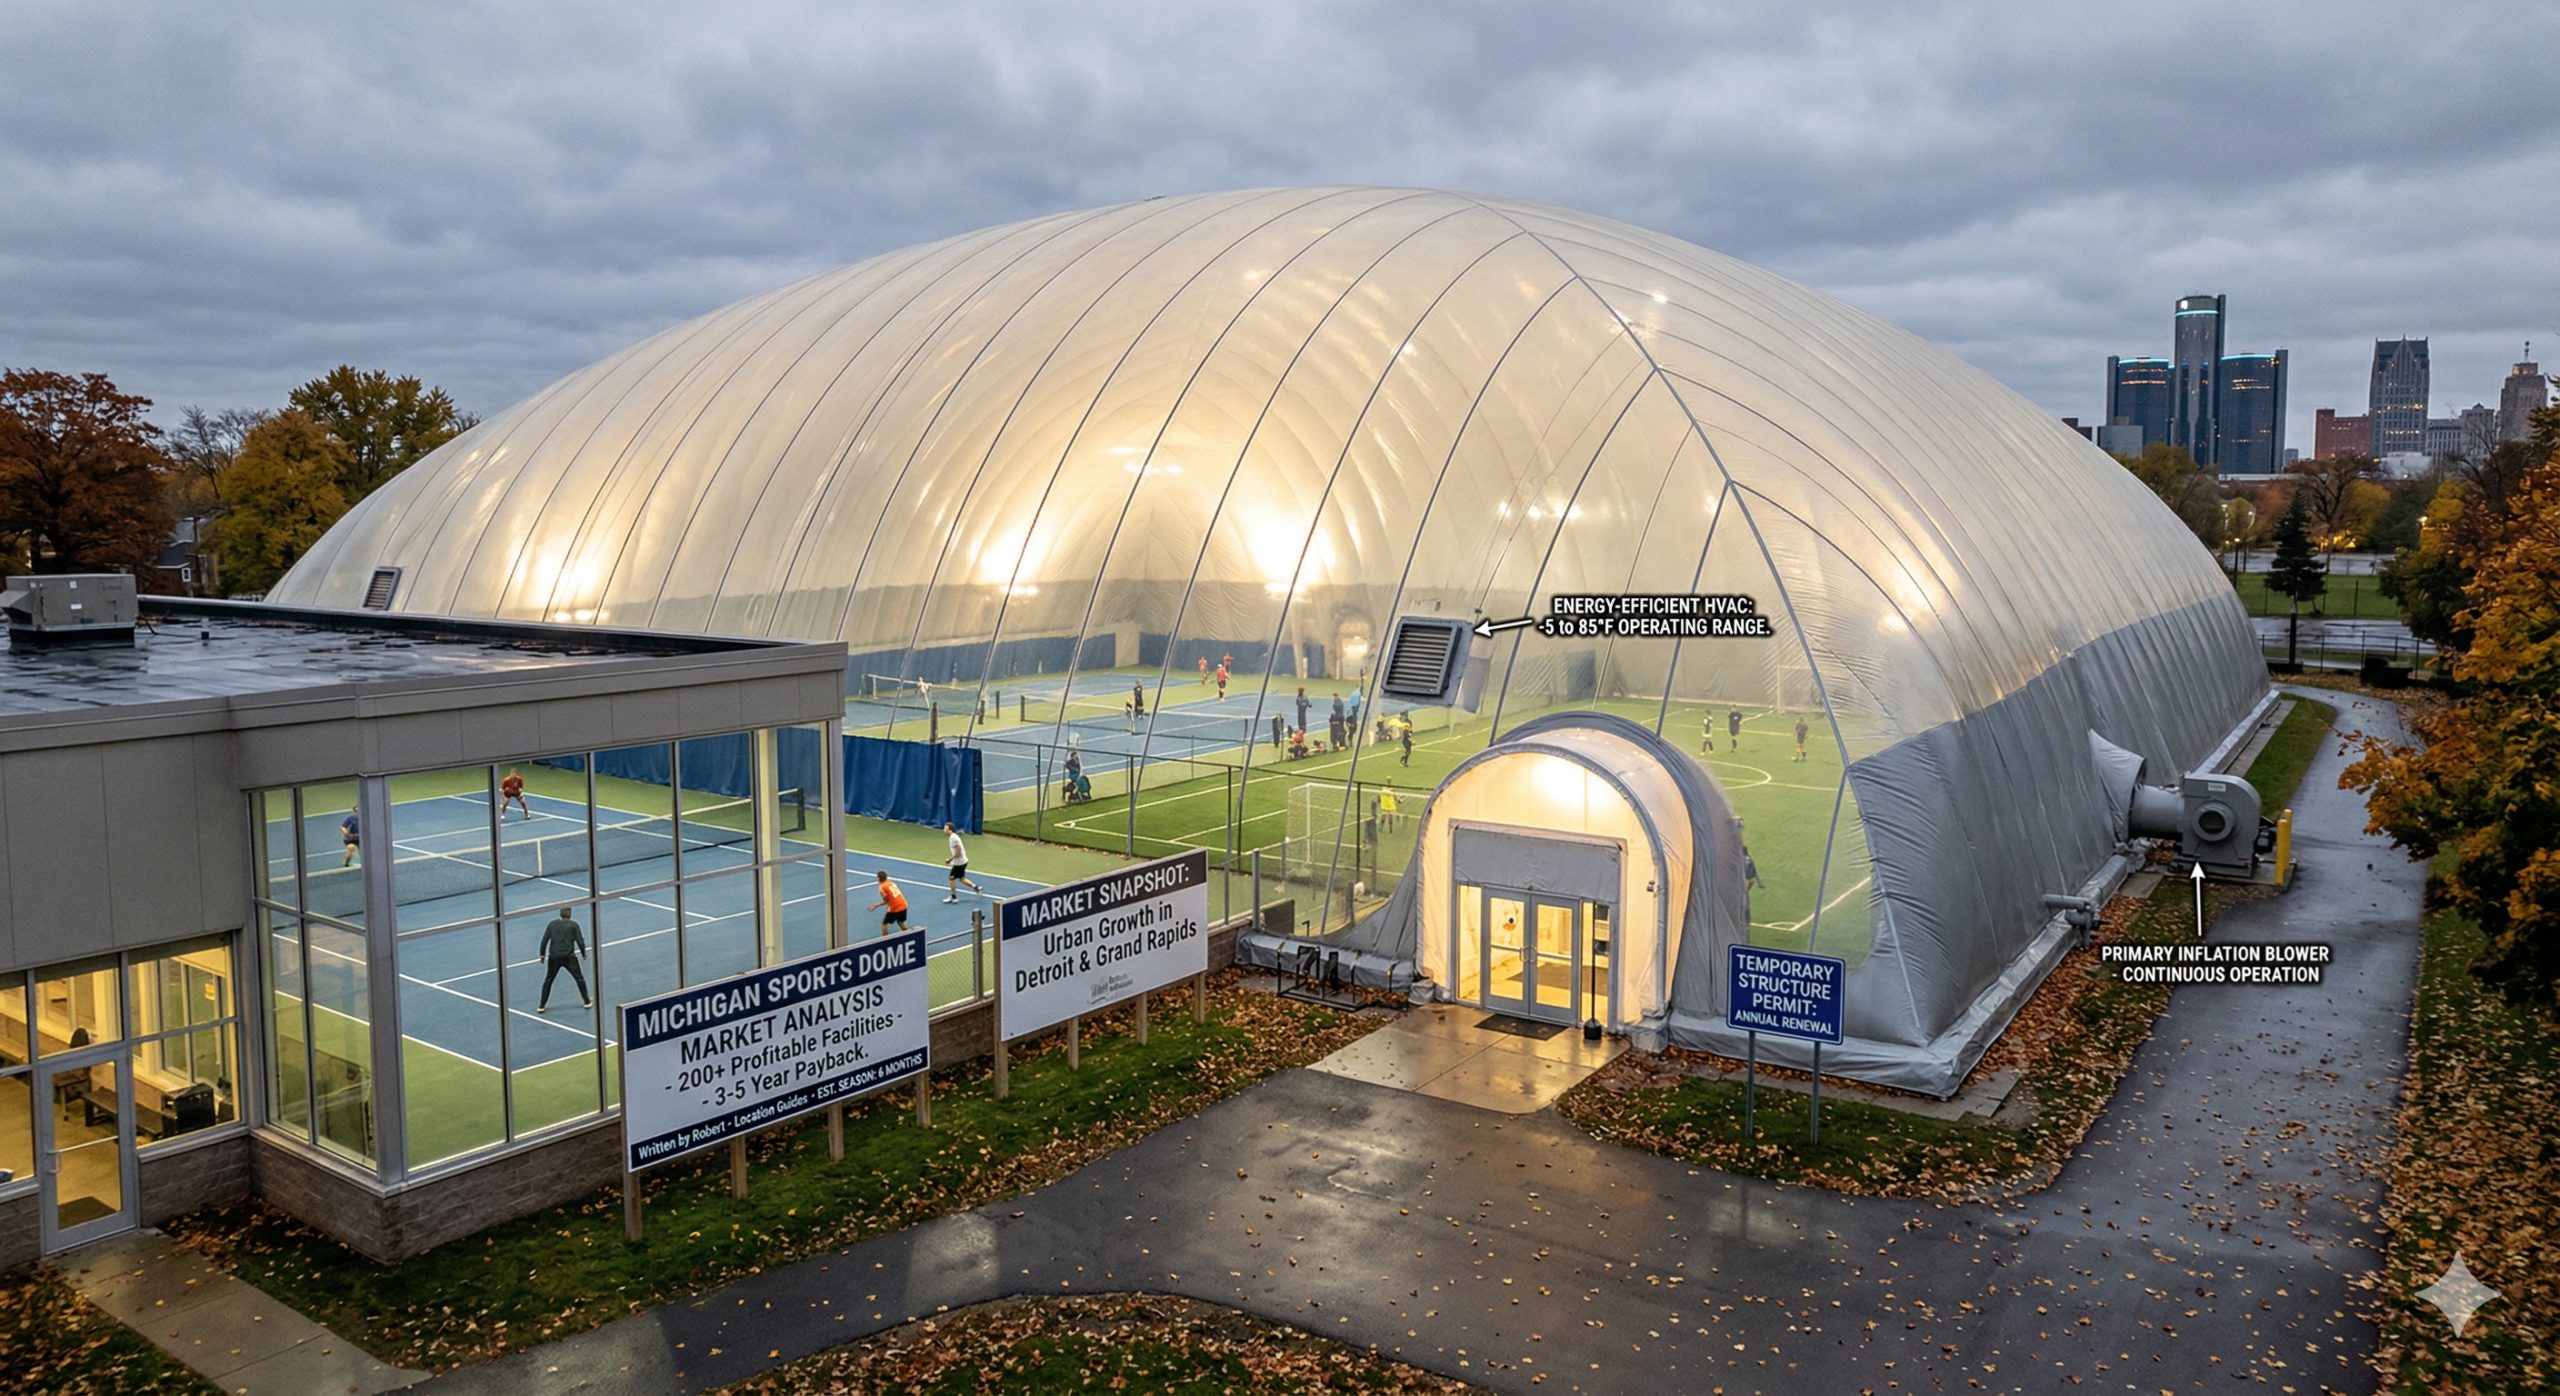
    You’ll find Michigan’s sports dome market offers compelling investment potential that most entrepreneurs overlook. With over 200 profitable facilities already operating across the state, there’s proven demand driving consistent returns in urban markets like Detroit and Grand Rapids. The numbers tell a story of six-month operational seasons generating substantial revenue, but the real opportunity lies in understanding why these investments deliver 3-5 year payback periods while others struggle to break even.

    Michigan Sports Dome Market: 200+ Facilities Drive Strong ROI

    Michigan’s sports dome landscape showcases remarkable growth potential, with over 200 facilities already establishing profitable operations across the state.

    You’ll find these structures dominating markets in Detroit and Grand Rapids, where demand for year-round sports facilities drives consistent revenue streams.

    When you’re considering a Michigan air dome investment, you’re looking at proven financial returns. A typical 20,000 square foot facility generates ROI within 3-5 years, supported by the state’s six-month dome season that extends from late fall through early spring.

    You’ll benefit from strong demand in tennis and soccer markets, where athletes need climate-controlled environments during Michigan’s harsh winters.

    Most municipalities classify these as temporary structures, streamlining your permitting process and reducing regulatory barriers for faster market entry.

    Why Michigan Dome Investments Return 3-5 Year Payback?

    Three key factors drive Michigan’s exceptional sports dome ROI performance, creating investment returns that consistently outpace national averages.

    First, you’ll benefit from Michigan’s extended six-month dome season, maximizing revenue potential when outdoor facilities can’t operate. Your Michigan sports facility will generate consistent income from November through April, capturing peak demand periods.

    Second, strong market fundamentals support profitability. With 200+ existing facilities and concentrated demand in Detroit and Grand Rapids, you’re entering a proven market where tennis and soccer programs drive year-round bookings.

    Third, favorable municipal regulations work in your favor. Most Michigan jurisdictions classify domes as temporary structures, reducing permitting costs and construction timelines.

    These combined advantages create the foundation for your 3-5 year payback period on 20,000 square foot facilities.

    Michigan’s 6-Month Dome Season Operating Requirements

    Operating successfully during Michigan’s extended dome season requires specific preparation for challenging temperature swings and energy management.

    You’ll need proper insulation designed for -5 to 85°F (-21 to 29°C) temperature variations throughout your six-month operational period. Your facility must maintain comfortable interior conditions while minimizing heating costs during harsh winter months.

    Energy-efficient HVAC systems become essential for profitability in Michigan indoor sports facilities.

    You’ll want to install programmable thermostats and consider radiant heating options that work effectively in large dome spaces. Proper ventilation prevents condensation issues that can damage equipment and create unsafe playing conditions.

    Schedule maintenance during off-season months to avoid disruptions.

    You’ll maximize revenue by planning tournaments and leagues during peak demand periods, typically October through March when outdoor alternatives aren’t available.

    Municipal Permits: Why Most Michigan Domes Qualify As Temporary?

    Because air-supported structures don’t require permanent foundations, most Michigan municipalities classify sports dome Michigan installations as temporary rather than permanent buildings. This classification notably simplifies your permitting process and reduces regulatory hurdles.

    You’ll typically need basic temporary structure permits instead of complex building permits required for permanent construction. Most Michigan cities allow temporary installations for extended periods, often renewable annually. This means you won’t face the extensive architectural reviews, structural engineering requirements, or zoning complications associated with permanent buildings.

    The temporary classification also offers flexibility for relocation if needed. You’ll save considerable time and money on permits, making your sports dome Michigan project more cost-effective.

    However, you should verify specific municipal requirements, as some larger cities may have stricter regulations for commercial temporary structures.

  • Wisconsin Indoor Sports Facilities Guide

    Wisconsin Indoor Sports Facilities Guide

    You’re facing Wisconsin’s brutal winters where outdoor sports become impossible for months, and you need a solution that won’t break your budget or crumble under heavy snow loads. Air domes offer year-round functionality, but choosing the wrong specifications or ignoring local building codes could cost you thousands in repairs or legal headaches. Before you commit to any indoor sports facility, there’s critical information about snow load requirements and heating systems that could make or break your investment.

    Why Air Domes Work for Wisconsin’s Extreme Weather?

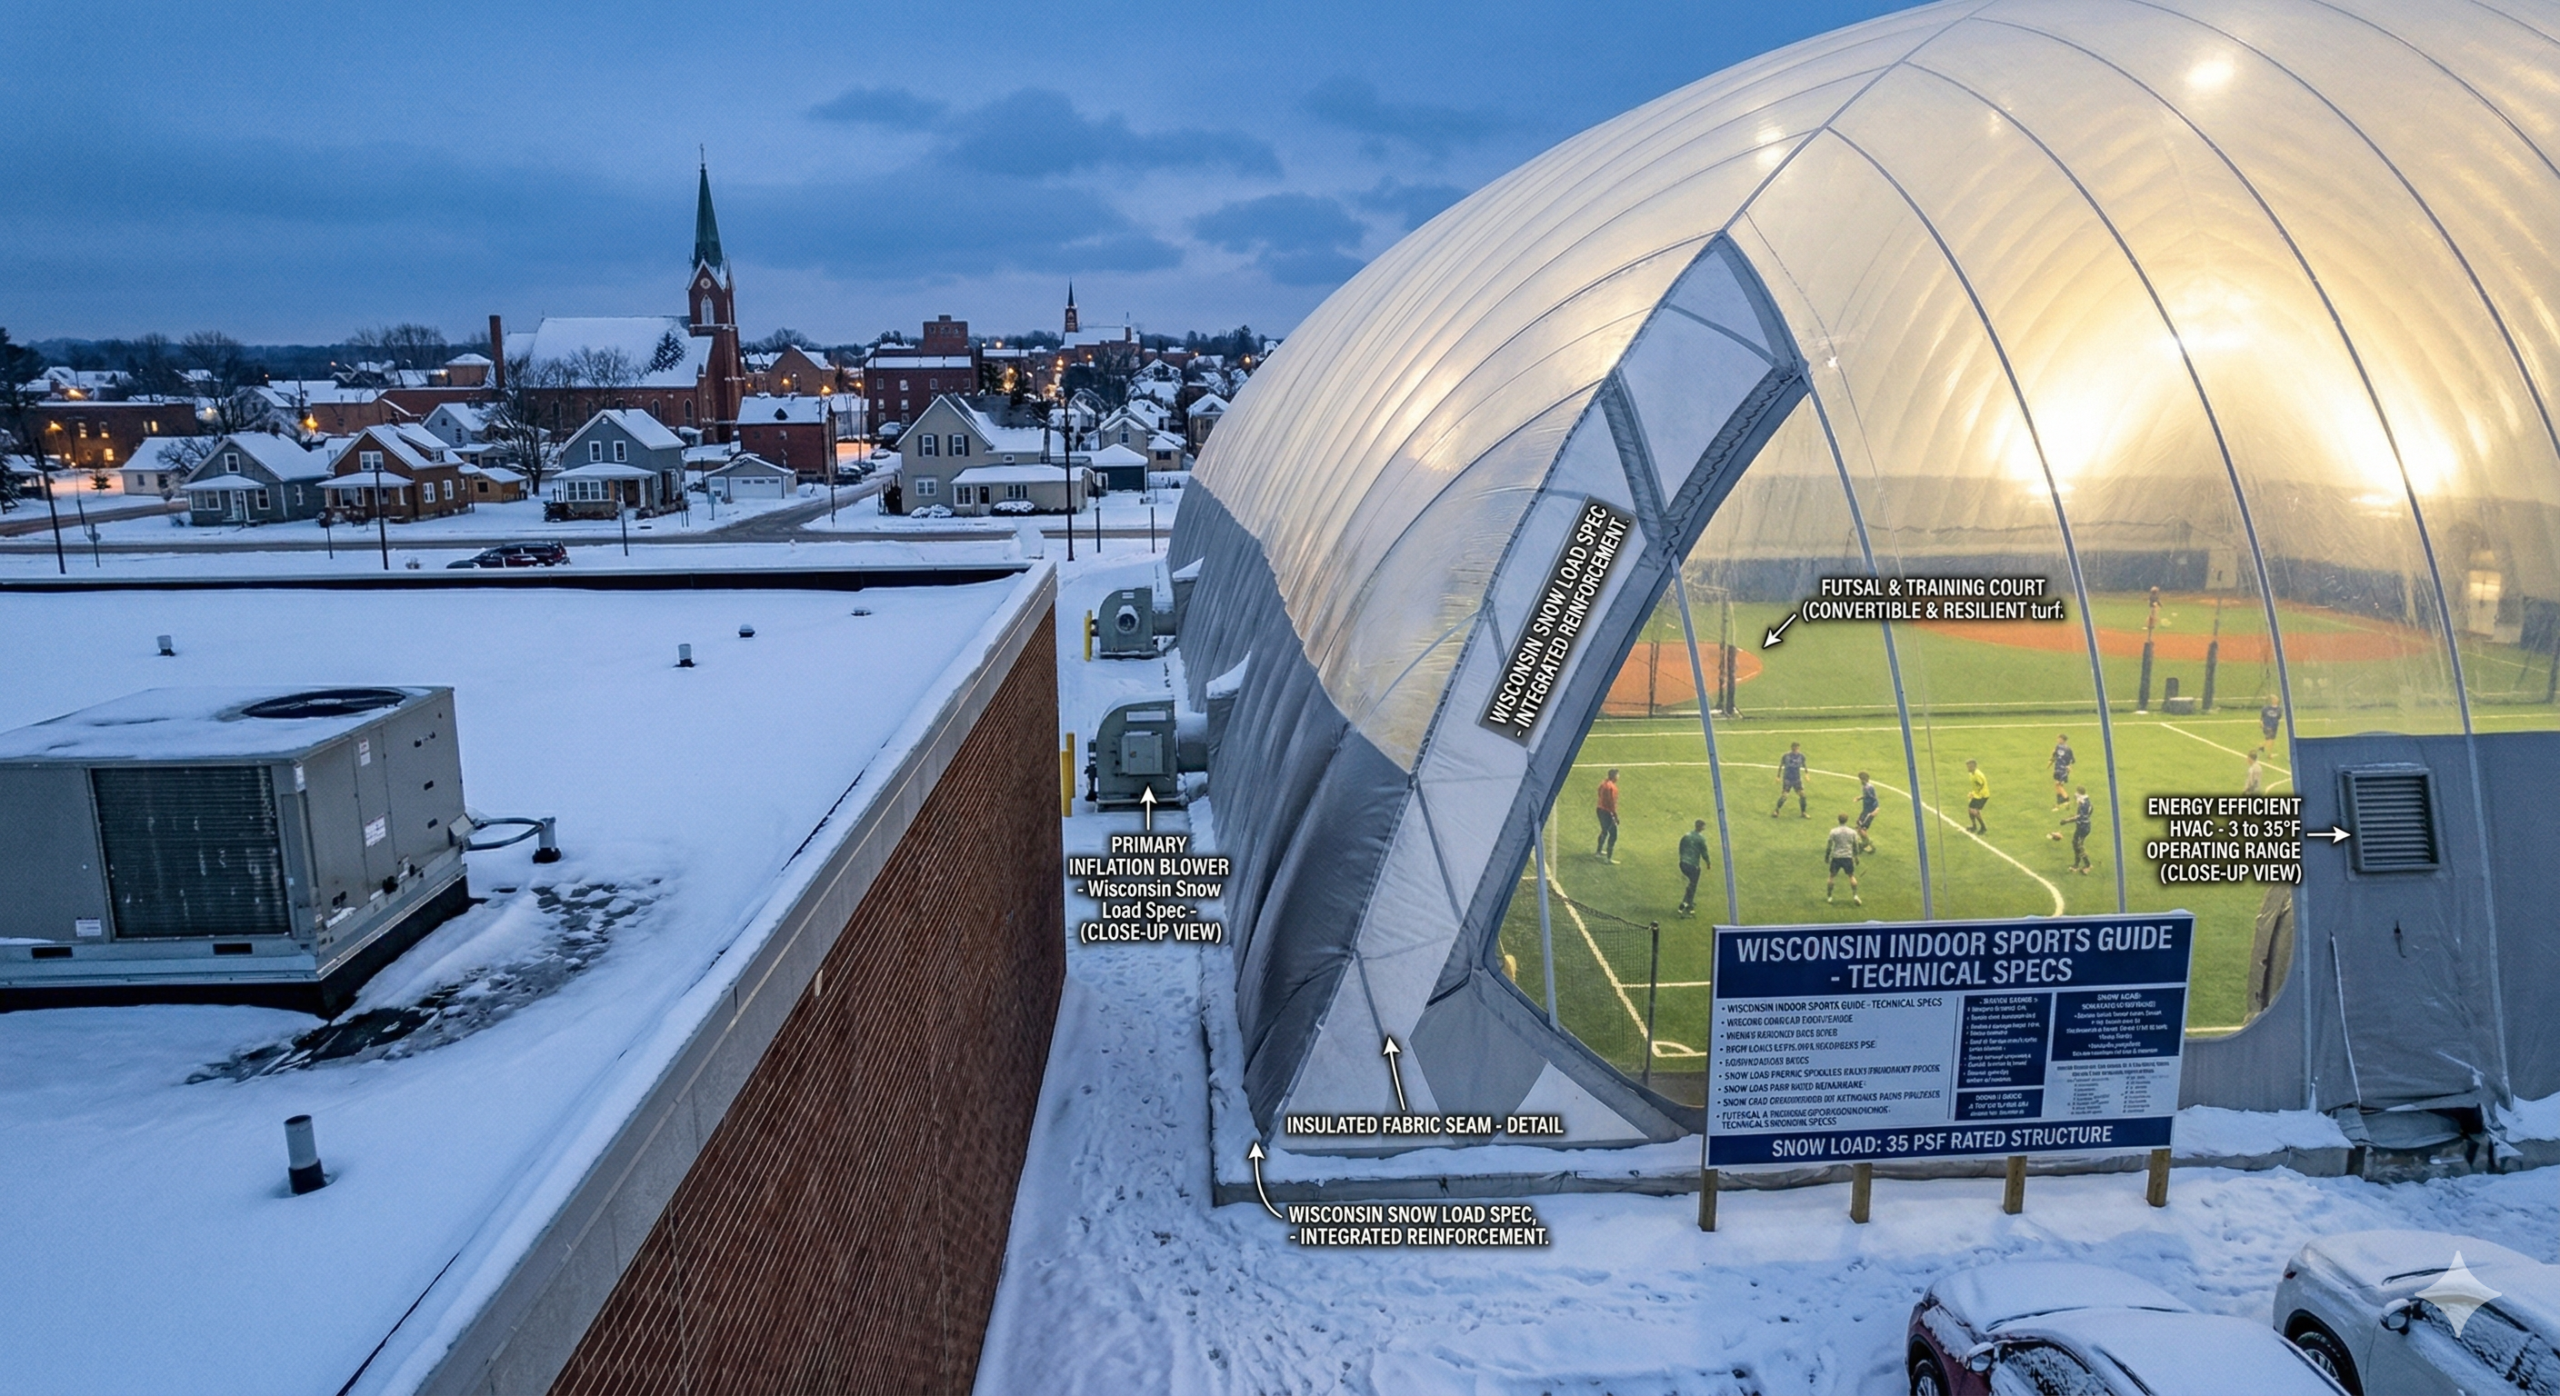
    Wisconsin’s brutal winters and sweltering summers create unique challenges for indoor sports facilities, but air domes excel in these extreme conditions. Your Wisconsin air dome maintains structural integrity through temperature swings from -10°F to 85°F because the pressurized air system adapts automatically to weather changes.

    The insulated membrane handles Wisconsin’s minimum 35 PSF snow loads while remaining flexible enough to prevent ice damage that destroys rigid structures. You’ll find Wisconsin indoor sports facilities using air domes stay operational year-round without expensive heating systems breaking down.

    Unlike traditional buildings, your Wisconsin tennis dome won’t suffer from foundation frost heaving or roof collapse from sudden snow accumulation. The dome’s air pressure distributes weight evenly, making it ideal for Wisconsin’s unpredictable weather patterns and freeze-thaw cycles.

    Tennis vs Soccer vs Baseball: Space and Design Requirements

    You’ll need to contemplate drastically different space requirements when choosing between tennis, soccer, and baseball air domes.

    Tennis courts require the least square footage but need specific dimensions of 78 by 36 feet, while soccer fields demand much larger areas up to 120 by 80 yards.

    Baseball facilities present unique challenges with asymmetrical layouts and varying height requirements from the infield to outfield areas.

    Court Dimensions and Layout

    Three distinct sports require dramatically different spatial considerations when planning your Wisconsin sports facility.

    Tennis courts demand precise 78-foot by 36-foot playing surfaces with additional 12-foot clearances on all sides, totaling approximately 7,200 square feet per court. You’ll need minimum 20-foot ceiling heights to accommodate high lobs and serves.

    Soccer facilities require massive open spaces – typically 200 by 85 feet for full-size fields, though you can accommodate smaller formats.

    Baseball presents the most complex layout challenges, needing 90-foot baselines and substantial foul territory. You’ll want at least 320 feet down the foul lines and 400 feet to center field for regulation play.

    Consider multi-use designs with removable nets or convertible spaces to maximize your investment and accommodate seasonal demand fluctuations across different sports.

    Facility Height Requirements

    While court dimensions establish your facility’s footprint, ceiling height requirements create equally critical design constraints that vary dramatically between sports.

    Tennis facilities need minimum 36-foot clearance above courts, with 40 feet preferred for competitive play. You’ll want additional height for lighting fixtures and structural elements.

    Soccer demands much greater vertical space – indoor fields require 50-65 feet minimum to accommodate high kicks and crosses. Professional facilities often exceed 70 feet for ideal play conditions.

    Baseball presents the most challenging height requirements, needing 85-120 feet depending on field size and intended use.

    Youth facilities can operate with lower clearances, but adult leagues require substantial vertical space for pop flies and batting practice.

    These height differences greatly impact your air dome selection, structural engineering requirements, and overall construction costs in Wisconsin’s demanding climate conditions.

    Understanding Wisconsin’s 35 PSF Snow Load Requirements

    Snow loads present a critical structural consideration when planning indoor sports facilities in Wisconsin. You’ll need to meet the state’s minimum requirement of 35 PSF (1.67 kPa) snow load capacity for your facility’s design.

    This requirement isn’t arbitrary—Wisconsin’s harsh winters can dump substantial snow accumulations that create dangerous structural stress. Your air dome or indoor facility must withstand this weight without compromising safety or performance.

    You’ll find that snow load requirements can vary by municipality, so check local building codes before finalizing plans. Some areas might require higher ratings based on historical weather patterns or elevation.

    Don’t underestimate this specification when budgeting. Meeting snow load requirements affects material costs, structural engineering fees, and installation complexity.

    Your facility’s long-term durability depends on proper snow load compliance from day one.

    Heating Systems That Handle -10°F Winter Temperatures

    You’ll need a robust heating system that can maintain comfortable temperatures when Wisconsin’s winter plunges to -10°F or below.

    Three proven options excel in indoor sports facilities: radiant floor heating systems that warm from the ground up, high-efficiency gas furnaces that deliver consistent heat throughout large spaces, and modern heat pump technology that’s increasingly effective in cold climates.

    Each system offers distinct advantages for different facility sizes and budgets.

    Radiant Floor Heating Systems

    Since Wisconsin’s brutal winters can plummet to -10°F, radiant floor heating systems offer an ideal solution for maintaining consistent temperatures in your indoor sports facility.

    You’ll benefit from even heat distribution across the entire floor surface, eliminating cold spots that can affect athletic performance.

    These systems work by circulating heated water through tubes embedded in concrete slabs or installing electric heating elements beneath flooring materials.

    You can expect 20-30% energy savings compared to forced-air systems because radiant heating warms objects directly rather than heating air that rises to the ceiling.

    Installation costs range from $6-20 per square foot depending on system type.

    Electric systems cost less upfront but have higher operating expenses, while hydronic systems require larger initial investments but deliver superior long-term efficiency for large facilities.

    High-Efficiency Gas Furnaces

    When temperatures drop to Wisconsin’s bone-chilling -10°F lows, high-efficiency gas furnaces provide the robust heating power your indoor sports facility demands.

    You’ll need units with 90% AFUE ratings or higher to manage extreme temperature swings from -10°F to 85°F effectively. These systems deliver consistent airflow throughout large spaces like tennis courts and soccer fields.

    Install multiple zones with programmable thermostats to control different areas independently. You’ll save considerably on operating costs compared to electric heating, especially during peak winter months.

    Choose furnaces with modulating burners that adjust output based on demand rather than cycling on-and-off continuously.

    Proper sizing matters – oversized units waste energy while undersized systems can’t maintain comfortable temperatures during Wisconsin’s harshest weather.

    Professional load calculations guarantee peak performance for your facility’s specific requirements.

    Heat Pump Technology

    Although traditional heat pumps struggled in Wisconsin’s frigid winters, modern cold-climate heat pumps now operate efficiently down to -13°F and continue providing heat even at -25°F.

    You’ll find these systems particularly effective for air domes since they provide both heating and cooling capabilities your facility needs year-round.

    Cold-climate heat pumps use variable-speed compressors and enhanced vapor injection technology to maintain performance in extreme temperatures.

    You’ll achieve 200-300% efficiency ratings even during Wisconsin’s harshest winter conditions, greatly reducing operating costs compared to traditional electric heating.

    Installation costs range from $15,000-$35,000 depending on your facility size, but you’ll recover this investment through lower utility bills.

    Many Wisconsin municipalities offer rebates for heat pump installations, and you’ll qualify for federal tax credits when upgrading your sports facility’s heating system.

    Air Dome Costs: From $120K Single Courts to Multi-Sport Complexes

    Air dome costs in Wisconsin start at $120,000 for a single tennis court facility covering 9,360 square feet, but you’ll find prices escalate quickly as you add courts or expand into multi-sport configurations.

    The $120K-$200K range for single courts reflects variations in insulation quality, structural specifications, and climate control systems needed for Wisconsin’s harsh winters.

    Multi-sport complexes commanding premium prices often feature multiple courts, advanced heating systems, and enhanced structural engineering to handle the state’s 35 PSF snow loads.

    You’re looking at considerably higher investments when designing facilities for soccer, baseball, or combined sports under one dome.

    Equipment quality, installation complexity, and local building codes across Wisconsin municipalities all impact your final costs, making detailed quotes essential for accurate budgeting.

    Before you break ground on your Wisconsin air dome project, you’ll need to navigate a complex web of building codes that vary considerably from one municipality to another.

    While state requirements mandate structures handle 35 PSF snow loads and extreme temperature swings from -10°F to 85°F, local jurisdictions add their own layers of regulations.

    Start by contacting your municipal building department early in the planning process. You’ll typically need permits for foundation work, electrical systems, and the air dome structure itself.

    Many Wisconsin municipalities require engineered drawings that account for wind loads, soil conditions, and emergency egress requirements.

    Don’t overlook zoning restrictions that might limit building height, setbacks, or usage types.

    Some communities classify air domes as temporary structures, while others treat them as permanent installations, dramatically affecting permit requirements and costs.

    Site Selection and Installation Timeline for Your Air Dome

    Once you’ve secured your permits, selecting the right site becomes your next critical decision. You’ll need level ground with proper drainage, utility access, and adequate space for your dome plus safety clearances. Consider wind exposure, as Wisconsin’s weather patterns affect structural loads.

    Installation Phase Duration Key Activities
    Site Preparation 2-3 weeks Excavation, foundation, utilities
    Dome Delivery 1-2 days Equipment transport, staging
    Inflation & Setup 3-5 days Membrane installation, pressurization

    Installation typically takes 4-6 weeks total. Summer installations work best, avoiding Wisconsin’s harsh winters. You’ll coordinate with contractors for electrical, heating systems, and final inspections. Plan your timeline around sports seasons—many facilities target spring installation for fall opening.

  • Batting Cage Air Dome Setup

    Batting Cage Air Dome Setup

    You’re looking at a substantial investment when you consider installing a batting cage air dome, but the numbers might surprise you. While the upfront costs seem intimidating—ranging from $150,000 to $400,000 depending on your specifications—the real challenge isn’t just the initial price tag. It’s understanding all the hidden expenses that can derail your project before you even break ground, and knowing which corners you can cut without compromising your facility’s success.

    How Much Does A Batting Cage Air Dome Really Cost?

    When you’re planning a batting cage facility, the air dome structure represents your largest upfront investment. A batting cage air dome for 4-6 cages typically costs between $300,000-$600,000 installed.

    You’ll need a minimum facility size of 60′ x 100′ (6,000 square feet) with 25-foot height clearance to accommodate multiple cages safely.

    Individual cages measure 12′ wide x 14′ high x 70′ long, requiring precise planning for your hitting facility dome layout. The price variation depends on factors like dome materials, foundation requirements, ventilation systems, and local installation costs.

    While this represents significant capital, indoor batting cages generate year-round revenue unlike outdoor facilities.

    You’re investing in weather-independent operation, extended seasons, and consistent training conditions that attract serious players willing to pay premium rates.

    Space Requirements For Your Batting Cage Dome Facility

    Planning your batting cage dome facility starts with understanding the minimum space requirements that’ll determine your entire operation’s success. Each individual cage within your baseball cage dome measures 12 feet wide, 14 feet high, and 70 feet long. However, you’ll need considerably more space for a complete facility.

    For a 4-6 cage operation, you’re looking at these requirements:

    Specification Measurement (US) Measurement (Metric)
    Facility Width 60 feet 18.3 meters
    Facility Length 100 feet 30.5 meters
    Total Floor Space 6,000 sq ft 557 sq meters
    Structure Height 25 feet 7.6 meters

    These dimensions guarantee proper spacing between cages, walkways for customers, and adequate overhead clearance for high fly balls during practice sessions.

    Site Prep And Foundation Work You’ll Need

    You’ll need to prepare a level foundation that can support your batting cage dome’s anchor points and withstand constant ball impacts.

    Proper concrete anchoring requires precise measurements to match your dome’s specifications, while inadequate installation can lead to structural failure.

    Don’t overlook drainage planning – water pooling around your foundation will create long-term problems that are expensive to fix later.

    Ground Leveling Requirements

    Before you can install your batting cage air dome, you’ll need a properly prepared foundation that meets strict leveling requirements. Your site must be level within 1-2 inches across the entire footprint to guarantee proper dome anchoring and structural integrity.

    You’ll need to grade the 60′ x 100′ area, removing any slopes, bumps, or depressions. Use a laser level or transit to verify elevation consistency throughout the space.

    If your site has significant grade changes, you’ll require cut-and-fill work or retaining walls.

    The foundation should have proper drainage with a slight slope away from the structure’s perimeter. Install French drains if water pooling is a concern.

    Most air dome manufacturers require a concrete perimeter footing that’s perfectly level for anchor point installation.

    Concrete Anchor Installation

    The concrete anchor system forms the critical connection point between your air dome structure and the foundation, requiring precise installation to handle the constant air pressure loads.

    You’ll need to install heavy-duty concrete anchors every 4-6 feet around the dome’s perimeter, typically using wedge anchors or epoxy-set threaded rods rated for minimum 3,000-pound pull-out strength.

    Mark anchor locations precisely using the manufacturer’s template, then drill holes to exact specifications – usually 5/8″ diameter by 6″ deep.

    Clean debris from each hole thoroughly before inserting anchors. You’ll want to embed anchors flush with concrete surface, ensuring proper thread engagement for the dome’s base rail system.

    Test each anchor’s holding power before proceeding with dome installation to prevent structural failure.

    Drainage System Planning

    Proper drainage planning prevents water accumulation that can undermine your batting cage foundation and create structural instability for the air dome system.

    You’ll need to grade your 6,000 square foot site with a minimum 2% slope away from the structure’s perimeter. Install French drains around the foundation’s exterior, connecting to your local storm water system or designated drainage area.

    Position catch basins at low points to collect runoff from the 60′ x 100′ footprint.

    Your contractor should excavate drainage trenches 18-24 inches deep, filled with graded gravel and perforated pipe.

    Don’t forget interior floor drains for cleaning and maintenance water removal.

    Test your system thoroughly before dome installation, as retrofitting drainage under an inflated structure becomes extremely difficult and expensive.

    Air Dome Installation Timeline And What To Expect

    When planning your batting cage air dome project, you’ll typically face a 12-16 week installation timeline from contract signing to completion.

    The first 4-6 weeks involve permit acquisition, site surveys, and foundation preparation. Your contractor will excavate, pour concrete footings, and install anchor points during this phase.

    Weeks 7-10 focus on dome fabrication and delivery. The manufacturer custom-builds your structure while utility connections are finalized on-site.

    You’ll see electrical conduit installation, lighting preparation, and HVAC rough-in during this period.

    Final installation occurs in weeks 11-16. Crews will inflate the dome, secure anchoring systems, and complete interior buildout including batting cages, netting, and safety equipment.

    Weather delays can extend timelines by 2-4 weeks, so plan accordingly for seasonal conditions.

    Climate Control Systems That Keep Players Comfortable

    Once your batting cage air dome is installed and operational, maintaining ideal temperature and air quality becomes your next priority.

    You’ll need an HVAC system that handles the dome’s large volume efficiently while managing moisture from player activity.

    Install heating units rated for your dome’s square footage, typically requiring 40-60 BTU per square foot. For a 6,000 sq ft facility, you’ll need 240,000-360,000 BTU capacity. Gas-fired units offer the most cost-effective heating solution.

    Ventilation systems should provide 4-6 air changes per hour to prevent condensation and maintain air quality. Position intake and exhaust fans strategically to create proper airflow patterns throughout all batting cages.

    Consider zone controls for different areas, allowing you to adjust temperatures based on usage. This reduces energy costs while ensuring player comfort year-round.

    Financing Your Batting Cage Air Dome Investment

    Although batting cage air dome projects require substantial upfront investment, you’ll find several financing options that make the $300K-$600K expense manageable. Equipment financing typically offers 7-10 year terms with competitive rates, while SBA loans provide longer repayment periods for established businesses. Many manufacturers offer lease-to-own programs that reduce initial capital requirements.

    Financing Option Key Benefits
    Equipment Loans 10-15% down, 7-10 year terms
    SBA Financing Lower rates, longer terms
    Manufacturer Leasing Minimal upfront costs
    Revenue-Based Funding Payments tied to income

    Consider your facility’s projected revenue when choosing financing. Most successful batting cage operations generate $150K-$400K annually, making monthly payments of $3K-$7K feasible. You’ll want to secure pre-approval before finalizing your dome specifications and installation timeline.

    Annual Maintenance Costs And Upkeep Requirements

    While your batting cage air dome represents a considerable investment, maintaining it properly guarantees decades of reliable operation with relatively modest annual expenses.

    You’ll spend approximately $8,000-$15,000 yearly on essential maintenance tasks. Your primary costs include fabric repairs ($2,000-$4,000), blower system servicing ($1,500-$3,000), and electrical maintenance ($1,000-$2,000).

    Winter preparations require additional weatherproofing treatments costing $500-$1,500 annually.

    Regular cleaning extends your dome’s lifespan considerably. You’ll need professional cleaning twice yearly ($800-$1,200 each session) to remove dirt, mold, and debris.

    Inspect anchor points quarterly and tighten hardware as needed. Monitor fabric tension monthly to prevent stress tears. Replace worn zippers immediately to maintain proper air pressure.

    Keep detailed maintenance records for warranty purposes and schedule professional inspections annually to identify potential issues before they become expensive repairs.

  • Winter Sports Domes Cold Climate

    Winter Sports Domes Cold Climate

    You’re facing a critical decision that could determine whether your winter sports facility thrives or struggles through harsh cold seasons. While traditional buildings demand enormous heating budgets and lengthy construction timelines, modern air domes engineered for extreme climates are reshaping how communities approach winter athletics. The temperature differential between success and failure often comes down to understanding one essential factor that most facility planners completely overlook when evaluating their options.

    Why Cold Climate Air Domes Beat Traditional Winter Sports Buildings

    When winter temperatures plummet to -20°F, you’ll discover that cold climate air dome outperforms traditional winter sports buildings in nearly every metric that matters.

    Your insulated sports dome operates efficiently from -20 to 90°F with double-layer fabric construction that handles snow loads up to 50 PSF. You’ll save considerably on construction costs—no foundations, steel frames, or lengthy permits required. Installation takes weeks, not years.

    Your northern climate sports facility maintains consistent interior temperatures while traditional buildings struggle with heat loss through concrete and steel.

    Emergency backup systems guarantee you’re never caught off-guard during blizzards. The vestibule entry system retains heat effectively, reducing operating costs.

    In Minnesota, you’ll spend $2,500-$3,500 monthly heating 20,000 square feet—markedly less than comparable permanent structures.

    Heating Costs and Energy Efficiency in Extreme Cold Conditions

    You’ll face significant heating costs when operating air domes in extreme cold, with typical Minnesota facilities spending $2,500-$3,500 monthly for 20,000 square feet during winter months.

    Your energy expenses directly impact profitability, making it essential to understand both the operational cost breakdown and proven strategies for reducing consumption.

    Smart energy management can cut your heating bills by 20-30% while maintaining ideal playing conditions throughout the coldest months.

    Operating Cost Analysis

    Operating costs for winter sports domes in extreme cold conditions represent a significant portion of your total facility expenses, with heating dominating the budget during harsh winter months.

    Your winter sports dome in Minnesota will typically cost $2,500-$3,500 monthly for a 20,000 square foot facility during peak winter operations.

    Understanding these financial realities helps you prepare for three major cost drivers:

    1. Heating system operation – Running continuously at -20°F temperatures doubles your energy consumption.
    2. Emergency backup systems – Redundant blowers and heating units increase operational expenses by 15-25%.
    3. Insulation maintenance – Double-layer fabric requires regular inspection and replacement, adding $500-$800 annually.

    Your vestibule entry system reduces heat loss but adds structural complexity.

    Snow load management and consistent temperature control make cold-climate operations substantially more expensive than moderate climate facilities.

    Energy Saving Strategies

    Since energy costs can consume up to 70% of your winter sports dome’s operating budget, implementing strategic efficiency measures becomes critical for financial sustainability.

    You’ll maximize heat retention by maintaining proper fabric tension and sealing air leaks around entry points and equipment penetrations.

    Installing programmable thermostats with zone controls lets you reduce heating in unused areas during off-peak hours.

    Consider upgrading to high-efficiency heating units with variable-speed fans that adjust output based on actual demand rather than running at full capacity continuously.

    Adding thermal curtains or barriers around entrance vestibules prevents heat loss during frequent door openings.

    Regular maintenance of your heating system, including filter changes and ductwork cleaning, guarantees peak performance.

    These combined strategies can reduce winter operating costs by 25-40%.

    Snow Load Capacity and Winter Weather Performance Standards

    When winter storms dump heavy snow on your air dome, the structure’s ability to handle substantial loads becomes critical for safe operation.

    You’ll need a dome rated for 35-50 PSF snow loads to withstand Minnesota’s harshest conditions. The double-layer insulated fabric provides structural integrity while maintaining ideal pressure differentials.

    Your dome’s performance standards must include:

    1. Emergency backup blower systems – Because power failures during blizzards can’t shut down your facility
    2. Vestibule entry design – Protecting your investment from heat loss that costs thousands monthly
    3. Temperature resilience from -20 to 90°F – Ensuring year-round functionality regardless of weather extremes

    Proper engineering prevents catastrophic collapse, protects athletes, and maintains the $2,500-$3,500 monthly operating investment you’re making in Minnesota’s challenging winter climate.

    Emergency Systems and Temperature Range Capabilities

    During catastrophic weather events, your air dome’s emergency backup blower system becomes the difference between continued operations and potential structural failure. These redundant systems automatically activate when primary blowers fail, maintaining critical air pressure within seconds. You’ll need systems rated for your dome’s cubic footage with 24-hour fuel capacity minimum.

    Temperature capabilities determine your facility’s year-round viability. Quality cold climate domes operate from -20°F to 90°F (-29°C to 32°C), handling Minnesota’s extreme temperature swings effectively.

    System Component Specification
    Backup Blower Response 15-30 seconds
    Fuel Reserve Capacity 24-48 hours
    Operating Temperature Range -20°F to 90°F
    Emergency Generator Size 125% of total load
    Backup Communication Cellular/satellite monitoring

    Your emergency preparedness directly impacts insurance rates and operational continuity during severe weather events.

    Site Preparation and Installation in Sub-Zero Conditions

    Although winter installation presents unique challenges, proper site preparation guarantees your air dome’s structural integrity and longevity in harsh climates.

    You’ll need to excavate and level your foundation before ground freezing occurs, making certain proper drainage systems are installed below the frost line.

    Critical preparation steps include:

    1. Foundation heating cables – Install these beneath your perimeter to prevent frost heaving that could damage your dome’s anchoring system.
    2. Insulated utility trenches – Protect electrical and heating lines from freezing, preventing costly repairs and system failures.
    3. Emergency access routes – Clear multiple pathways for maintenance crews during blizzards when your dome needs immediate attention.

    Your installation crew must work in temperatures as low as -20°F, so schedule accordingly.

    Pre-warming materials and using cold-weather adhesives makes certain proper sealing of your double-layer insulated fabric system.

    Operating Cost Breakdown and Return on Investment Analysis

    After completing your winter sports dome installation, you’ll face ongoing operational expenses that directly impact your facility’s profitability.

    Heating costs dominate winter operations, ranging from $2,500-$3,500 monthly for a 20,000 square foot facility in Minnesota’s harsh climate. Your double-layer insulated fabric and high-efficiency heating systems help minimize these expenses, but you’ll still need budgeting for electricity, maintenance, and backup blower operations.

    Calculate your ROI by projecting revenue from membership fees, hourly rentals, and programs against these operational costs.

    Most facilities break even within 18-24 months when properly marketed. You’ll maximize profitability by maintaining consistent indoor temperatures, scheduling regular equipment maintenance, and utilizing your dome’s extended season capabilities to generate year-round income streams that traditional outdoor facilities can’t match.

  • Swimming Pool Air Dome Cover

    Swimming Pool Air Dome Cover

    You’ve probably wondered how some pool owners manage to swim comfortably even during harsh winters while keeping their energy bills surprisingly low. The secret lies in pool air dome covers—inflatable structures that create a controlled environment over your existing pool. These aren’t just oversized bubbles; they’re engineered systems that can transform your seasonal pool into a year-round aquatic retreat. But there’s more to contemplate than simply inflating a dome over your water.

    What Is A Pool Air Dome And How Does It Work?

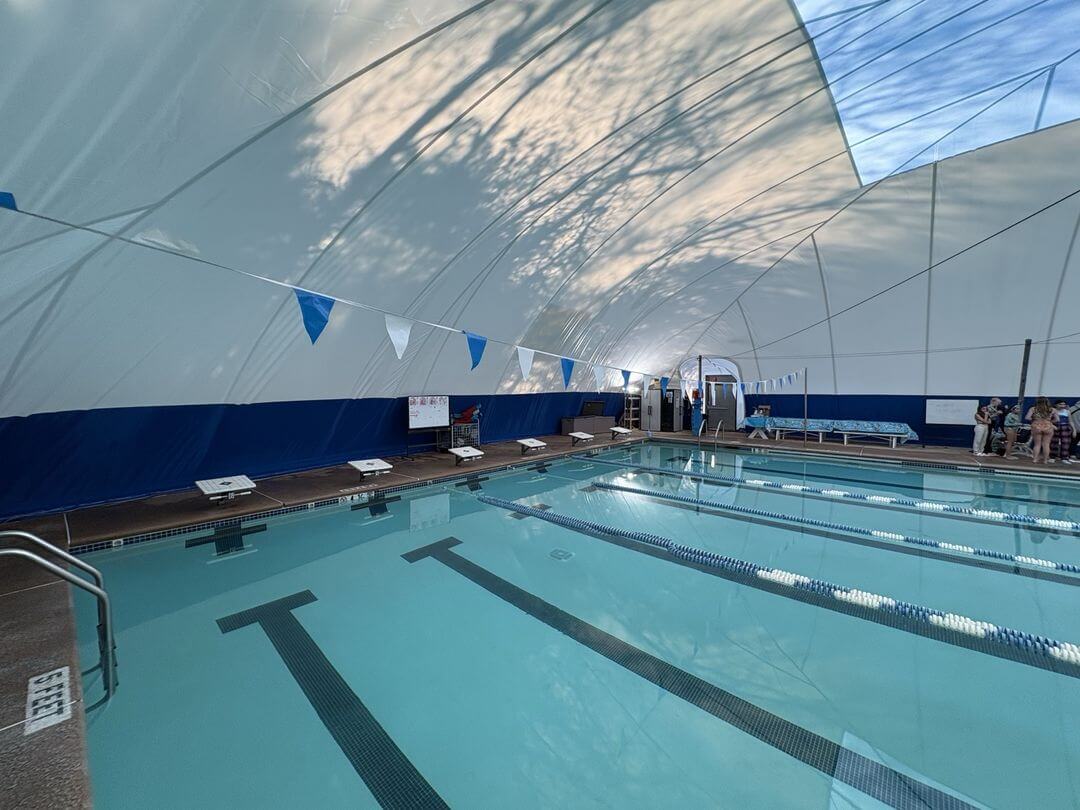
    A pool air dome is an inflatable fabric structure that completely encloses your swimming pool, creating a controlled indoor environment year-round.

    You’ll benefit from constant air pressure that maintains the dome’s shape while providing structural integrity without traditional support beams or frames.

    Your swimming pool air dome operates through continuous air circulation systems that maintain positive internal pressure.

    The specialized fabric withstands chlorine exposure and humidity while the pressurized air keeps the structure inflated.

    Temperature controls maintain ideal conditions between 75-85°F.

    This indoor pool enclosure transforms your outdoor pool into a protected swimming space.

    The natatorium air dome shields against weather elements while dehumidification systems prevent moisture buildup.

    You’ll enjoy extended swimming seasons with reduced maintenance costs and energy efficiency compared to traditional indoor pool construction methods.

    Pool Air Dome Benefits: Year-Round Swimming And Energy Savings

    You’ll transform your pool into a year-round aquatic haven with an air dome that extends your swimming season well beyond traditional outdoor limits.

    Your heating bills will drop considerably as the dome traps warm air and reduces heat loss, creating an insulated environment that maintains comfortable temperatures with less energy.

    You’re also protected from harsh weather conditions like rain, snow, and strong winds that would otherwise force you to close your pool for months at a time.

    Extended Swimming Season Benefits

    When winter temperatures drop and outdoor pools become unusable, an air dome cover transforms your swimming facility into a year-round aquatic haven.

    You’ll extend your swimming season from the typical 3-4 months to a full 12 months of operation, maximizing your pool investment regardless of weather conditions.

    Your pool cover dome creates a controlled environment that maintains ideal water temperatures between 75-85°F, eliminating seasonal shutdowns.

    You won’t need to winterize your pool or deal with expensive reopening procedures each spring.

    The extended season means increased revenue opportunities for commercial facilities and enhanced property value for residential pools.

    Additionally, you’ll protect swimmers from harsh weather elements like wind, rain, and UV exposure while maintaining consistent water quality year-round through the dome’s climate-controlled environment.

    Reduced Heating Costs

    Since air dome covers create an insulated barrier around your pool, you can slash heating costs by up to 70% compared to open-air swimming facilities.

    The dome’s specialized fabric traps warm air inside while blocking cold outdoor temperatures from affecting your pool water. You’ll maintain consistent water temperatures between 75-85°F without constantly running expensive heating systems.

    The enclosed environment eliminates heat loss from wind and evaporation, which typically accounts for most energy waste in outdoor pools. Your heating equipment won’t work overtime fighting against weather conditions, dramatically reducing monthly utility bills.

    During winter months, you’ll see the most significant savings when outdoor temperatures drop substantially. This energy efficiency means your air dome investment pays for itself through reduced operational costs over time.

    Weather Protection Advantages

    Beyond energy savings, air dome covers shield your pool from harsh weather conditions that would otherwise shut down swimming operations.

    You’ll maintain consistent swimming schedules regardless of external conditions, protecting your investment and users from nature’s unpredictability.

    Your air dome provides extensive weather protection through:

    • Wind resistance – Engineered fabric withstands strong gusts without compromising structural integrity
    • Rain and snow deflection – Waterproof membrane keeps precipitation from contaminating pool water
    • UV protection – Specialized materials filter harmful rays while maintaining natural lighting
    • Temperature stability – Insulated environment prevents extreme temperature fluctuations
    • Debris prevention – Sealed structure blocks leaves, dirt, and airborne contaminants

    This weather barrier extends your swimming season year-round, eliminating closures due to storms, cold snaps, or seasonal changes.

    You’ll maximize facility usage while minimizing weather-related maintenance costs.

    Must-Have Features: Dehumidification And Chlorine-Resistant Materials

    Although swimming pool air domes offer excellent year-round protection, they’ll fail without two critical components that address the unique challenges of indoor pool environments.

    First, you need continuous dehumidification systems. Pool water creates constant moisture that’ll cause condensation, mold growth, and structural damage without proper humidity control. Your dehumidification system must run 24/7 to maintain safe moisture levels and prevent your dome from becoming a breeding ground for harmful microorganisms.

    Second, you can’t compromise on chlorine-resistant materials. Standard dome fabrics won’t survive the harsh chemical environment. You need specialized materials engineered to withstand chlorine exposure, preventing deterioration and costly replacements.

    Your hardware must also feature corrosion-resistant coatings.

    These features aren’t optional upgrades—they’re essential investments that determine whether your dome lasts years or fails within months.

    Pool Air Dome Size Requirements For Different Pool Dimensions

    You’ll need to determine the right dome size based on your pool’s specific dimensions to guarantee complete coverage and structural integrity.

    A 25-meter pool typically requires an 82′ x 50′ dome covering 4,100 square feet, but your measurements will vary depending on your pool’s length, width, and surrounding deck space.

    Most manufacturers offer both standard sizing options for common pool dimensions and custom solutions for unique layouts or oversized installations.

    Standard Pool Dimensions

    Pool dimensions directly determine the size and cost of your air dome installation.

    You’ll need to account for adequate clearance beyond your pool’s perimeter to guarantee proper coverage and structural integrity.

    Common residential pool sizes require these air dome dimensions:

    • 25-foot pools: Need 50′ x 82′ coverage (4,100 sq ft)
    • 30-foot pools: Require 60′ x 90′ coverage (5,400 sq ft)
    • Olympic-sized pools: Demand 164′ x 82′ coverage (13,448 sq ft)
    • Lap pools: Typically need 75′ x 25′ coverage (1,875 sq ft)
    • Custom shapes: Require individual measurements plus 10-15′ clearance

    Your dome must extend beyond the pool deck to accommodate entry points, equipment access, and proper anchoring.

    Irregular pool shapes increase complexity and cost since you’ll need custom engineering.

    Always measure your entire pool area, including decking and surrounding features, before selecting dome specifications.

    Coverage Area Calculations

    Calculating your air dome’s coverage area requires precise measurements that extend well beyond your pool’s actual dimensions.

    You’ll need additional space around your pool’s perimeter for safety zones, equipment access, and structural anchoring points.

    For a standard 25-meter pool, you’ll require coverage of approximately 82′ x 50′ (25m x 15.2m), totaling 4,100 square feet.

    This accounts for the pool itself plus necessary clearance zones. The extra width accommodates pool decking, lane rope storage, and maintenance access.

    Don’t underestimate these buffer zones – they’re essential for proper dome installation and daily operations.

    Your coverage calculations should include walkways around the pool perimeter, space for diving boards or starting blocks, and room for poolside equipment.

    Measure twice, as undersized domes create operational headaches and safety concerns.

    Custom Size Solutions

    Since every pool presents unique dimensional challenges, standard air dome sizes rarely provide perfect fits for residential, commercial, or Olympic-scale installations. You’ll need customized solutions that account for your pool’s specific length, width, and surrounding deck space.

    Custom sizing considerations include:

    • Deck overhang requirements – Additional 3-6 feet beyond pool edges for proper anchoring and maintenance access
    • Height specifications – Minimum 8-foot clearance at shallow end, 12+ feet at diving areas
    • Shape accommodations – Kidney, L-shaped, or irregularly contoured pools need specialized pattern cutting
    • Utility integration – Custom placement of air intake, exhaust, and access door locations
    • Foundation modifications – Anchoring systems adapted to existing concrete, pavers, or landscaping

    Professional manufacturers create detailed site plans ensuring your dome maximizes coverage while maintaining structural integrity and operational efficiency.

    Pool Air Dome Installation: Process And Timeline Breakdown

    Three distinct phases define the air dome installation process, each requiring specialized expertise and precise coordination. You’ll work with certified installers who manage foundation preparation, fabric assembly, and system commissioning over several weeks.

    Phase Duration Key Activities
    Site Preparation 3-5 days Foundation anchoring, electrical connections, equipment positioning
    Fabric Installation 2-3 days Dome assembly, inflation testing, seal verification
    System Commissioning 1-2 days HVAC calibration, dehumidification setup, safety checks
    Final Testing 1 day Full system operation, emergency procedures, handover training

    Weather conditions considerably impact your timeline—you’ll need dry conditions during fabric installation. The entire process typically takes 7-11 days, though complex installations may require additional time for custom features or challenging site conditions.

    Pool Air Dome Costs: Equipment, Installation, And Operating Expenses

    Understanding the installation timeline sets the stage for planning your budget—pool air dome investments involve substantial upfront costs plus ongoing operational expenses.

    Equipment costs typically range from $250,000 to $500,000 for a standard 25-meter pool setup. You’ll need specialized chlorine-resistant fabric, continuous dehumidification systems, and corrosion-resistant hardware designed for harsh pool environments.

    Your total investment includes:

    • Initial equipment purchase ($250K-$500K depending on size and features)
    • Professional installation labor (20-30% of equipment cost)
    • Site preparation and foundation work ($15K-$25K)
    • Electrical connections for climate control systems ($8K-$12K)
    • Annual operating expenses including electricity, maintenance, and fabric replacement reserves ($25K-$40K)

    Factor in energy costs for maintaining ideal 75-85°F temperatures year-round when calculating your long-term financial commitment.

    Pool Air Dome Maintenance: Essential Tasks And Schedules

    While your air dome investment protects your pool year-round, it’ll only deliver reliable performance through consistent maintenance. You’ll need to establish regular schedules for critical tasks that keep your dome operating efficiently.

    Maintenance Task Frequency Key Focus Areas
    Fabric Inspection Monthly Tears, wear spots, anchor points
    Blower System Check Weekly Motor function, air pressure levels
    Dehumidification Service Quarterly Filter replacement, system calibration
    Hardware Assessment Bi-annually Corrosion, fasteners, seals

    Your fabric requires gentle cleaning with mild detergents to remove chlorine residue and environmental buildup. Monitor air pressure constantly—low pressure can cause structural stress, while excessive pressure wastes energy. Replace worn components immediately to prevent minor issues from becoming costly repairs that compromise your dome’s integrity.

    How To Choose The Best Pool Air Dome Manufacturer

    Selecting the right manufacturer determines whether your air dome investment delivers decades of reliable service or becomes a source of ongoing headaches.

    You’ll want to evaluate potential partners based on their track record and specialized expertise in pool environments.

    Research manufacturers who demonstrate proven experience with swimming pool domes specifically. Look for companies that understand the unique challenges of chlorinated, humid environments and offer appropriate material solutions.

    Key factors to evaluate include:

    • Experience and portfolio – Review completed pool dome projects and client testimonials
    • Material quality – Verify they use chlorine-resistant, specialized fabrics designed for aquatic facilities
    • Engineering capabilities – Guarantee proper structural calculations for your specific dimensions and climate
    • Support services – Confirm installation training, maintenance programs, and replacement part availability
    • Warranty coverage – Compare terms for fabric, hardware, and structural components
  • Gymnastics Air Dome Facilities

    Gymnastics Air Dome Facilities

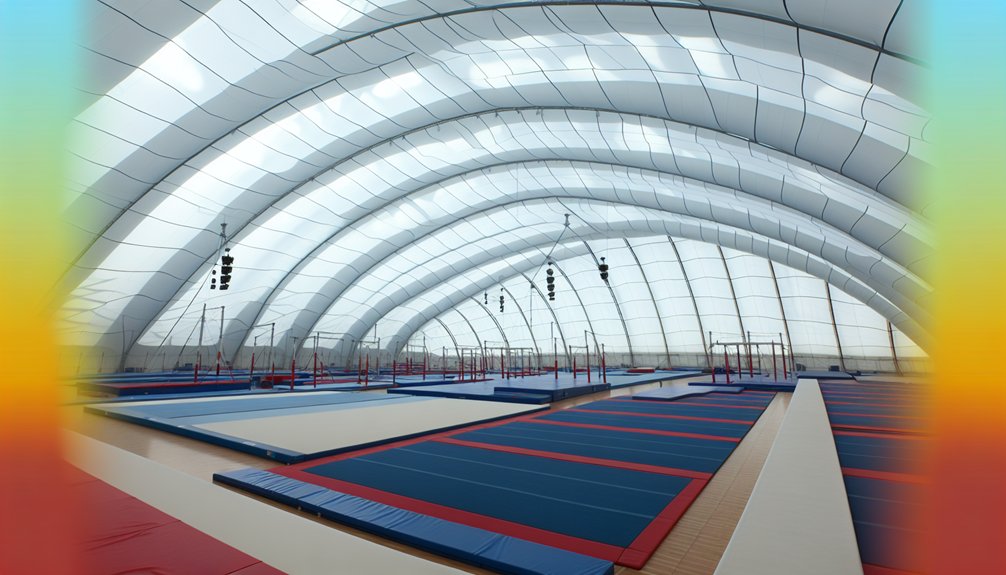
    You’re probably tired of cramped gymnastics facilities with sky-high construction costs and limited training seasons. Gymnastics air domes change everything – they’ll give you 50-70% savings over traditional buildings while providing the clear-span space your athletes need year-round. Whether you’re running a competitive program or recreational classes, these inflatable structures solve the biggest challenges facing gym owners today. But there’s more to evaluate than just the initial investment when you’re making this decision.

    Why Gymnastics Air Domes Beat Traditional Buildings

    When you’re planning a gymnastics facility, air domes offer compelling advantages over traditional brick-and-mortar buildings. Your gymnastics air dome costs considerably less to construct—often 50-70% cheaper than conventional structures.

    You’ll also save on heating and cooling since the pressurized air system provides natural insulation. Unlike permanent buildings, you can relocate your gymnastics training dome if needed.

    The flexible membrane withstands weather extremes while providing consistent indoor conditions year-round. You’ll avoid lengthy construction permits and zoning battles that plague traditional builds.

    Installation happens in weeks, not months. Your indoor gymnastics facility can accommodate full programs with proper ceiling heights for vault and uneven bars.

    The clear-span design eliminates support columns, maximizing usable space for equipment layout and athlete movement patterns.

    Gymnastics Air Dome Costs: Building vs Renting Options

    Since gymnastics air dome require significant upfront investment, you’ll need to weigh purchasing against rental options based on your facility’s long-term goals.

    Buying a gymnastics bubble typically costs $150,000-$400,000 for a complete 15,000 square foot facility, including installation, equipment, and safety features. This investment pays off if you’re planning five-plus years of operation.

    Rental options start around $8,000-$15,000 monthly for comparable space, making them ideal for seasonal programs or testing market demand. However, rental costs accumulate quickly—you’ll break even around the three-year mark compared to purchasing.

    Consider additional factors like maintenance responsibilities, insurance requirements, and equipment inclusion. Rentals often include maintenance and insurance, while purchased domes require ongoing upkeep budgets.

    Your membership projections and revenue forecasts should drive this critical financial decision.

    Space and Height Requirements for Gymnastics Air Domes

    When you’re planning your gymnastics air dome, you’ll need to meet specific height and space standards to guarantee safe training conditions.

    Your dome must reach a minimum height of 30 feet to accommodate vault runs and uneven bar routines without compromising athlete safety.

    You’ll also need to allocate sufficient floor space for spring flooring installation, equipment storage, and safety features like pit areas.

    Minimum Height Standards

    Although floor exercises and beam routines can function in relatively low spaces, vault runs and uneven bar dismounts demand considerably more vertical clearance in your gymnastics air dome.

    You’ll need to prioritize height requirements when planning your facility to guarantee athlete safety and proper skill execution.

    The minimum height standards for your gymnastics air dome include:

    1. 30-foot (9.1m) minimum ceiling height for vault and uneven bars apparatus
    2. Additional clearance zones around high-impact landing areas for safety compliance
    3. Consistent height maintenance throughout the dome structure to prevent low spots
    4. Professional installation verification to confirm height specifications meet gymnastics federation standards

    Don’t compromise on these height requirements.

    Insufficient vertical space restricts training progression and creates dangerous conditions for athletes performing advanced skills.

    Floor Space Requirements

    Beyond vertical clearance, your gymnastics air dome requires substantial floor space to accommodate multiple apparatus and safe training zones.

    You’ll need a minimum 4,000 square feet for spring floor installation alone, plus additional space for equipment placement and safety margins.

    A 100′ x 150′ dome provides 15,000 square feet, which accommodates a complete gymnastics program. This configuration allows you to install vault runways, uneven bars, balance beams, and floor exercise areas simultaneously.

    You’ll also need designated pit areas for skill development and landing practice.

    Don’t forget storage requirements for portable equipment like bars, beams, and vault components.

    Plan for safety matting zones around each apparatus, ensuring adequate spacing between stations. This prevents interference during training and maintains proper safety protocols throughout your facility.

    Planning Your Gymnastics Equipment Layout in Air Domes

    When planning your gymnastics equipment layout, you’ll need to allocate specific zones for each apparatus while maintaining required safety clearances between them.

    Your vault and uneven bars require the most vertical space at 30 feet minimum, so position these under the dome’s highest points.

    Create dedicated areas for your spring floor, balance beams, and training pits, ensuring each zone has adequate buffer space for athlete safety during routines and dismounts.

    Equipment Zone Allocation

    Four distinct zones form the backbone of any successful gymnastics air dome layout, each requiring specific spatial considerations and safety clearances.

    You’ll need to strategically position each area to maximize flow while maintaining athlete safety throughout your facility.

    Your equipment zones should include:

    1. Vault runway and landing area – Requires 100+ feet of clear runway space with adequate deceleration zones.
    2. Uneven bars section – Needs 30-foot minimum ceiling height with extensive matting around equipment.
    3. Balance beam training area – Positioned away from high-traffic zones with soft landing surfaces.
    4. Floor exercise space – Minimum 4,000 square feet of spring flooring for tumbling passes.

    You’ll want to separate high-energy activities from precision work, ensuring vault and floor exercise areas don’t interfere with beam concentration zones.

    Safety Space Requirements

    Because gymnastics equipment poses inherent collision risks, you’ll need to establish generous buffer zones around each apparatus to prevent athlete injuries and equipment damage.

    Plan minimum 8-foot clearances around vault runways and landing areas, while uneven bars require 10-foot perimeters due to dismount trajectories.

    Your floor exercise space needs 6-foot borders beyond the 40′ x 40′ competition area.

    Don’t overlook vertical safety requirements—vault and bar activities demand full dome height utilization, so you can’t store equipment overhead in these zones.

    Position safety matting strategically around high-impact areas like beam dismounts and bar release moves.

    Create clear sight lines between apparatus zones so coaches can monitor multiple athletes simultaneously.

    These buffer zones typically consume 40% of your total floor space but they’re non-negotiable for safe operations.

    Spring Floor and Safety Matting Installation Guide

    Installing a proper spring floor system forms the foundation of any safe gymnastics air dome facility. You’ll need at least 4,000 square feet of specialized spring flooring to accommodate tumbling passes and floor exercise routines effectively.

    Your installation process requires these critical steps:

    1. Foundation preparation – Confirm level concrete base with proper drainage systems.
    2. Spring system assembly – Install manufacturer-approved springs with consistent tension throughout.
    3. Carpet bonding – Secure competition-grade carpet using approved adhesives and seaming techniques.
    4. Safety perimeter setup – Place 8-inch minimum safety matting around all floor boundaries.

    You’ll also need strategic placement of landing mats near vault runways and dismount areas from uneven bars.

    Don’t forget portable safety mats for beam training areas, as these provide essential protection during skill development and routine practice sessions.

    Air Dome Climate Control for Year-Round Gymnastics Training

    While maintaining consistent temperature and humidity levels proves critical for gymnast performance and safety, your air dome’s climate control system must handle unique challenges that traditional buildings don’t face.

    You’ll need specialized HVAC units designed for pressurized environments that won’t compromise the dome’s structural integrity. Install redundant heating systems since equipment failure could deflate your dome and cancel training sessions.

    Target 68-72°F (20-22°C) with 40-60% humidity to prevent slippery equipment and maintain ideal grip conditions. Your system should include dehumidification capabilities, especially in humid climates where condensation can create dangerous surfaces on bars and beams.

    Position air circulation units strategically to eliminate dead zones while avoiding direct airflow that could affect gymnasts during routines, particularly on beam and vault approaches.

    Gymnastics Air Dome Safety Standards and Maintenance

    Beyond climate control considerations, your gymnastics air dome requires rigorous safety protocols and preventive maintenance to protect athletes and maintain structural integrity.

    Regular inspections guarantee your facility meets industry standards while preventing costly emergency repairs.

    Essential safety and maintenance protocols include:

    1. Daily pressure monitoring – Check blower systems and maintain ideal PSI levels to prevent dome collapse or structural stress.
    2. Weekly fabric inspection – Examine seams, anchor points, and surface wear for tears or deterioration that compromise safety.
    3. Monthly equipment audits – Verify safety matting placement, pit foam density, and apparatus anchoring meets gymnastics federation requirements.
    4. Quarterly professional assessments – Schedule certified technician evaluations of structural components, emergency exits, and ventilation systems.

    Proper maintenance extends your dome’s lifespan while guaranteeing athlete safety during high-impact training sessions.

  • Golf Driving Range Air Dome

    Golf Driving Range Air Dome

    You’ve probably watched golfers abandon their practice sessions when storms roll in, but air domes are changing that reality. These pressurized fabric structures create controlled environments where you can swing year-round, regardless of what’s happening outside. Whether you’re considering adding one to your facility or curious about the technology behind them, there’s more complexity to these installations than meets the eye—from space calculations to heating systems that’ll determine your project’s success.

    What Is a Golf Driving Range Air Dome?

    A golf driving range air dome transforms your practice sessions into year-round training opportunities by enclosing the entire range within a pressurized fabric structure. This innovative golf driving range dome creates a controlled environment where weather conditions won’t interrupt your training schedule.

    The indoor driving range operates through continuous air pressure that maintains the dome’s shape and structural integrity. You’ll find these golf practice dome facilities equipped with heated tee areas, ball tracking technology, and multiple teaching stations.

    The dome typically spans 100 feet wide by 300 feet deep with heights exceeding 45 feet, providing ample space for full swing practice.

    Modern installations often include impact screens to reduce required depth and protective netting systems. This enclosed environment eliminates seasonal limitations while offering consistent lighting and temperature control for ideal practice conditions.

    Golf Air Dome Costs and Installation Timeline

    Understanding the financial commitment behind these impressive structures helps you make informed decisions about your golf facility investment. Golf air dome costs typically range from $800,000 to $2 million, depending on size, features, and customization level.

    Several factors influence your final investment for a golf training facility dome:

    1. Size specifications – Minimum dimensions of 100′ width x 300′ depth x 45′ height affect base pricing.
    2. Technology integration – Ball tracking systems, heated tee lines, and teaching bay equipment add substantial costs.
    3. Installation complexity – Site preparation, utilities, and permit requirements vary by location.

    Installation timelines generally span 3-6 months from groundbreaking to operation. Weather conditions, permit approval processes, and custom feature installations can extend this timeframe.

    You’ll need to budget additional funds for ongoing maintenance, heating costs, and insurance coverage.

    Space Requirements and Layout Planning

    When designing your golf air dome facility, proper space allocation determines both operational efficiency and player experience.

    You’ll need minimum dimensions of 100 feet width by 300 feet depth, with heights exceeding 45 feet to accommodate full golf swings and ball trajectories.

    Plan for 10-20 teaching stations along your heated tee line, spacing them adequately for comfort and safety.

    Position instruction bays strategically to maximize sightlines and student-instructor interaction.

    Install protective netting at the rear boundary to contain balls safely.

    Consider reducing your facility’s depth by incorporating impact screens, which can cut space requirements considerably while maintaining functionality.

    Designate areas for ball tracking technology integration and guarantee your layout accommodates radiant heating systems for the tee line.

    Smart planning maximizes your available square footage.

    Heating, Lighting, and Weather Protection Systems

    Because golf training demands consistent conditions year-round, your air dome’s environmental systems become critical for maintaining player comfort and facility operations.

    You’ll need robust heating systems to maintain playable temperatures during winter months, with radiant heating particularly effective for the tee line area where golfers spend most of their time.

    Your lighting design should provide uniform illumination across the entire range, typically requiring 50-75 foot-candles for ideal ball visibility.

    LED systems offer energy efficiency and consistent color temperature.

    Weather protection involves three key components:

    1. Structural integrity – Wind load calculations and snow load capacity
    2. Climate control – HVAC systems maintaining 60-70°F operational temperatures
    3. Moisture management – Proper ventilation preventing condensation buildup

    These systems work together ensuring year-round functionality regardless of external conditions.

    Full-Depth Range vs Impact Screen Options

    While full-depth driving ranges offer the most authentic practice experience, impact screen configurations can markedly reduce your facility’s footprint and initial investment.

    You’ll need 300 feet of depth for a traditional full-range setup, allowing golfers to see their complete ball flight and develop proper shot visualization. However, impact screens let you cut that depth considerably—sometimes by 60-70%—while still providing valuable feedback through ball tracking technology.

    Impact screens work best when you’re dealing with limited land availability or tighter budgets. They’ll reduce your construction costs substantially since you need less dome material and structural support.

    You’ll sacrifice some realism, but modern simulators and launch monitors can compensate with detailed shot data.

    Consider your target market: beginners and casual players adapt well to screens, while serious golfers often prefer full-depth ranges.

  • Field Hockey Air Dome Guide

    Field Hockey Air Dome Guide

    You’re considering a significant investment that could transform your field hockey program’s capabilities, but the sheer number of decisions ahead might feel overwhelming. From determining the right dimensions and turf surface to understanding installation timelines and ongoing costs, there’s a complex web of factors that’ll directly impact your facility’s success. The choices you make now will influence everything from player performance to your bottom line for years to come.

    What Is A Field Hockey Air Dome?

    When you need year-round field hockey training regardless of weather conditions, a field hockey air dome provides the perfect solution. This inflatable structure creates a controlled indoor field hockey facility that maintains ideal playing conditions throughout all seasons.

    A hockey training dome typically spans 180′ x 300′ with a minimum 25-foot ceiling height, providing full regulation field dimensions. The pressurized air system keeps the dome inflated while maintaining consistent temperatures between 40-60°F for player comfort and performance.

    Inside, you’ll find specialized turf surfaces designed specifically for field hockey – either water-based or sand-dressed synthetic materials that replicate professional playing conditions.

    The controlled environment eliminates weather disruptions, allowing teams to maintain consistent training schedules. These versatile structures can also accommodate soccer when needed, maximizing facility usage and investment value.

    Field Hockey Air Dome Size Requirements And Specifications

    Understanding the exact dimensions and technical specifications guarantees your field hockey air dome meets regulation standards and provides excellent playing conditions.

    Your field hockey dome must measure 180′ x 300′ (54.9m x 91.4m), totaling 54,000 square feet of playing surface. You’ll need a minimum ceiling height of 25 feet to accommodate high ball trajectories and player movements.

    The dome requires either water-based or sand-dressed artificial turf that mimics professional field conditions. Climate control systems should maintain temperatures between 40-60°F for peak performance year-round.

    These specifications also allow your facility to double as a soccer field, maximizing usage potential.

    Installation costs typically range from $1.2-3 million depending on location, features, and site preparation requirements. Proper ventilation and lighting systems are essential components for regulation compliance.

    Field Hockey Air Dome Cost: Purchase And Installation

    You’ll face two major cost components when budgeting for your field hockey air dome: the initial purchase price and installation labor expenses.

    The dome structure itself typically ranges from $1.2M to $3M depending on size, materials, and features you select.

    Installation costs can add another 20-40% to your total investment, covering foundation work, mechanical systems, and specialized setup required for proper dome operation.

    Initial Purchase Pricing

    Budgeting for a field hockey air dome requires understanding the significant upfront investment involved in both the structure and installation process.

    You’ll face costs ranging from $1.2 million to $3 million for a regulation-sized field hockey dome measuring 180′ x 300′. This price variation depends on several key factors you need to take into account.

    The dome structure itself typically costs $800,000 to $1.8 million, while site preparation and installation add another $400,000 to $1.2 million.

    You’ll pay more for premium features like advanced climate control systems, higher-quality membrane materials, and sophisticated lighting packages.

    The turf surface choice also impacts pricing – water-based systems cost more than sand-dressed alternatives.

    Location affects pricing too, with remote sites requiring higher transportation and labor costs.

    Installation Labor Costs

    When planning your field hockey air dome project, installation labor represents 25-35% of your total budget, typically ranging from $300,000 to $600,000 for a full-sized facility.

    You’ll need specialized crews for foundation work, electrical systems, and dome assembly. Site preparation costs vary considerably based on soil conditions and drainage requirements, potentially adding $50,000-$150,000 to your labor expenses.

    Professional installers must handle the complex anchoring system that secures your 54,000 square foot structure. Climate control installation requires HVAC specialists familiar with pressurized environments.

    You’ll also need certified electricians for lighting systems that meet field hockey standards. Factor in additional costs for permits, inspections, and potential overtime charges.

    Remote locations increase labor costs due to travel time and accommodation expenses for installation teams.

    Turf Options: Water-Based Vs Sand-Dressed Surfaces

    You’ll need to choose between two primary turf surfaces for your field hockey air dome: water-based and sand-dressed systems.

    Water-based turf delivers superior ball speed and player performance, mimicking international competition standards.

    Sand-dressed surfaces require less complex maintenance but demand regular grooming and infill management to maintain ideal playing conditions.

    Water-Based Performance Benefits

    Professional field hockey players consistently choose water-based turf surfaces for their superior performance characteristics, and you’ll immediately notice the difference when playing on this premium surface type.

    Water-based turf creates ideal ball speed and predictable bounces that match international competition standards. You’ll experience enhanced stick-to-ball control during dribbling, passing, and shooting sequences.

    The surface maintains consistent moisture levels through integrated irrigation systems, eliminating unpredictable dry patches that can disrupt play.

    Your players will develop better technical skills on water-based surfaces since the ball moves similarly to outdoor championship fields. The turf reduces joint stress while providing reliable traction for quick directional changes.

    Most importantly, you’re investing in a surface that prepares athletes for elite-level competition where water-based fields are the global standard.

    Sand-Dressed Maintenance Requirements

    Sand-dressed field hockey surfaces demand a different maintenance approach that requires consistent attention to sand infill levels and distribution patterns.

    You’ll need to regularly redistribute sand using specialized drag brushes to maintain even coverage across the playing surface. Weekly grooming prevents sand migration and guarantees consistent ball roll characteristics.

    You must monitor sand depth carefully, as insufficient infill creates uneven bounces while excess sand slows ball speed dramatically.

    Plan for sand top-ups every 6-8 weeks, particularly in high-traffic areas like shooting circles and center field. Your maintenance schedule should include daily brushing, weekly deep grooming, and monthly sand level assessments.

    Unlike water-based surfaces, you won’t need irrigation systems, but you’ll invest more time in mechanical maintenance to preserve ideal playing conditions throughout your dome’s operating season.

    Climate Control For Year-Round Field Hockey Training

    When temperatures drop below freezing or soar above 80°F, maintaining ideal playing conditions becomes critical for serious field hockey training. Your air dome’s climate control system should target 40-60°F with 50-70% humidity for optimal ball speed and player comfort.

    Temperature Range Player Performance Ball Behavior
    Below 40°F Reduced mobility, stiff muscles Slower roll, unpredictable bounce
    40-60°F (Ideal) Peak performance, comfort Consistent speed and control
    60-75°F Good performance, slight fatigue Slightly faster roll
    75-80°F Increased fatigue, dehydration risk Fast ball speed
    Above 80°F Heat stress, poor performance Erratic behavior

    You’ll need HVAC systems with heating, cooling, and dehumidification capabilities. Install multiple temperature sensors throughout the dome to guarantee even climate distribution. Quality systems cost $150,000-$400,000 but dramatically extend your training season.

    Using Your Air Dome For Soccer And Multi-Sport Activities

    Beyond optimizing your dome for field hockey performance, you can maximize your investment by converting the space for soccer and other sports. Your 180′ x 300′ dome perfectly accommodates a regulation soccer field, making it an ideal dual-purpose facility.

    The shift between sports is straightforward since both use similar field dimensions and turf surfaces. You’ll simply need to swap out goal equipment and adjust line markings as needed.

    Consider these multi-sport possibilities for your air dome:

    • Soccer training sessions with professional-grade turf and consistent playing conditions
    • Lacrosse practices utilizing the spacious field dimensions and protective enclosed environment
    • Ultimate frisbee tournaments taking advantage of the wind-free indoor space
    • Corporate team-building events combining multiple field sports activities

    This versatility transforms your dome into a year-round revenue generator serving diverse athletic communities.

    Field Hockey Air Dome Installation: Timeline And Process

    Once you’ve decided on your field hockey air dome specifications, the installation process typically spans 8-12 weeks from groundbreaking to first play.

    You’ll start with site preparation and foundation work, which takes 2-3 weeks depending on soil conditions and drainage requirements.

    Next comes the turf installation phase, requiring another 2-3 weeks for proper base preparation and synthetic surface laying.

    The dome structure arrives pre-manufactured and takes just 1-2 days to install once the foundation’s ready.

    Inflation and pressurization systems are then connected and tested over several days.

    You’ll need final inspections for electrical, HVAC, and safety systems before receiving occupancy permits.

    Weather delays can extend timelines, so plan accordingly for your region’s seasonal conditions.

    Annual Operating Costs And Maintenance Requirements

    While your field hockey air dome represents a significant upfront investment, you’ll face ongoing annual operating costs ranging from $50,000 to $150,000 depending on your facility’s size and usage intensity.

    Your primary expenses include:

    • Energy costs – Blowers running 24/7 to maintain air pressure, plus HVAC systems for climate control
    • Turf maintenance – Regular watering, brushing, and sand/rubber infill replacement for ideal playing conditions
    • Membrane care – Annual inspections, patch repairs, and UV protection treatments to extend dome life
    • Insurance and permits – Specialized coverage for air-supported structures and municipal compliance requirements

    You’ll also budget for equipment replacement, emergency repair funds, and seasonal weatherproofing.

    Proper preventive maintenance reduces long-term costs while ensuring your facility remains safe and playable year-round.