Author: Robert

  • Baseball Air Dome Design Guide

    Baseball Air Dome Design Guide

    You’re considering a baseball air dome, but the sheer scope of decisions ahead might feel overwhelming. From determining whether your $1.2 million budget covers the full 150′ x 150′ infield space you need, to understanding why specialized engineering costs can make or break your project timeline. The foundation requirements alone will dictate your site selection, and there’s one critical ventilation mistake that’s already derailed three similar projects this year.

    Baseball Air Dome Costs: Complete Investment Breakdown

    Several factors determine your total investment when planning a baseball air dome, with costs typically ranging from $800,000 to $2.5 million depending on size, features, and site requirements.

    Your baseball air dome costs include the fabric structure itself, foundation work, mechanical systems, and installation. A full infield dome measuring 150′ x 150′ with 70′ height represents the baseline investment.

    You’ll need additional budget for batting cages, typically 12′ x 14′ x 70′ each, and portable mounds.

    Site preparation considerably impacts your budget. You’ll pay more for complex terrain, utility connections, and permit requirements.

    Premium features like advanced climate control, LED lighting, and upgraded entrance systems increase costs.

    Don’t forget ongoing expenses including electricity, maintenance, and insurance when calculating your total investment.

    Size and Space: Baseball Air Dome Dimensions Guide

    When planning your baseball air dome, understanding proper dimensions guarantees ideal gameplay and safety for all skill levels.

    Your baseball training dome requires careful space allocation to accommodate different activities effectively.

    For a complete facility, you’ll need these essential dimensions:

    • Full infield space: 150′ x 150′ minimum with 90′ basepaths and 70′ height clearance for fly balls
    • Batting cage areas: 12′ x 14′ x 70′ each cage, allowing multiple simultaneous training sessions
    • Pitching zones: Portable mound placement with adequate surrounding clearance for safety

    The 70-foot height specification isn’t negotiable—it’s vital for realistic practice conditions.

    Your baseball training dome’s width determines how many batting cages you can install alongside the main field.

    Remember that additional space around the perimeter provides safety zones and storage areas for equipment and maintenance access.

    Key Features: Structural Design for Baseball Facilities

    Your baseball air dome’s structural integrity depends on specialized engineering that handles both massive internal air pressure and dynamic loads from wind, snow, and seismic forces.

    You’ll need reinforced fabric membranes made from PVC or PTFE materials that resist tears and UV degradation. The anchoring system requires deep concrete foundations with tensioned cables extending around the perimeter to counteract uplift forces.

    Your baseball air dome must incorporate emergency backup systems, including redundant blowers and automatic pressure monitoring.

    Strategic reinforcement patches strengthen high-stress areas where doors, windows, and ventilation systems connect. The fabric’s translucent properties provide natural lighting while maintaining structural performance.

    Consider modular designs that allow expansion or relocation.

    Professional engineers must calculate load factors specific to your climate zone, ensuring your facility meets local building codes and safety standards.

    Site Requirements: Foundation and Installation Process

    Three critical foundation elements determine your baseball air dome’s long-term stability and performance. You’ll need proper site preparation, drainage systems, and anchor points to guarantee your indoor baseball facility operates safely year-round.

    The installation process requires careful planning and professional execution:

    • Site preparation – Level the ground, remove debris, and create proper grading for water runoff.
    • Foundation installation – Pour concrete footings or install anchor systems according to manufacturer specifications.
    • Utility connections – Run electrical lines for lighting, ventilation, and air circulation systems before dome installation.

    You’ll typically need 2-4 weeks for complete installation, depending on site conditions and weather.

    Professional installers handle the dome inflation and tensioning process, ensuring proper air pressure maintenance.

    Consider accessibility for maintenance vehicles and emergency exits when finalizing your site layout.

    Climate Systems: Heating and Ventilation for Year-Round Play

    Since temperature fluctuations can make or break your baseball training sessions, you’ll need robust climate systems that maintain ideal playing conditions regardless of outside weather.

    Your softball air dome requires powerful HVAC units capable of heating volumes up to 787,500 cubic feet efficiently. Install multiple heating zones with thermostatic controls to prevent hot and cold spots across your 150′ x 150′ playing area.

    Ventilation systems must circulate fresh air continuously while maintaining positive air pressure to keep the dome inflated. You’ll want industrial fans positioned strategically to eliminate humidity buildup and prevent condensation on interior surfaces.

    Consider energy-efficient radiant heating for player comfort during winter months. Backup heating systems guarantee uninterrupted operation during equipment failures, protecting your investment and maintaining consistent training schedules year-round.

  • Soccer Air Dome Installation and Design

    Soccer Air Dome Installation and Design

    You’re considering a soccer air dome for your facility, but the complexity of installation might surprise you. From securing proper zoning permits to calculating precise ground dimensions, there’s more to this project than inflating a massive structure over your field. The $1.5-4 million investment demands careful planning, and one overlooked detail during site preparation could derail your entire timeline. Before you commit to this game-changing addition, you’ll need to understand what separates successful installations from costly disasters.

    Soccer Air Dome Site Planning: Dimensions, Permits, and Prep Work

    Before you can install a soccer air dome, you’ll need to secure a site that measures at least 240′ x 360′ (73m x 110m) to accommodate a full regulation field. This translates to roughly 86,400 square feet of ground space for your soccer air dome installation.

    Start by obtaining proper zoning permits and building approvals from local authorities. Most municipalities require detailed engineering plans showing the dome’s foundation requirements and safety systems.

    You’ll also need environmental assessments if the site has drainage concerns.

    Prepare the ground by leveling and compacting the surface to create a stable foundation. Install proper drainage systems to prevent water accumulation.

    Consider utility access for electricity, heating systems, and backup power. Plan for adequate parking and access roads for maintenance vehicles during construction and ongoing operations.

    Soccer Air Dome Installation Costs and Project Timelines

    Once you’ve completed site preparation, you’ll face installation costs ranging from $1.5 million to $4 million for a full-size soccer air dome.

    Your soccer bubble facility’s price depends on several factors, including fabric quality, foundation requirements, and mechanical systems complexity.

    Installation typically takes 4-8 weeks once materials arrive on-site. You’ll need specialized crews for foundation work, fabric installation, and mechanical systems integration.

    Weather conditions can greatly impact your timeline, so plan accordingly.

    Key cost factors include:

    • Foundation and anchoring systems – Concrete footings and tie-down infrastructure
    • Fabric membrane quality – Single vs. double-wall insulated options
    • Climate control systems – Heating, ventilation, and pressurization equipment
    • Lighting and electrical – LED sports lighting and power distribution

    Expect additional costs for permits, engineering, and ongoing maintenance contracts.

    Why Soccer Air Domes Work: Performance Benefits Year-Round

    While outdoor soccer fields sit unused during harsh weather conditions, your air dome facility maintains perfect playing conditions throughout the entire year.

    You’ll eliminate weather-related cancellations that disrupt training schedules and game plans. The controlled environment protects players from extreme temperatures, wind, and precipitation that can compromise performance and increase injury risks.

    Your soccer field cover creates consistent surface conditions, allowing players to develop technical skills without adapting to varying field states.

    The stable 50-65°F temperature range prevents muscle stiffness and maintains ideal ball behavior. LED lighting guarantees visibility remains constant regardless of outside conditions or daylight hours.

    You’ll maximize facility utilization, generating revenue year-round instead of seasonal operation.

    Teams can maintain intensive training schedules, improving player development and competitive performance through uninterrupted practice sessions.

    Operating Your Soccer Air Dome: Maintenance and Energy Costs

    Three primary cost categories will define your air dome’s operational budget: energy consumption, routine maintenance, and seasonal preparations. Your indoor soccer dome requires constant air pressure and climate control, consuming approximately $8,000-$15,000 annually in electricity costs depending on regional rates and facility size.

    Regular maintenance prevents costly emergency repairs while ensuring player safety.

    Key Operating Considerations:

    • Blower system maintenance – Monthly filter changes and quarterly professional inspections prevent system failures
    • Membrane care – Annual cleaning and patching extends dome lifespan to 15-20 years
    • Heating optimization – Programmable thermostats reduce winter energy costs by 20-30%
    • Emergency protocols – Backup generators and repair kits minimize downtime during equipment failures

    Budget $12,000-$25,000 annually for thorough operations, including utilities, maintenance contracts, and consumables.

  • Tennis Air Dome Complete Guide USA

    Tennis Air Dome Complete Guide USA

    You’ve probably wondered how tennis facilities maintain year-round play despite harsh winters or unpredictable weather patterns. Tennis air domes offer a practical solution that’s gaining traction across the USA, but there’s more to evaluate than simply inflating a structure over your courts. From understanding the engineering behind pressurized systems to maneuvering substantial upfront investments and ongoing operational costs, you’ll need to weigh several critical factors before determining if this approach aligns with your facility’s long-term goals.

    What Is a Tennis Air Dome and How Does It Work?

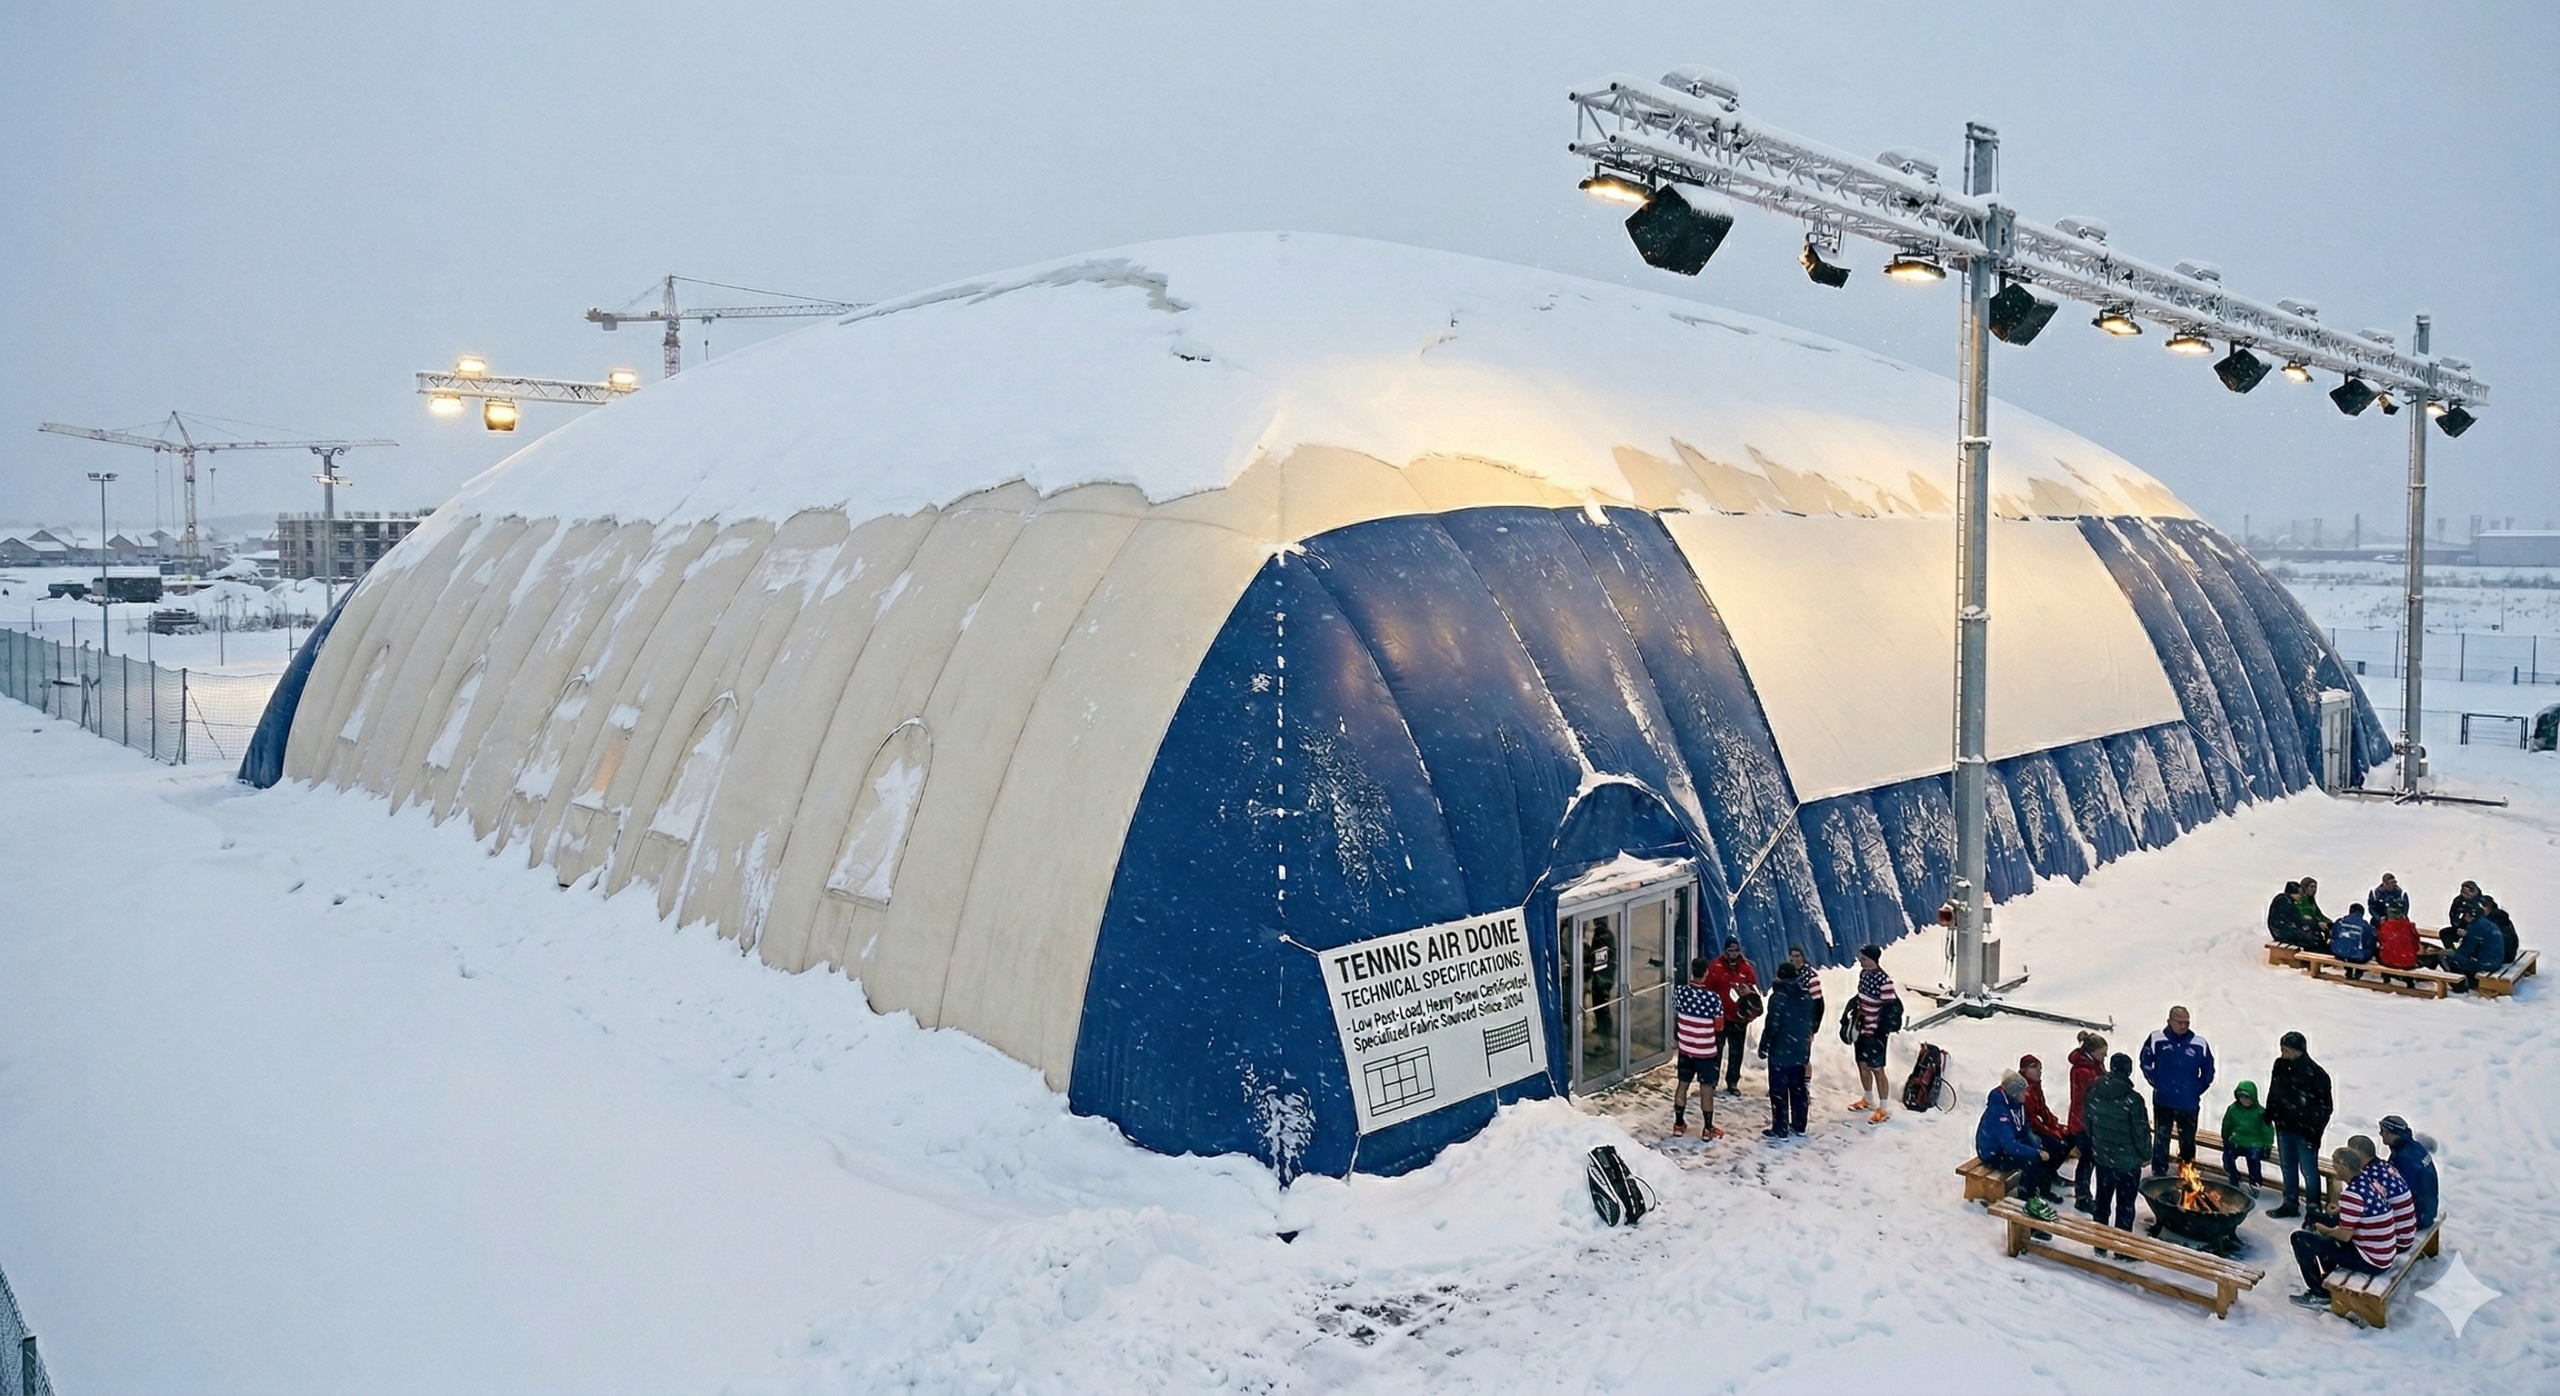
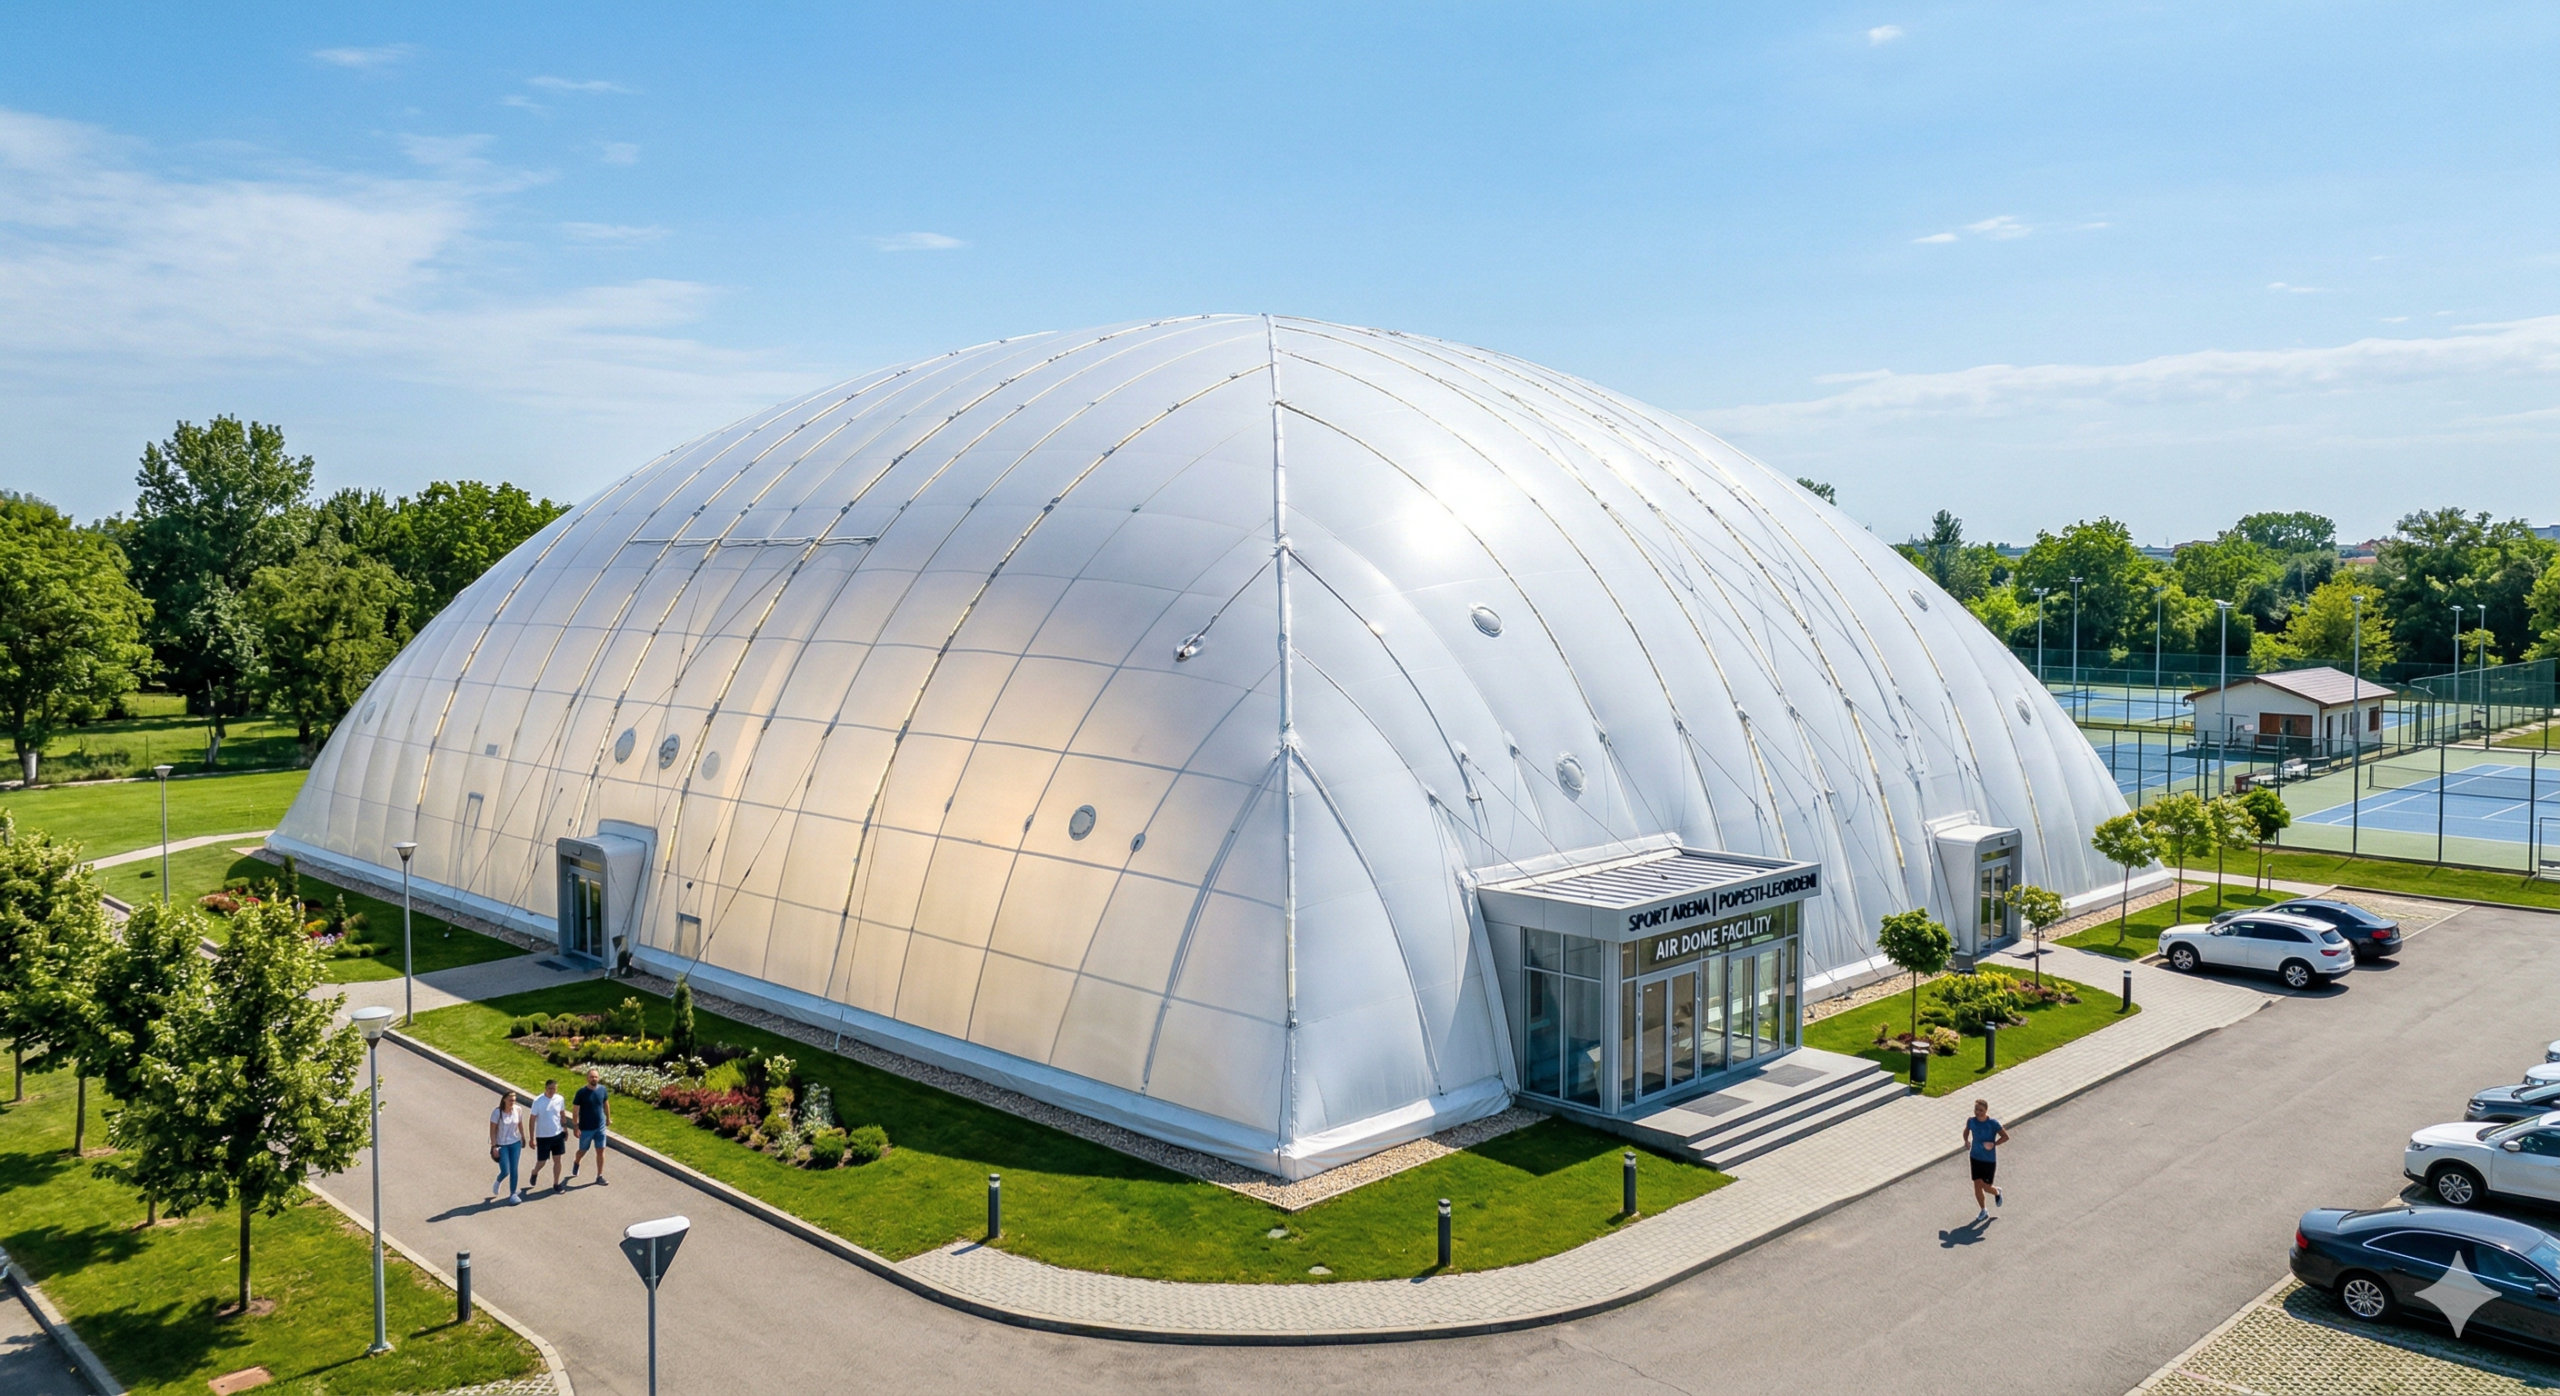
    Imagine stepping into a massive inflated bubble where you can play tennis year-round, regardless of weather conditions outside. That’s exactly what a tennis air dome offers – an indoor tennis dome that creates a controlled playing environment through pressurized air systems.

    These structures work by maintaining constant air pressure inside the dome, which keeps the fabric membrane inflated and structurally sound. Powerful fans continuously circulate air while maintaining slightly higher pressure than outside atmospheric conditions.

    This tennis bubble specifications system requires no internal support beams, creating an unobstructed playing space.

    Your tennis air dome guide wouldn’t be complete without understanding that these domes feature climate control systems, professional lighting, and ventilation that guarantees ideal playing conditions.

    They’re fundamentally portable tennis facilities that can be installed seasonally or permanently on existing courts.

    Tennis Air Dome Costs and Budget Planning

    Now that you understand how tennis air domes function, you’ll need to budget for this investment carefully.

    A single covered tennis court dome typically costs $15,000-$35,000 for basic models, while premium structures reach $50,000+. Installation adds $5,000-$15,000 depending on site preparation requirements.

    Operating costs include electricity for air blowers ($200-$500 monthly), heating/cooling systems ($300-$800 monthly in extreme climates), and annual maintenance ($2,000-$5,000).

    Factor in permit fees ($500-$2,000) and potential concrete pad installation ($8,000-$15,000).

    Multi-court domes offer better value per court but require larger upfront investments ($40,000-$100,000+).

    Consider financing options, as many manufacturers offer lease programs. Budget an additional 15-20% for unexpected costs like electrical upgrades or drainage improvements.

    Plan for fabric replacement every 10-15 years.

    Court Size Requirements and Space Planning

    You’ll need to plan for a minimum court size of 78′ x 120′ (23.8m x 36.6m) per tennis court within your air dome structure.

    If you’re considering multiple courts, a 2-court layout requires 78′ x 200′ (23.8m x 61m) of floor space.

    Don’t forget that your dome’s peak height must reach at least 45 feet (13.7m) to accommodate overhead shots and lobs during play.

    Standard Court Dimensions

    Planning your tennis air dome starts with understanding the precise space requirements for each court. You’ll need a minimum interior space of 78 feet wide by 120 feet long for a single court, with additional clearance beyond the baseline and sidelines for player safety and movement.

    The peak height must reach 45 feet to accommodate high lobs and serves without interference. This vertical clearance guarantees professional-level play remains uncompromised throughout your facility.

    Configuration Width Length Peak Height
    Single Court 78′ (23.8m) 120′ (36.6m) 45′ (13.7m)
    Double Court 78′ (23.8m) 200′ (61m) 45′ (13.7m)
    Triple Court 78′ (23.8m) 280′ (85.3m) 45′ (13.7m)
    Quad Court 156′ (47.5m) 200′ (61m) 45′ (13.7m)

    These dimensions provide the foundation for your dome’s structural engineering and installation planning.

    Multi-Court Layout Options

    Multi-court facilities maximize your investment by housing multiple playing surfaces under one dome structure.

    You’ll need to evaluate several layout configurations that optimize space while maintaining proper clearances between courts.

    For dual-court setups, you’ll require a minimum 78′ x 200′ (23.8m x 61m) footprint. This allows adequate space between courts and proper ball containment.

    Here are key multi-court layout evaluations:

    • Side-by-side arrangement requires 12′ minimum between court sidelines
    • End-to-end configuration needs 21′ clearance between baselines
    • Shared spectator areas reduce overall footprint requirements
    • Central entrance positioning improves traffic flow
    • Equipment storage can be integrated between courts

    Three or four-court facilities become increasingly cost-effective as you share structural, HVAC, and lighting systems across multiple playing surfaces while reducing per-court construction costs.

    Height Clearance Requirements

    While court dimensions follow standard regulations, vertical space becomes the critical factor that determines playability and player safety in your tennis air dome.

    You’ll need a minimum peak height of 45 feet (13.7 meters) to accommodate high lobs and overhead shots without interference. This clearance guarantees players can execute their full range of strokes naturally.

    The dome’s arched design means you’ll have maximum height at the center, gradually decreasing toward the sides.

    Position courts strategically so the peak height aligns with the court’s center line where most lobs occur.

    Don’t compromise on this specification – insufficient height restricts play quality and creates safety hazards when balls contact the dome ceiling.

    Professional installations often exceed minimum requirements to provide ideal playing conditions and account for dome settling over time.

    Climate Control and Lighting Standards

    Since tennis requires precise ball visibility and comfortable playing conditions, your air dome’s climate control and lighting systems form the foundation of player experience and safety.

    You’ll need to maintain temperatures between 55-75°F (13-24°C) for ideal comfort across seasons. Humidity control is equally critical—keep levels below 60% to prevent condensation on walls and equipment deterioration.

    Your lighting system must deliver 50-70 foot candles of uniform illumination throughout the playing surface. This guarantees proper ball tracking and reduces eye strain during extended play sessions.

    Essential climate and lighting standards include:

    • Temperature range: 55-75°F (13-24°C)
    • Humidity levels: Below 60%
    • Lighting intensity: 50-70 foot candles
    • Even light distribution across courts
    • Energy-efficient LED fixtures recommended

    Proper implementation of these systems guarantees year-round playability and player satisfaction.

    Single vs Multi-Court Tennis Air Dome Options

    When planning your tennis air dome, you’ll need to decide between a single-court or multi-court structure based on your specific needs and budget.

    Single-court domes offer lower initial costs and simpler maintenance, making them ideal for private use or smaller facilities.

    Multi-court options provide better cost efficiency per court and increased revenue potential, though they require larger upfront investments and more complex climate systems.

    Single Court Benefits

    Although multi-court facilities grab attention for their revenue potential, single-court tennis air domes offer distinct advantages that make them the smart choice for many operators.

    You’ll find single courts easier to manage operationally and financially more accessible with lower upfront investment requirements.

    Key benefits of single-court tennis air domes include:

    • Lower initial investment – Reduced construction and equipment costs
    • Simplified maintenance – Easier HVAC management and structural upkeep
    • Flexible scheduling – Complete control over court availability and pricing
    • Intimate atmosphere – Better player experience with focused environment
    • Faster ROI – Quicker path to profitability with lower break-even point

    You’ll also benefit from reduced utility costs, as heating and cooling a 78′ x 120′ space requires considerably less energy than larger multi-court facilities.

    Multi-Court Advantages

    Multi-court tennis air domes present compelling opportunities for operators seeking maximum revenue generation and facility utilization. You’ll accommodate more players simultaneously, increasing hourly income potential while spreading operational costs across multiple courts.

    The shared infrastructure model reduces per-court expenses for heating, lighting, and structural components.

    You can host tournaments, leagues, and group lessons more effectively with multiple courts under one dome. Players won’t wait as long for court availability, improving customer satisfaction and retention rates.

    The 78′ x 200′ configuration for two courts optimizes space efficiency compared to separate single-court installations.

    Multi-court facilities also provide operational flexibility during maintenance or repairs. If one court needs attention, you’ll maintain revenue streams from remaining courts, ensuring consistent cash flow throughout the season.

    Tennis Air Dome Installation Process and Timeline

    Since proper planning determines your project’s success, understanding the tennis air dome installation process helps you prepare for the typical 4-6 week timeline from groundbreaking to first serve.

    The installation follows these key phases:

    • Site preparation and foundation work (Week 1-2): Excavation, utilities, concrete pouring
    • Anchor ring installation (Week 2): Steel foundation ring placement and securing
    • Membrane installation (Week 3): Professional dome fabric assembly and attachment
    • Inflation and testing (Week 3-4): System pressurization and safety checks
    • Interior finishing (Week 4-6): Lighting, HVAC, court surfaces, and accessories

    Weather conditions greatly impact your timeline, especially during foundation work.

    You’ll coordinate with multiple contractors including excavators, concrete specialists, and dome technicians.

    Most manufacturers provide project management services to streamline the process and guarantee proper sequencing of trades.

    Ongoing Maintenance and Operating Expenses

    Smart budgeting for your tennis air dome extends far beyond the initial installation costs, as ongoing maintenance and operating expenses typically range from $15,000 to $35,000 annually per court.

    You’ll face considerable electricity bills for continuous air circulation and climate control systems, particularly during extreme weather conditions. Regular fabric inspections and repairs prevent costly emergency replacements, while HVAC maintenance guarantees ideal playing conditions year-round.

    Your major expense categories include utility costs (40-50% of annual budget), routine maintenance contracts, insurance premiums, and periodic fabric replacements every 15-20 years.

    You can reduce operating costs through energy-efficient LED lighting upgrades, programmable climate controls, and preventive maintenance schedules.

    Multi-court facilities benefit from economies of scale, lowering per-court operational expenses considerably.

    Best Tennis Air Dome Manufacturers and Suppliers

    Selecting the right manufacturer greatly impacts your dome’s performance, longevity, and overall satisfaction with your investment. Research manufacturers with proven track records in tennis facility construction and strong warranty programs.

    When evaluating potential suppliers, prioritize these key factors:

    • Industry experience – Look for companies with 10+ years specializing in tennis air domes.
    • Project portfolio – Review completed installations similar to your facility size and requirements.
    • Engineering capabilities – Confirm they handle structural design, HVAC systems, and local permitting.
    • Service network – Verify they provide maintenance support and emergency repairs in your region.
    • Financial stability – Choose established companies that’ll honor long-term warranty commitments.

    Request detailed proposals from multiple manufacturers, including installation timelines, material specifications, and thorough cost breakdowns before making your final decision.

  • Multi-Sport Air Dome Planning Guide

    Multi-Sport Air Dome Planning Guide

    You’re facing a critical decision that’ll determine whether your air dome investment pays off or becomes a costly mistake. The key isn’t just selecting the right sports—it’s understanding how to configure your space so each activity flows seamlessly into the next. Most facility owners overlook three essential elements that separate profitable multi-sport domes from those struggling to break even, and the difference comes down to strategic planning decisions you’ll make in the next few weeks.

    How Much Space Do You Need for Multi-Sport Air Dome Facilities?

    When planning your multi-sport air dome, you’ll need to calculate space requirements based on the sports you want to accommodate. A standard tennis court measures 78′ x 36′ and can house four pickleball courts at 20′ x 44′ each with proper line markings.

    Your versatile sports dome should consider basketball courts requiring 50′ x 84′, while volleyball needs 30′ x 60′ of playing space.

    The key to maximizing your multi purpose indoor facility lies in strategic layout planning. You can overlay multiple sport lines on the same surface, using different colors to distinguish each game.

    Include removable nets and portable dividers to quickly transform spaces. This flexible approach lets you host tennis in the morning, switch to pickleball for afternoon leagues, then accommodate basketball or volleyball during evening sessions.

    Multi-Sport Court Layout Planning: Maximizing Your Available Space

    Since your air dome’s footprint determines your facility’s earning potential, smart court layout planning becomes essential for maximizing both space utilization and revenue streams.

    Effective multi court air dome planning requires strategic positioning of different sports within your available space. A standard tennis court (78′ x 36′) can accommodate four pickleball courts (20′ x 44′), instantly quadrupling your capacity for that sport.

    Key layout considerations include:

    • Removable net systems for quick sport changes
    • Multi-purpose court lines painted for multiple sports
    • Retractable dividers to create separate playing areas
    • Adequate clearance zones between courts for safety
    • Strategic placement of high-activity sports away from entrances

    You’ll maximize revenue by designing flexible spaces that can adapt to demand fluctuations throughout different seasons and peak hours.

    Tennis Courts That Convert to 4 Pickleball Courts

    You’ll find that converting a standard 78′ x 36′ tennis court into four 20′ x 44′ pickleball courts requires careful layout planning to maximize your space efficiency.

    Your net system installation becomes essential since you’ll need removable pickleball nets that can be quickly set up or stored when switching between sports.

    The key lies in designing multi-purpose court lines that clearly define each pickleball court’s boundaries while maintaining the original tennis court markings.

    Court Conversion Layout Design

    Although tennis courts measure 78′ x 36′ (23.8m x 11m), their spacious dimensions make them perfect for accommodating four standard pickleball courts at 20′ x 44′ (6.1m x 13.4m) each.

    You’ll need to strategically position these courts within the tennis boundaries while maintaining proper spacing.

    Your conversion layout should include:

    • Perpendicular orientation – Position pickleball courts across the tennis court’s width for ideal fit
    • Center dividing net – Install removable barrier separating the two pairs of courts
    • Color-coded line systems – Use different colors to distinguish tennis from pickleball boundaries
    • Removable net posts – Deploy portable systems that don’t damage existing surfaces
    • Safety clearance zones – Maintain 3-4 feet between adjacent courts for player movement

    This configuration maximizes your facility’s revenue potential while serving multiple sports communities efficiently.

    Net System Installation

    When converting tennis courts to accommodate four pickleball courts, your net system becomes the backbone of functional gameplay.

    You’ll need portable net posts that anchor securely without damaging the court surface. Install four regulation pickleball nets at 36″ height on ends and 34″ at center, positioned 22 feet apart within each court section.

    Choose wheeled net systems with easy-lock mechanisms for quick setup and removal. Your posts should feature tension adjustments to maintain proper net tautness across the 20-foot width.

    Consider posts with weighted bases or ground sleeves for stability during intense play.

    Mark clear storage zones along court perimeters for net equipment when tennis mode is active. This system allows seamless shifts between sports while maintaining professional playing standards for both activities.

    Basketball and Volleyball Multi-Sport Configurations

    You’ll find basketball and volleyball courts share similar rectangular dimensions, making them ideal partners for multi-sport air dome configurations.

    Your 50′ x 84′ basketball court can accommodate volleyball’s 30′ x 60′ playing area with strategic line placement and net positioning systems.

    Smart equipment switching setups let you transform between sports quickly using retractable basketball hoops and adjustable volleyball net systems.

    Court Layout Options

    Since basketball and volleyball courts share similar rectangular dimensions, they create an ideal pairing for multi-sport air dome configurations.

    You’ll find that basketball courts at 50′ x 84′ can easily accommodate volleyball’s 30′ x 60′ requirements with strategic line placement and removable nets.

    Your layout options include:

    • Side-by-side configuration – Two courts running parallel with shared buffer zones
    • Overlapping design – Volleyball court positioned within basketball boundaries using colored lines
    • Convertible single court – Quick transformation between sports using removable equipment
    • Multi-zone layout – Dedicated areas for each sport with flexible dividers
    • Shared centerline approach – Courts positioned back-to-back with common boundary

    You’ll maximize space efficiency by incorporating multi-purpose line markings and installing ceiling-mounted net systems that retract when not needed.

    Equipment Switching Systems

    You’ll need quick-release net posts that lock securely into floor sockets. Store folding equipment carts along dome walls to transport gear efficiently between activities.

    System Type Switch Time
    Hydraulic Basketball Hoops 30 seconds
    Ceiling Volleyball Nets 2 minutes
    Floor Socket Net Posts 45 seconds
    Equipment Cart Storage 1 minute

    Consider installing wall-mounted control panels near each court zone. These centralized switching stations let facility managers coordinate equipment changes without crossing active play areas, maintaining safety while maximizing operational efficiency.

    Removable Net Systems for Quick Sport Transitions

    Three key components make removable net systems essential for maximizing your air dome’s versatility: portable posts, adjustable height mechanisms, and secure anchoring systems.

    You’ll need posts that accommodate different sports’ specific requirements. Tennis nets stand at 3 feet center height, while pickleball nets measure 34 inches at center and 36 inches at posts.

    Volleyball nets require significant height adjustments between men’s (7’11⅝”) and women’s (7’4⅛”) play.

    Essential features for efficient shifts include:

    • Quick-release base systems that don’t damage flooring
    • Telescoping posts with reliable locking mechanisms
    • Wheeled storage carts for easy transport
    • Color-coded height markers for rapid setup
    • Standardized anchor points across court areas

    Invest in professional-grade systems that withstand frequent adjustments while maintaining proper tension and regulation heights for competitive play.

    Smart Line Marking for Multiple Sports on Shared Courts

    When multiple sports share the same court space, strategic line marking becomes the foundation for seamless changes and clear gameplay boundaries. You’ll need different colored lines for each sport to eliminate confusion during play. Use white for tennis, blue for pickleball, yellow for basketball, and red for volleyball to create visual distinction.

    Consider permanent court markings with durable paint that withstand heavy foot traffic and equipment movement. For temporary lines, removable tape works well but requires regular maintenance.

    Position lines strategically so they don’t interfere with other sports’ play areas.

    Design your layout with a master plan showing all sports’ boundaries simultaneously. This prevents overlapping conflicts and guarantees each sport has adequate buffer zones for safe, competitive play.

    Air Dome Climate Control for Year-Round Multi-Sport Use

    Since air domes create sealed environments, maintaining ideal climate conditions becomes critical for athlete performance and equipment longevity across different sports.

    You’ll need sophisticated HVAC systems that accommodate varying activity levels and occupancy loads throughout your facility.

    Temperature control requires balancing comfort for multiple sports simultaneously. Tennis players prefer 65-70°F, while basketball demands slightly cooler conditions at 60-68°F.

    Humidity management prevents condensation on dome surfaces and maintains court traction.

    Essential climate control features include:

    • Zoned temperature control for independent court area management
    • Variable speed fans for consistent air circulation without drafts
    • Dehumidification systems maintaining 40-60% relative humidity
    • Air filtration removing dust, pollen, and outdoor pollutants
    • Backup heating/cooling ensuring uninterrupted operations during equipment maintenance

    Proper ventilation prevents stagnant air pockets while maintaining structural pressure requirements for dome integrity.

  • Sports Dome Contractors USA Directory

    Sports Dome Contractors USA Directory

    You’ll find choosing the right air dome contractor can make or break your sports facility project. With dozens of contractors across the USA claiming expertise in dome construction, you’re facing a complex decision that’ll impact your budget, timeline, and facility’s long-term performance. The contractor categories aren’t clearly defined, and what works for a small training facility won’t necessarily suit a large sports complex. Before you commit to any contractor, there’s critical information you need to understand about your options.

    What To Look For In Professional Air Dome Contractors

    When evaluating air dome contractors, you’ll encounter three main categories that directly impact your project’s success and budget.

    Manufacturer direct contractors offer the highest quality but premium pricing.

    Manufacturer-certified sports dome contractors provide balanced solutions, ideal for projects spanning 10,000-50,000 square feet.

    Independent air dome installers deliver cost-effective options with potentially lower overhead.

    Regardless of category, you must verify essential credentials.

    Demand proof of liability insurance exceeding $2 million, active worker’s compensation coverage, and thorough bonding.

    Request detailed references from recent projects similar in scope to yours.

    Don’t skip this verification step – it protects your investment and guarantees professional standards.

    Smart selection among dome construction contractors usa requires balancing quality expectations, budget constraints, and project timeline requirements for best results.

    Manufacturer-Direct Air Dome Contractors: Premium Quality Options

    Since manufacturer-direct air dome contractors represent the manufacturer’s flagship operations, you’ll receive unmatched quality control and cutting-edge technology with every installation.

    These premium contractors maintain direct relationships with equipment manufacturers, ensuring access to the latest innovations and materials before they reach the broader market.

    You’ll benefit from extensive warranties, specialized training programs, and immediate technical support when issues arise.

    Manufacturer-direct teams typically handle large-scale projects exceeding 50,000 square feet, including professional sports facilities and municipal complexes.

    While costs run higher than independent contractors, you’re investing in proven expertise and long-term reliability.

    Many tennis bubble installation companies operate under manufacturer-direct models, providing specialized knowledge for court-specific requirements like proper ventilation, lighting integration, and surface compatibility for ideal playing conditions.

    Certified Regional Air Dome Contractors For Mid-Size Projects

    Most certified regional air dome contractors offer the ideal balance between premium quality and cost-effectiveness for projects ranging from 10,000 to 50,000 square feet. You’ll find these contractors maintain manufacturer certifications while providing competitive pricing for mid-size sports facilities.

    When evaluating certified regional contractors, you should verify they carry minimum $2 million liability insurance and current worker’s compensation coverage. Request detailed references from similar-sized projects they’ve completed within the past three years.

    Don’t skip checking their bonding capacity, as it protects your investment.

    These contractors typically specialize in sports complexes, training facilities, and recreational centers. They’ll provide extensive services including site preparation, installation, and maintenance support.

    You can expect faster project timelines compared to manufacturer-direct options while maintaining professional installation standards that meet local building codes and safety requirements.

    Budget-Friendly Independent Air Dome Contractors: Pros And Cons

    Although independent air dome contractors typically offer the lowest upfront costs, you’ll need to carefully weigh the trade-offs between savings and potential risks.

    Independent contractors often lack manufacturer training and certification, which can lead to installation errors or subpar workmanship. They might use generic materials instead of manufacturer-specified components, potentially compromising your dome’s longevity and performance. Additionally, warranty coverage may be limited or non-existent.

    However, these contractors can provide significant cost savings, especially for smaller projects or basic installations. They’re often more flexible with scheduling and willing to negotiate pricing.

    Before hiring any independent contractor, you must verify they carry minimum $2M liability insurance, worker’s compensation coverage, and bonding.

    Request multiple references from recent projects and inspect their previous work personally. Don’t let low prices override proper due diligence.

    Matching Your Air Dome Project Size To Contractor Type

    Beyond evaluating contractor credentials, your project’s square footage directly determines which contractor type will deliver the best value and results.

    You’ll maximize efficiency by aligning your dome size with the right contractor expertise.

    Here’s how to match your project:

    • Small projects (under 10,000 sq ft): Independent contractors offer competitive pricing and personalized service.
    • Medium projects (10,000-50,000 sq ft): Manufacturer-certified contractors provide balanced quality and cost-effectiveness.
    • Large projects (over 50,000 sq ft): Manufacturer direct guarantees premium quality and thorough support.
    • Complex installations: Choose certified or direct contractors regardless of size.
    • Budget-constrained projects: Independent contractors work best for straightforward installations.

    You’ll avoid cost overruns and delays when your contractor’s capabilities align with your project’s scope and complexity requirements.

  • Refurbished Air Domes Are They Worth It

    Refurbished Air Domes Are They Worth It

    You’re facing budget constraints but need substantial indoor space coverage, and refurbished air domes might seem like the perfect solution. While these structures can slash your initial investment by 25-35% compared to new installations, the real question isn’t about the upfront savings. It’s whether you’ll encounter unexpected costs, structural issues, or warranty complications down the road. Before you commit to what appears to be a smart financial decision, there are several critical factors that could make or break your investment.

    Why Choose Refurbished Air Domes: 25-35% Cost Savings Breakdown

    When you’re evaluating facility expansion options, refurbished air domes offer substantial financial advantages that can free up 25-35% of your budget for other priorities.

    This significant cost reduction stems from the professional refurbishment process, where existing structures receive new blowers, fabric repairs, and re-tensioning rather than complete replacement.

    You’ll find that a refurbished air dome covering 7,200-24,000 square feet costs thousands less than new construction while delivering comparable performance.

    Whether you’re considering a reconditioned sports dome for athletics or a certified pre-owned tennis bubble for year-round play, the savings remain consistent across applications.

    The refurbishment process includes professional cleaning, tear repairs, and equipment upgrades, ensuring you receive a facility that meets current safety standards without the premium price tag of brand-new installations.

    Fabric, Blowers, and Frames: What Gets Refurbished vs. Replaced

    When you’re evaluating a refurbished air dome, you’ll need to understand which components get repaired versus completely replaced.

    The fabric typically undergoes professional cleaning and tear repairs, while blower systems often receive full upgrades to newer, more efficient models.

    Frame structures get thorough assessments to determine whether reinforcement will suffice or if sections require replacement.

    Fabric Repair vs Replacement

    Understanding which components get repaired versus replaced determines the quality and longevity of your refurbished air dome. When evaluating a factory refurbished dome, you’ll find that fabric typically undergoes extensive repair rather than complete replacement. Professional refurbishers patch tears, re-tension sagging areas, and reinforce stress points to extend the fabric’s lifespan.

    Component Repair Process Replacement Criteria
    Fabric tears Heat welding, patches Damage >30% surface area
    Blower systems Motor rebuilds, cleaning Age >15 years
    Anchor points Re-tensioning, reinforcement Structural failure
    Zippers/doors Track realignment Complete mechanism failure
    Inflation controls Calibration, sensor cleaning Electronic system failure

    This approach maintains structural integrity while keeping costs 25-35% below new dome prices, making refurbished options financially attractive.

    Blower System Upgrades

    Although fabric repairs dominate most refurbishment projects, blower systems present different upgrade opportunities that can significantly improve your dome’s performance and energy efficiency.

    You’ll typically find that refurbishment specialists replace older blowers with modern, energy-efficient models rather than attempting repairs on worn units.

    New blower installations during refurbishment often include variable-speed controls, allowing you to adjust air pressure based on weather conditions and usage patterns.

    This upgrade can reduce your energy costs by 20-30% compared to single-speed systems.

    You should expect upgraded control panels with digital monitoring capabilities, giving you real-time data on pressure levels and system performance.

    Some refurbishers also install backup blower systems during upgrades, ensuring your dome stays inflated even if the primary unit fails unexpectedly.

    Frame Structure Assessment

    Before upgrading blowers or repairing fabric, you’ll need a detailed structural assessment to determine which frame components can be refurbished versus those requiring complete replacement.

    Professional evaluators examine anchor points, cable systems, and structural integrity to identify wear patterns and stress damage.

    Frame components typically last longer than fabric, making them prime candidates for refurbishment.

    Steel cables, tensioning hardware, and foundation anchors often retain structural integrity even when fabric needs replacement.

    However, corroded cables or damaged anchor points require immediate replacement for safety reasons.

    You’ll find that most reputable refurbishment companies replace high-wear components like door seals, ventilation systems, and emergency deflation equipment regardless of condition.

    This all-encompassing approach guarantees your refurbished dome meets current safety standards while maximizing the value of salvageable structural elements.

    Warranty Protection: 10-15 Year Coverage for Refurbished Air Domes

    When you invest in a refurbished air dome, you’re protected by extensive warranty coverage that spans 10-15 years for fabric components and three years for equipment.

    This thorough protection gives you confidence that your facility investment is secure, matching nearly the same coverage you’d receive with a new installation.

    The warranty demonstrates the refurbisher’s commitment to quality workmanship and materials.

    You’ll have peace of mind knowing that professionally repaired tears, re-tensioned fabric, and new blowers are backed by substantial guarantees.

    Key warranty benefits include:

    1. Fabric longevity assurance – Your dome’s structural integrity is protected for over a decade
    2. Equipment reliability guarantee – New blowers and mechanical systems are covered during critical early years
    3. Professional repair backing – All refurbishment work is warranted against defects

    Size and Capacity Options: 7,200-24,000 Sq Ft Facilities Available

    Beyond warranty protection, refurbished air domes offer remarkable flexibility in size options to match your specific facility needs.

    You’ll find refurbished units ranging from 7,200 to 24,000 square feet, covering 669 to 2,230 square meters respectively. This range accommodates various applications, from small training facilities to large multi-sport complexes.

    You can choose smaller 7,200-10,000 sq ft domes for single courts, batting cages, or specialized training areas.

    Mid-range options of 12,000-16,000 sq ft work perfectly for full basketball courts or soccer fields.

    Larger facilities up to 24,000 sq ft can house multiple courts, full-size indoor fields, or combined recreational spaces.

    This size flexibility means you won’t compromise on your vision while staying within budget.

    You’ll get professional-grade space that’s been properly refurbished to meet your capacity requirements.

    Hidden Costs and Potential Issues With Refurbished Domes

    While refurbished air domes offer significant savings, you’ll need to watch for unexpected installation expenses that weren’t included in the initial quote.

    The limited warranty coverage on refurbished units may leave you vulnerable if major issues arise after the 3-year equipment guarantee expires.

    You should also carefully assess potential structural integrity risks, as the dome’s previous use and wear patterns mightn’t be immediately apparent during your initial inspection.

    Unexpected Installation Expenses

    Although refurbished air domes offer significant upfront savings, you’ll likely encounter installation expenses that weren’t part of your initial budget calculations.

    These unexpected costs can quickly erode the 25-35% savings you’re expecting from choosing refurbished over new.

    Common installation surprises include:

    1. Site preparation modifications – Your existing foundation mightn’t align with the refurbished dome’s specifications, requiring costly concrete work or leveling adjustments that can reach $15,000-30,000.
    2. Updated electrical systems – Newer blower equipment often demands upgraded electrical panels, conduits, and safety switches that older facilities lack, adding $8,000-20,000 to your project.
    3. Permit and inspection fees – Local authorities may treat refurbished installations as new construction, triggering engineering reviews, structural assessments, and extended approval processes costing $5,000-12,000.

    Limited Warranty Coverage

    Despite manufacturers advertising 10-15 year fabric warranties and 3-year equipment coverage, refurbished air dome warranties contain significant gaps that’ll leave you financially exposed when problems arise.

    You’ll discover most warranties exclude pre-existing damage that wasn’t identified during initial inspection. Installation defects, foundation issues, and weather-related problems often aren’t covered.

    The refurbisher’s warranty typically covers only their specific work—not the original dome components they didn’t touch.

    Equipment warranties usually apply solely to replaced blowers, not refurbished mechanical systems. You’re responsible for parts that fail due to age-related wear, even if they weren’t addressed during refurbishment.

    Many warranties require you to use specific maintenance companies or void coverage.

    Labor costs for warranty repairs frequently aren’t included, leaving you paying technician fees for covered parts.

    Structural Integrity Risks

    Beyond warranty limitations, refurbished air domes carry structural risks that can trigger expensive emergency repairs or complete facility shutdowns.

    When you’re evaluating a refurbished dome, you’re fundamentally betting on the integrity of aged infrastructure that’s already weathered years of stress cycles, temperature fluctuations, and environmental exposure.

    Consider these critical structural vulnerabilities:

    1. Fabric stress points – Previous anchor failures or micro-tears can propagate under pressure, causing catastrophic deflation during peak usage periods.
    2. Foundation settlement issues – Existing concrete anchors may have shifted over time, creating uneven tension that compromises the entire structure’s stability.
    3. Blower system integration problems – Mismatched replacement equipment can create pressure inconsistencies, leading to fabric fatigue and premature failure.

    You’re inheriting unknown maintenance histories that could surface as costly surprises.

    Quality Verification: How to Assess Refurbishment Standards

    How can you determine whether a refurbished air dome meets professional standards before making your investment? Start by requesting detailed documentation of the refurbishment process, including professional cleaning records, blower replacement specifications, and fabric repair history.

    You’ll want to verify that tears have been properly patched using manufacturer-approved materials and techniques.

    Inspect the re-tensioning work personally or hire an independent engineer to assess fabric tautness and anchor point integrity.

    Don’t accept vague promises—demand specific warranty terms covering both fabric (10-15 years) and equipment (3 years).

    Request references from previous refurbishment customers and visit their facilities if possible.

    Finally, confirm the refurbisher is certified by the original manufacturer or holds relevant industry credentials. This verification protects your investment and confirms you’re getting genuine professional-grade restoration work.

    Best Candidates for Refurbished Air Dome Investment

    Several specific buyer profiles consistently achieve the best returns when investing in refurbished air domes. You’ll maximize your investment if you fall into one of these categories.

    1. Budget-conscious facility operators who need immediate coverage for sports programs, events, or storage but can’t justify new dome costs.

    You’re getting 65-75% of original value while saving thousands upfront.

    2. Seasonal business owners running tennis clubs, golf facilities, or event venues who require temporary or semi-permanent structures.

    Your shorter payback period makes refurbished units ideal.

    3. Municipal recreation departments with limited capital budgets but community pressure for year-round facilities.

    You can serve more residents while maintaining fiscal responsibility.

    These buyers typically see ROI within 3-5 years versus 7-10 years for new installations.
  • Seasonal vs Year-Round Air Dome Decision

    Seasonal vs Year-Round Air Dome Decision

    You’re facing a critical decision that’ll impact your facility’s budget for years to come. Choosing between a seasonal air dome ($700K-$1M) and a year-round installation ($800K-$1.2M) isn’t just about upfront costs—it’s about hidden expenses that can quietly drain your resources. While that $100K-$300K price difference might seem straightforward, the real financial picture becomes clear only when you factor in setup, removal, storage, and weather-related risks that most operators completely overlook.

    Air Dome Costs: Seasonal ($700K-$1M) vs Year-Round ($800K-$1.2M)

    Two distinct pricing tiers separate seasonal and year-round air domes, with seasonal options starting at $700,000 to $1 million while year-round installations range from $800,000 to $1.2 million.

    When you’re evaluating seasonal vs year-round air dome options, you’ll notice the upfront difference isn’t dramatic—typically $100,000 to $200,000 more for permanent structures.

    However, your temporary vs permanent dome decision involves hidden costs. Seasonal domes require annual setup and removal expenses ranging from $16,000 to $30,000, plus you’ll need dedicated storage space measuring 10′ x 20′.

    Over five years, these recurring costs can offset initial savings.

    Your seasonal dome vs fixed installation choice ultimately depends on usage patterns. If you’ll operate nine to twelve months annually, permanent installations deliver better value despite higher upfront investment.

    Hidden Expenses: Setup, Removal, and Storage Requirements for Seasonal Domes

    Beyond the sticker price, seasonal air domes carry recurring expenses that can greatly impact your total cost of ownership.

    You’ll face annual setup and removal costs ranging from $16,000 to $30,000, which includes professional installation, equipment rental, and labor. These expenses occur every single year your dome operates.

    Storage presents another ongoing challenge.

    You’ll need a dedicated 10′ x 20′ space to house your deflated dome during off-seasons. This storage area must remain dry, secure, and climate-controlled to prevent damage from moisture, pests, or temperature fluctuations.

    Factor in storage facility rental costs or the opportunity cost of using your own space.

    Don’t overlook transportation expenses either.

    Moving your dome between storage and installation sites requires specialized vehicles and handling equipment, adding hundreds to thousands annually.

    Break-Even Point: When Permanent Air Domes Beat Seasonal Options

    You’ll reach the break-even point between seasonal and permanent air domes faster than you might expect when you factor in annual setup costs.

    Your 20,000 sq ft seasonal dome’s $16K-$30K yearly expenses mean you’ll spend an additional $80K-$150K over five years compared to a permanent structure.

    Calculate your total cost of ownership over 7-10 years, and you’ll likely find the permanent dome’s higher upfront investment pays off through eliminated recurring costs.

    Annual Cost Calculations

    Understanding the break-even point between seasonal and year-round air domes requires examining both upfront investments and ongoing operational costs.

    For a 20,000 sq ft dome, you’ll face $700K-$1M upfront for seasonal options versus $800K-$1.2M for permanent structures.

    Your annual operational costs tell the real story. Seasonal domes require $16K-$30K yearly for setup and removal, plus storage expenses for a 10′ x 20′ space. Year-round domes eliminate these recurring costs entirely.

    Calculate your break-even timeline by dividing the upfront cost difference by annual operational savings.

    With $100K-$200K higher initial investment but $16K-$30K annual savings, you’ll typically break even within 3.3-12.5 years. If you’re planning 9-12 months of annual use, permanent domes become financially advantageous.

    Multi-Year ROI Analysis

    When your facility operates more than seven months annually, the financial mathematics shift dramatically in favor of permanent air domes. You’ll reach break-even between years three and four, depending on your annual setup costs and usage intensity.

    Here’s your ROI timeline: Year one shows seasonal domes ahead by $100K-$200K due to lower upfront investment. By year two, you’re still saving $84K-$170K with seasonal options.

    However, year three marks the turning point where cumulative costs converge. From year four onward, you’ll save $16K-$30K annually with permanent structures.

    Over ten years, permanent domes deliver $112K-$210K in total savings. Factor in reduced labor disruption, eliminated weather delays during setup, and consistent facility availability—permanent air domes become the clear financial winner for extended seasonal operations.

    Storage Solutions: Planning for 20,000 Sq Ft Seasonal Air Dome Systems

    One critical aspect of owning a 20,000 sq ft seasonal air dome that’s often overlooked during the planning phase is the storage requirement during off-season months.

    You’ll need approximately 200 square feet of storage space (10′ x 20′) to properly house your dome membrane, blower systems, and accessories.

    Consider climate-controlled storage to protect your investment from moisture, temperature fluctuations, and UV exposure.

    Many facilities opt for dedicated storage buildings or rent warehouse space specifically for dome components.

    You’ll also need adequate ventilation to prevent mold and mildew formation on fabric materials.

    Factor storage costs into your annual operating budget—typically $1,200-$3,600 yearly for commercial storage.

    Some operators negotiate shared storage arrangements with other seasonal dome owners to reduce individual costs while maintaining proper storage conditions.

    9+ Month Usage: Why Year-Round Air Domes Make Financial Sense

    While seasonal air domes initially appear more cost-effective with their lower upfront investment of $700K-$1M compared to year-round systems at $800K-$1.2M, the financial mathematics shift dramatically when you’re operating nine months or more annually.

    The recurring costs quickly erode seasonal systems’ initial savings:

    Cost Factor Seasonal Year-Round
    Year 1 Total $716K-$1.03M $800K-$1.2M
    Year 5 Total $764K-$1.15M $800K-$1.2M
    Year 10 Total $844K-$1.3M $800K-$1.2M
    Storage Space Required None
    Setup Risk Annual Eliminated

    You’ll reach break-even around year three to five. Beyond this point, year-round domes deliver superior ROI while eliminating storage headaches and weather-dependent installation windows that can delay your season openings.

    Real-World Air Dome ROI: Cost Analysis Over 5-10 Years

    Three critical factors determine your air dome’s actual return on investment: operational intensity, local climate conditions, and facility utilization rates.

    Over five years, a seasonal dome‘s total cost reaches $780K-$1.15M ($700K initial + $80K-$150K setup/removal).

    Year-round domes cost $800K-$1.2M with no recurring expenses.

    If you’re operating 9+ months annually, year-round domes break even by year two.

    The math shifts dramatically with usage patterns—seasonal domes favor 6-month operations, while year-round models excel with consistent use.

    Storage costs add $2K-$5K annually for seasonal units.

    Labor disruptions during changes can impact revenue by 10-15%.

    Climate Considerations: Weather Impact on Seasonal vs Permanent Domes

    Your dome’s climate resilience directly impacts whether seasonal or permanent installation makes financial sense.

    Seasonal domes face repeated stress from setup and teardown cycles, while permanent structures must withstand year-round weather extremes including snow loads, high winds, and temperature fluctuations.

    You’ll need robust temperature control systems and storm-resistant designs, but the risk-reward equation changes dramatically based on your local weather patterns.

    Winter Weather Resistance

    When winter storms arrive with heavy snow loads and freezing temperatures, the structural differences between seasonal and year-round air domes become critical factors in your facility’s survival.

    Year-round domes feature reinforced fabric systems and enhanced anchoring specifically engineered for harsh winter conditions. They’ll withstand snow accumulation up to 40 pounds per square foot and temperatures as low as -40°F without compromising structural integrity.

    Seasonal domes weren’t designed for these extreme conditions. Their lighter materials and standard anchoring systems can fail under heavy snow loads, potentially causing:

    • Complete structural collapse from excessive weight
    • Fabric tears from ice formation and expansion
    • Air leakage through temperature-stressed seams
    • Foundation damage from freeze-thaw cycles

    You’ll face considerably higher winter maintenance costs and safety risks with seasonal options during severe weather events.

    Temperature Control Systems

    Because temperature control systems directly impact both operational costs and athletic performance, the choice between seasonal and year-round air domes creates vastly different heating and cooling requirements throughout the year.

    Seasonal domes let you optimize climate control for specific months when you’ll use the facility most. You can install heating systems during winter installations or cooling equipment for summer sports seasons, reducing energy costs by avoiding year-round climate management.

    Year-round domes require extensive HVAC systems handling extreme temperature variations across all seasons. You’ll need robust heating for winter months and adequate cooling for summer heat.

    While initial HVAC investments run higher, you’ll achieve better energy efficiency through consistent system operation rather than intermittent seasonal heating spikes that seasonal domes experience during setup periods.

    Storm Damage Risks

    Storm damage risks vary dramatically between seasonal and year-round air domes, with each design philosophy creating distinct vulnerabilities during severe weather events.

    Your seasonal dome faces unique challenges since you’ll typically remove it before winter’s harshest conditions. However, unexpected storms during operating seasons can catch you off-guard with limited structural reinforcement options.

    You’re also vulnerable during setup and takedown periods when the structure isn’t fully secured.

    Year-round domes withstand more severe weather but face prolonged exposure to multiple storm seasons. Consider these key risk factors:

    • Wind resistance: Permanent structures handle sustained winds better than temporary installations.
    • Snow loading: Year-round domes require engineered snow load calculations.
    • Hail damage: Both types need puncture-resistant materials in hail-prone regions.
    • Emergency deflation: Seasonal domes offer quicker protective deflation options.
  • Air Dome Features and Customization Options

    Air Dome Features and Customization Options

    You’re investing in an air dome, but the standard options won’t cut it for your specific needs. Whether you’re powering a sports facility or industrial workspace, the choices you make regarding insulation layers, entry systems, lighting, and ventilation will directly impact your operational costs and user experience. The difference between selecting double-layer construction versus single-layer alone could save you thousands annually, and that’s just the beginning of what you’ll need to contemplate.

    Double-Layer vs Single-Layer Air Dome Energy Efficiency

    When you’re deciding between single and double-layer air dome construction, the energy efficiency difference becomes immediately apparent in your utility bills.

    Double-layer vs single-layer air dome energy efficiency creates a significant performance gap that directly impacts your operating costs.

    Double-layer systems provide 30-40% energy savings compared to single-layer alternatives, particularly noticeable in 20,000 square foot facilities.

    You’ll benefit from superior insulation properties that reduce heating and cooling demands throughout the year. The air gap between layers acts as a thermal barrier, maintaining consistent internal temperatures with less HVAC workload.

    Single-layer domes offer lower upfront costs but higher ongoing energy expenses.

    You’re trading initial savings for increased monthly utility bills. For year-round facilities, double-layer construction typically pays for itself through reduced energy consumption within three years.

    Air Dome Door Systems: Zipper vs Airlock Entry

    Your door system choice fundamentally determines how users access your air dome while maintaining internal pressure and climate control.

    Air dome door systems come in two primary configurations: zipper and airlock entries, each serving different operational needs.

    Zipper doors offer cost-effective access with simple operation. You’ll find them suitable for facilities requiring occasional entry and exit. However, they compromise pressure integrity during use, temporarily affecting climate control.

    Airlock systems provide superior pressure maintenance through double-door chambers. You enter the first door, allow it to seal, then proceed through the second door. This prevents pressure loss and maintains consistent internal conditions.

    Standard dimensions typically measure 6′ x 8′ (1.8m x 2.4m) for both systems.

    Choose zipper doors for budget-conscious projects with limited traffic. Select airlocks for facilities demanding continuous climate control and frequent access.

    Air Dome Lighting: LED vs Metal Halide Systems

    Two primary lighting technologies compete for air dome installations: LED systems and traditional metal halide fixtures.

    When selecting air dome features, you’ll find LED systems offer superior energy efficiency, consuming 50-70% less power than metal halide alternatives. LED fixtures provide instant-on capability, eliminating the warm-up time metal halides require. You’ll achieve better light distribution with LEDs, reducing dark spots and shadows across your dome’s interior.

    Metal halide systems cost less upfront but carry higher operational expenses through increased energy consumption and frequent bulb replacements.

    Among essential air dome upgrades, switching to LED technology delivers long-term savings and improved performance. Your choice between air dome lighting: LED vs metal halide systems depends on budget priorities and operational requirements, though LED technology increasingly dominates new installations.

    Ventilation and Custom Logo Options for Air Domes

    Although lighting systems grab attention during air dome planning, ventilation and branding elements greatly impact both functionality and visual appeal. When exploring ventilation and custom logo options for air domes, you’ll find sidewall vents provide essential airflow control while maintaining structural integrity. These dome accessories work alongside your HVAC system to regulate temperature and humidity effectively.

    Feature Standard Option Premium Option
    Sidewall Vents Manual operation Automated controls
    Logo Placement Single location Multiple positions
    Printing Method Vinyl application Heat-sealed graphics
    Ventilation Size 24″ x 24″ Custom dimensions
    Color Options Limited palette Full-color matching

    Custom logo printing transforms your dome into a branded facility, while proper ventilation guarantees peak air quality. You can specify logo placement, colors, and sizing to match your organization’s identity perfectly.

  • Fabric Structure Manufacturer Comparison

    Fabric Structure Manufacturer Comparison

    You’re facing a critical decision that’ll impact your project for decades. Choosing the wrong fabric structure manufacturer means you’ll likely encounter costly repairs, structural limitations, or design compromises down the road. With Legacy Building Solutions and ClearSpan dominating the market, each offers distinct advantages in steel framing and fabric options. However, the differences between PVC and PTFE materials, along with span capabilities, create a complex puzzle that demands careful analysis before you commit your budget.

    Essential Selection Criteria: Span Requirements, Climate, and Timeline Factors

    When selecting a fabric structure manufacturer, you’ll need to evaluate three critical factors that directly impact your project’s success and long-term performance.

    Span Requirements determine which fabric structure manufacturers can handle your project. If you need spans exceeding 200 feet, Legacy Building Solutions’ steel I-beam frames support up to 300 feet, while other manufacturers may require multiple supports or can’t accommodate such distances.

    Climate considerations affect fabric selection and structural design. PTFE fabrics offer superior UV resistance and longevity in harsh climates, while PVC provides cost-effective solutions for moderate conditions.

    You’ll also need wind and snow load calculations.

    Timeline factors influence manufacturer choice, as custom architectural solutions from companies like Signature Structures require longer lead times than standardized systems from economical providers like Calhoun Super Structure.

    Steel Frame Showdown: Legacy Building Solutions vs ClearSpan Capabilities

    Both Legacy Building Solutions and ClearSpan dominate the steel-framed fabric structure market, yet they’ve developed distinctly different approaches to structural engineering.

    Legacy specializes in steel I-beam frames that’ll span up to 300 feet without interior supports, making them ideal when you need maximum clear space. Their engineering focuses on heavy-duty applications where structural integrity can’t be compromised.

    ClearSpan offers more versatility in their frame designs, providing various structural options to match your specific requirements and budget. While they may not achieve Legacy’s extreme span capabilities, they’re among the top rigid frame suppliers for projects requiring flexible engineering solutions.

    You’ll find Legacy excels in industrial applications, while ClearSpan’s adaptable approach suits diverse commercial and agricultural needs better.

    Fabric Material Breakdown: PVC vs PTFE Performance and Longevity

    While frame design determines your structure’s strength, the fabric material you choose directly impacts its lifespan and performance under harsh conditions. When evaluating tension fabric companies, you’ll encounter two primary options: PVC and PTFE membranes.

    Feature PVC Fabric PTFE Fabric
    Lifespan 15-20 years 25-30+ years
    UV Resistance Moderate degradation Exceptional stability
    Temperature Range -40°F to 180°F -100°F to 500°F
    Cost Budget-friendly Premium investment
    Maintenance Regular cleaning required Self-cleaning surface

    PVC offers cost-effective protection for shorter-term applications, while PTFE delivers superior longevity and weather resistance. Your climate, budget, and performance expectations should guide this critical decision.

    Budget Reality Check: Custom Design vs Economical Fabric Building Options

    Budget constraints often force a critical decision between architectural elegance and practical functionality when selecting your fabric structure manufacturer.

    Signature Structures delivers premium custom architectural solutions with engineered aesthetics, but you’ll pay considerably more for their design expertise and specialized fabrication.

    Conversely, Calhoun Super Structure focuses on economical options that prioritize cost-effectiveness over visual appeal.

    Legacy Building Solutions and ClearSpan occupy the middle ground, offering solid engineering with moderate customization flexibility.

    Clear span building manufacturers like these provide excellent value by balancing structural integrity with reasonable pricing.

    Your choice ultimately depends on whether you need a showpiece structure or simply require reliable shelter.

    Consider your long-term needs—sometimes paying more upfront saves money through reduced maintenance and extended lifespan.

  • Sports Dome Financing and Loans Guide

    Sports Dome Financing and Loans Guide

    You’re considering building a sports dome, but the financing options can feel overwhelming. Whether you’re a school district, private facility owner, or community organization, understanding your funding choices will make or break your project. From equipment loans requiring 20% down to creative leasing arrangements and government funding opportunities, each path offers distinct advantages and challenges. The key is matching the right financing structure to your specific situation and long-term goals.

    How Much Does Air Dome Financing Really Cost?

    When you’re budgeting for an air dome facility, the financing costs extend far beyond the sticker price of the structure itself. Air dome loans typically require 10-20% down payments on facilities ranging from $200K to $500K, meaning you’ll need $20K to $100K upfront.

    Equipment loans offer 5-7 year terms at 5-8% interest rates, while leasing options run $3K-$8K monthly for 20,000 square foot facilities. Your total financing costs include interest payments, insurance, permits, site preparation, and ongoing maintenance expenses.

    SBA 7(a) loans provide attractive terms with just 10% down for projects up to $5M, making them ideal for larger facilities.

    Municipal bonds offer another avenue for public projects, potentially reducing borrowing costs considerably compared to traditional commercial financing options.

    Equipment Loans: The Most Common Air Dome Financing Path

    Most air dome buyers choose equipment loans as their primary financing method because these specialized loans treat the dome structure as movable equipment rather than permanent real estate.

    You’ll typically encounter loan terms spanning 5-7 years with interest rates ranging from 5-8%. Most lenders require a 20% down payment for facilities costing $200,000-$500,000.

    Equipment loans offer several advantages for your air dome project. You won’t need complex real estate appraisals or lengthy property evaluations. The approval process moves faster since you’re financing equipment rather than property.

    Your dome serves as collateral, which helps secure competitive rates. These loans work particularly well if you’re purchasing a complete air dome system from established manufacturers.

    You’ll find that equipment financing companies understand the sports facility market and can structure payments around your seasonal revenue patterns.

    Should You Lease Or Buy Your Air Dome Facility?

    How do you decide between leasing and purchasing your air dome facility? Your choice depends on several critical factors that’ll impact your long-term financial strategy and operational flexibility.

    Consider these key factors when evaluating sports dome financing options:

    1. Cash flow requirements – Leasing offers lower upfront costs ($3K-$8K monthly) versus 20% down payments on purchases.
    2. Tax implications – Lease payments are fully deductible operating expenses, while purchases offer depreciation benefits.
    3. Long-term commitment – Buying makes sense if you’ll operate for 10+ years; leasing provides flexibility for shorter commitments.
    4. Maintenance responsibilities – Lessors typically handle major repairs and upgrades, reducing your operational burden.

    Purchasing builds equity but requires significant capital. Leasing preserves cash flow but costs more over time without ownership benefits.

    SBA Loans For Large Air Dome Projects

    For ambitious air dome projects exceeding $500,000, SBA 7(a) loans offer a powerful financing alternative that bridges the gap between conventional equipment loans and large-scale commercial lending.

    These government-backed loans provide up to $5 million in funding with just 10% down payment requirements, making them ideal for extensive sports facilities.

    SBA loans for large air dome projects typically feature competitive interest rates and extended repayment terms up to 25 years.

    You’ll benefit from lower down payments compared to traditional commercial loans, preserving working capital for operations and marketing.

    The SBA guarantee reduces lender risk, improving your approval odds even with limited collateral.

    However, expect a longer approval process requiring detailed business plans, financial projections, and documentation.

    You’ll also pay guarantee fees, but the favorable terms often offset these costs for substantial air dome investments.

    Government Funding Options For Public Air Domes

    1. General obligation bonds – backed by the municipality’s full faith and credit, offering lowest interest rates.
    2. Revenue bonds – secured by facility income streams like user fees and memberships.
    3. Special assessment bonds – funded through property taxes within designated districts.
    4. Certificate of participation – lease-purchase agreements that don’t require voter approval.

    You’ll typically secure 20-30 year terms with rates 2-3% below commercial alternatives, making municipal financing ideal for community air dome projects.